Add, update, or remove a credit card or other payment option for Office 365 for home
When you buy an Office 365 for home subscription directly from Microsoft, you can pay with a credit or debit card. In some countries/regions, you can also pay with a bank, direct debit, or other account, or with a PayPal account.
To add, update, or remove a payment option, sign in to the Payment options page with the Microsoft account associated with your Office 365 subscription, and follow the instructions below. We can help if you can't remember the Microsoft account or password you use with Office.
To change how you pay for a specific Office 365 subscription, see Change the payment option you're using to pay for a subscription.
Need to compare plans or get pricing details? See Office products.
Did you buy your subscription through Apple? See Manage Office billing and subscription when you buy from Apple.
Manage credit/debit cards
Add a credit/debit card
-
Sign in to the Payment options page with the Microsoft account associated with your Office 365 subscription.
We can help if you can't remember the Microsoft account or password you use with Office.
-
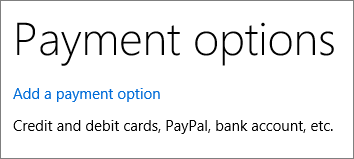
On the Payment options page, choose Add a payment option.
-
On the next page, choose Credit/debit card, then choose Next. Your screen might look like either of the following:
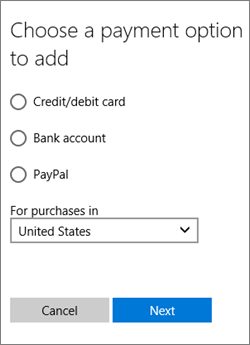
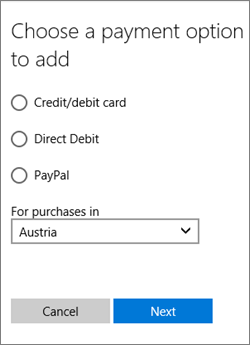
Note: If the country/region displayed under For purchases in isn't correct, make sure to change it. The payment options may be different, because some options aren't available everywhere.
-
On the next page, enter the card information, then choose Next. The card is now listed as an available payment option.
Update credit/debit card details
Important: On the Payment options page, you can only update the expiration date, the name on the card, address, and phone number. You can't change the card type or the card number. If you want to change the card type or number, you have to add a new card. Then you can remove the one you don't want to use.
-
Sign in to the Payment options page with the Microsoft account associated with your Office 365 subscription.
We can help if you can't remember the Microsoft account or password you use with Office.
-
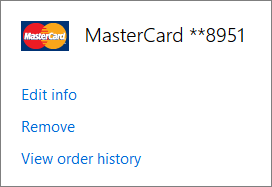
On the Payment options page, find the card that you want to update, and choose Edit info.
-
Make your updates, and then choose Next. The card information is now updated.
Remove a credit/debit card
Note: You can't remove a payment option that's currently used to pay for an active subscription . If you don't see the Remove link, that means the card is associated with an active subscription. First, add or select a different payment option for the subscription, and then follow these steps.
Caution: When you remove a payment option, it's removed from all Microsoft services. Keep that in mind if you use other Microsoft services, like Xbox Live.
-
Sign in to the Payment options page with the Microsoft account associated with your Office 365 subscription.
We can help if you can't remember the Microsoft account or password you use with Office.
-
On the Payment options page, find the card that you want to remove, then choose Remove.

-
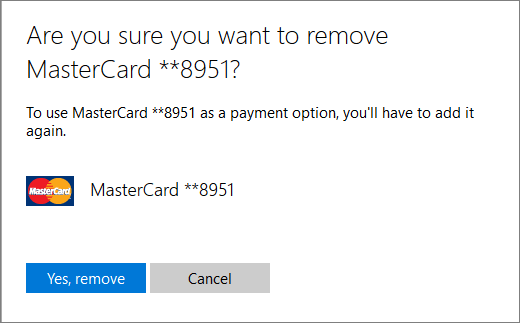
On the next page, choose Yes, remove.
-
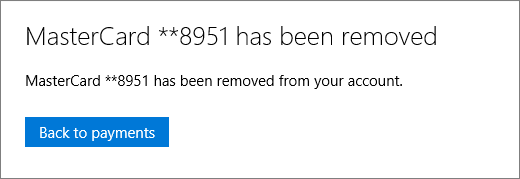
On the next page, choose Back to payments.
Manage bank, direct debit, or other accounts
Depending on your country/region, you might have the option to use a bank, direct debit, or other type of account to pay for your subscription.
Add a bank, direct debit, or other account
-
Sign in to the Payment options page with the Microsoft account associated with your Office 365 subscription.
-
On the Payment options page, choose Add a payment option.

-
On the next page, choose Bank account (US only), or Direct Debit (where available), then choose Next. Your screen might look like either of the following screenshots:


Note: Some countries/regions might have different options.
-
On the next page, enter your account information, then choose Next. The account is now listed as an available payment option.
Update a bank, direct debit, or other account
-
Sign in to the Payment options page with the Microsoft account associated with your Office 365 subscription.
-
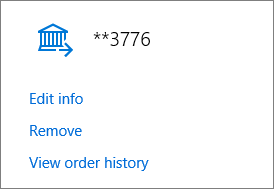
Find the account you want to update, and choose Edit info.
-
Update the information, and then choose Next. The account information is now updated.
Note: You can't change the account type or the account number. If you want to change the account type or number, you'll have to add a new account.
Remove a bank, direct debit, or other account
Note: You can't remove a payment option that's currently used to pay for an active subscription . If you don't see the Remove link, that means the payment option is associated with an active subscription. First, add or select a different payment option for the subscription, and then follow these steps.
Caution: When you remove a payment option, it's removed from all Microsoft services. Keep that in mind if you use other Microsoft services, like Xbox Live.
-
Sign in to the Payment options page with the Microsoft account associated with your Office 365 subscription.
-
On the Payment options page, find the account that you want to remove, then choose Remove.

-
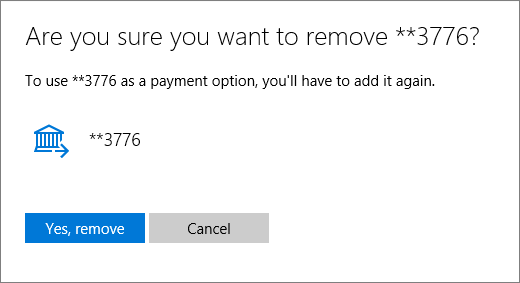
On the next page, choose Yes, remove.
-
On the next page, choose Back to payments.

Manage PayPal
You can use PayPal to pay for your Office 365 Home or Office 365 Personal subscription in most countries/regions. If you're not sure if it's available in your area, check the "Locations where PayPal is an option" section below.
Add a PayPal account
-
Sign in to the Payment options page with the Microsoft account associated with your Office 365 subscription.
We can help if you can't remember the Microsoft account or password you use with Office.
-
Choose Add a payment option.
-
On the next page, choose PayPal, then choose Next.
-
On the next page, choose Next.
-
Sign in to your PayPal account to associate it with your Microsoft account. After you're finished, you're returned to the Payment options page, and your PayPal account is now listed as a payment option.
Update a PayPal account
To update information associated with your PayPal account, go to PayPal.com.
Remove a PayPal account
Note: You can't remove a payment option that's currently used to pay for an active subscription . If you don't see the Remove link, that means the PayPal account is associated with an active subscription. First, add or select a different payment option for the subscription, and then follow these steps.
Caution: When you remove a payment option, it's removed from all Microsoft services. Keep that in mind if you use other Microsoft services, like Xbox Live.
-
Sign in to the Payment options page with the Microsoft account associated with your Office 365 subscription.
-
On the Payment options page, find your PayPal account, and choose Remove.
-
On the next page, choose Yes, remove.
-
Choose Back to payments.
Tip:
Locations where PayPal is an option
PayPal is available in the following countries/regions:
|
|
|
Change the payment option you're using to pay for a subscription
After you've added or updated a payment option, you can change the payment option that you use to pay for your Office 365 subscription, as well as manage automatic renewal, switch subscriptions, and more.
-
Sign in to the Services & subscriptions page with the Microsoft account associated with your Office 365 subscription.
-
Find the subscription you want to change, and choose Change how you pay.

-
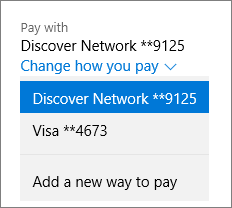
In the Change how you pay drop-down list, do one of the following:
-
Choose a different payment option. The Pay with section updates to show that your subscription now uses the new payment option.
-
Choose Add a new way to pay, and continue to the next step.
-
-
On the next page, choose a payment option, enter the details, and then choose Next.

Note: Some countries/regions might have different options.
-
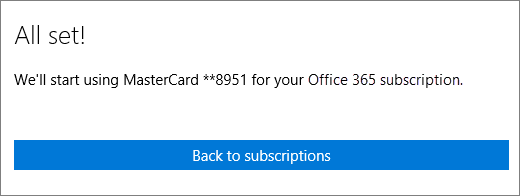
On the next page, choose Back to subscriptions. Your subscription is now ready to use the payment option you selected.
Still need help? Contact Support
As an Office 365 subscriber, you can contact support for free to get help with account and billing issues.
Leave us a comment
Were these steps helpful? If so, please let us know at the bottom of this topic. If they weren't, and you're still having trouble, tell us what you were trying to do, and what problems you encountered.
No comments:
Post a Comment