Watch this video to learn how to create more complex formulas using multiple operators, cell references, and functions.
Now, we'll create more complex formulas using multiple operators, cell references, and functions.
We are going to calculate the sales commission based off of the net revenue.
To do this, I take the Sales Price and subtract from it the Cost of goods sold.
This is in parentheses to ensure it occurs first.
I then multiply the Net profit by the Commission percentage in B4, 3%.
This returns the commission.
Let's take a look at how this works in a formula.
Because the cell references are in parentheses, first the cost of goods sold is subtracted from the sales price.
This returns a Net profit of $3200.
This is then multiplied by 3%, returning a commission of $96.
Now, we are going to determine the Weighted scores for students.
By Weighted scores, I mean that different tests account for a different percentage of the students' final grade.
Tests 1 and 2, each account for 10%, and the mid-term and final tests, each account for 40%.
To do this, I multiply the Test 1 score for Bob by its Weight.
I press F4 after I select the Weight value in B3, so that when I copy the formula, the Weight for Test 1 will always remain cell B3.
This is referred to as Absolute Cell Reference.
I then add Bob's Mid-term score multiplied by its Weight in B4, and press F4 again.
I follow the same steps for Test 2 and the Final test.
To copy the formula, I click the cell, put the mouse pointer over the bottom right-hand corner of the cell until I get a black + sign, click the left mouse button, and drag the border to the right.
Here are the weighted scores for the students.
Let's take a look at what's happening in this formula for Bob's Weighted score.
Each of the test scores and their weights are multiplied, resulting in this formula.
Then the numbers are added together, resulting in 74.5.
What's the value returned by this formula? First, we do the inner most parentheses, 5 minus 3 is 2, resulting in this formula.
Next, we do the remaining parentheses, 10 times 2 is 20 and 1 minus 4 is -3, resulting in this formula.
Now, we do multiplication and division, from left to right.
6 times 20 is 120, divided by 3 is 40, resulting in this formula.
Lastly, we do addition and subtraction from left to right. 4 + 40 is 44, - 3 is 41.
You can use functions in formulas with multiple operators, including nested parentheses.
Functions and cell references are evaluated and treated as their resulting numbers.
The parentheses that follow a function name act only as a container for the function's arguments, such as numbers or cell references, and don't affect the order of operations in a formula.
Let's take a look at what's happening in this formula.
The functions and cell references are evaluated, resulting in this formula. The operations in parentheses occur first, resulting in a formula of 12 minus 3, and this is 9.
Now, you have a good idea about how to do basic math in Excel.
Of course, there's more to learn.
So, check out the course summary at the end, and best of all, explore Excel 2013 on your own.


 ")
")


 "
"

 > Get link to team. Click Copy and send the link to the person you want to invite to your team.


 for more options.
 .
.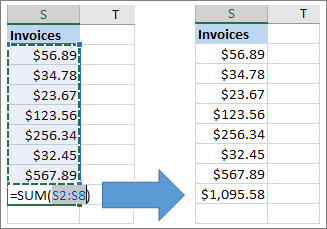
 to the bottom-right of the selected cells.


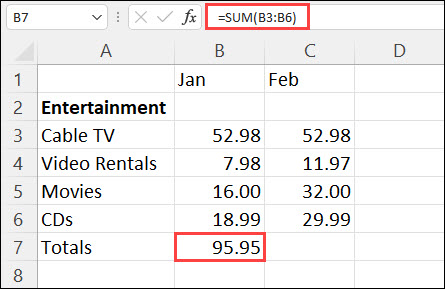
 += (Mac) into a cell, and Excel automatically inserts the SUM function.
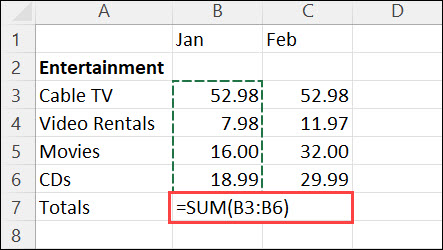
 next to cell that shows the error. Click Show Calculation Steps if it's available. Then pick the resolution that works for your data.