You can stop sharing an item, see who it's shared with, or change the permissions others have to it, if you're the owner of the item.
Note: You can't change the permission of a sharing link from edit to view or from view to edit. The way around it is to delete your sharing link and create a new one with a different permission.
What you see differs depending whether you're signed in with a personal account or a work or school account. Select a tab below to learn more.
Stop or change sharing
Files and folders can be shared by sending someone a sharing link, or by giving them direct access to the file or folder. (People may also have access to a file or folder if they've been given access to the site itself.)
If you are the file owner, you can stop sharing the file or folder.
If someone has been given direct access, or has access through a specific people link, you can also change the sharing permissions between view and edit.
Here are the steps:
-
Select the file or folder you want to stop sharing.
-
Select Information
 in the upper-right corner to open the Details pane.
Note: (The Information icon is just below your profile picture. If you don't see it, make sure you only have one file or folder selected - it won't display if you have multiple items selected.)
-
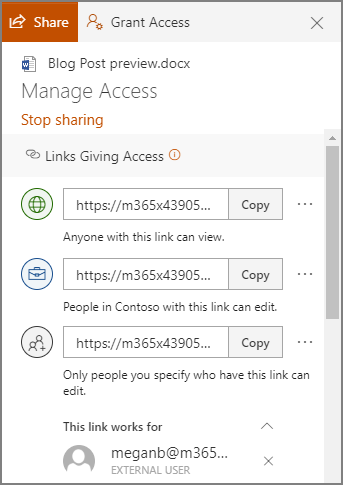
On the Details pane, under the Has Access header, you'll see the People icon, the Links icon, and/or the Email icon. These options vary depending on how you have shared the file or folder. Select Manage access and:
-
To stop sharing the file entirely, click Stop sharing.
-
To delete a sharing link, click the ... next to the link, then click the X next to the link to remove it. (You'll get a prompt asking you if you're sure you want to delete the link - if so, click Delete link.)
-
To stop sharing with specific people, expand the list under a specific people link and click the X to remove someone.
-
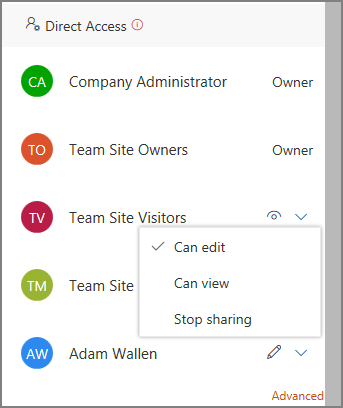
To change permissions or stop sharing with someone who has direct access, under Direct Access, click the dropdown next to the person's name and choose the option that you want.
-
Tip: You can also manage a file or folder's sharing permissions through the OneDrive desktop app for Windows 7, Windows 10, and Mac. All you need to do is right-click the shared file or folder in your OneDrive folder on your computer, and select Share, then select More  > Manage access, and a dialog box will open on your desktop so you can make your selections as described above in step 3.
See the items you've shared
On OneDrive.com, select Shared in the left pane, and then select Shared by me.
Stop or change sharing
If you are the file owner, you can stop or change the sharing permissions. Here are the steps:
-
Select the file or folder you want to stop sharing.
-
Select Information
in the upper-right corner to open the Details pane.Note: (The Information icon is just below your profile picture. If you don't see it, make sure you only have one file or folder selected - it won't display if you have multiple items selected.)
-
On the Details pane, under the Has Access header, you'll see the People icon, the Links icon, and/or the Email icon. These options vary depending on how you have shared the file or folder. Select Manage access.
-
To remove a sharing link, click the X next to the link to remove it. (You'll get a prompt asking you if you're sure you want to delete the link - if so, click Remove link.) You can also remove it through the Edit link page (see below).
-
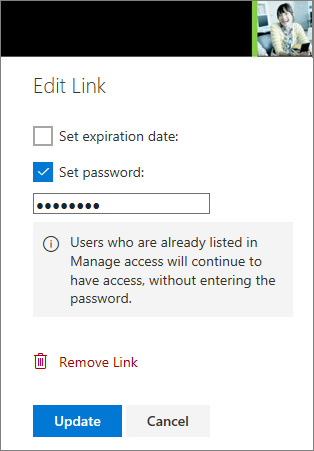
To change the password or expiration date on a sharing link, click the dropdown arrow for the link that you want to edit, and then on the Edit link page:
-
Select the password and change it, or clear the Set password check box to remove the password.
-
Update the link expiration date, or clear the Set link expiration check box to remove the expiration date from the link.
-
Select Remove Link to delete the link and stop sharing with that link. (You'll get a prompt asking you if you're sure you want to remove the link - if so, click Remove link.)
-
Notes:
-
If your Microsoft account is set with Family Safety, and your parent has turned off contact management, you can only share items with people who are already on your contact list.
-
Please respect copyright and be careful what you share online. Copying or sharing unauthorized materials violates the Microsoft Services Agreement.
See the items you've shared
On OneDrive.com, select Shared in the left pane.
Learn more
Need more help?
| | Get online help |
| | Contact Support |
| | Got feedback? Go to the OneDrive UserVoice. |


 , and then click Site contents.


 .
.