When you want to display a list of values that users can choose from, add a list box to your worksheet.
Add a list box to a worksheet
-
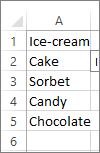
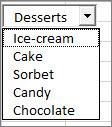
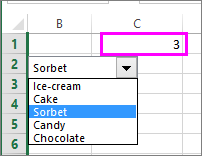
Create a list of items that you want to displayed in your list box like in this picture.
-
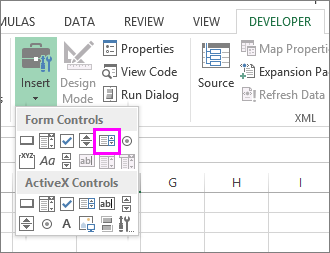
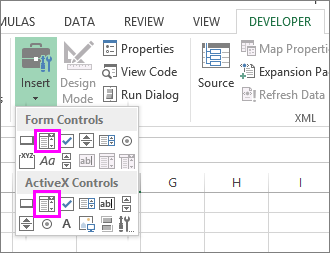
Click Developer > Insert.
Note: If the Developer tab isn't visible, click File > Options > Customize Ribbon. In the Main Tabs list, check the Developer box, and then click OK.
-
Under Form Controls, click List box (Form Control).
-
Click the cell where you want to create the list box.
-
Click Properties > Control and set the required properties:
-
In the Input range box, type the range of cells containing the values list.
Note: If you want more items displayed in the list box, you can change the font size of text in the list.
-
In the Cell link box, type a cell reference.
Tip: The cell you choose will have a number associated with the item selected in your list box, and you can use that number in a formula to return the actual item from the input range.
-
Under Selection type, pick a Single and click OK.
Note: If you want to use Multi or Extend, consider using an ActiveX list box control.
-
Add a combo box to a worksheet
You can make data entry easier by letting users choose a value from a combo box. A combo box combines a text box with a list box to create a drop-down list.
You can add a Form Control or an ActiveX Control combo box. If you want to create a combo box that enables the user to edit the text in the text box, consider using the ActiveX Combo Box. The ActiveX Control combo box is more versatile because, you can change font properties to make the text easier to read on a zoomed worksheet and use programming to make it appear in cells that contain a data validation list.
-
Pick a column that you can hide on the worksheet and create a list by typing one value per cell.
Note: You can also create the list on another worksheet in the same workbook.
-
Click Developer > Insert.
Note: If the Developer tab isn't visible, click File > Options > Customize Ribbon. In the Main Tabs list, check the Developer box, and then click OK.
-
Pick the type of combo box you want to add:
-
Under Form Controls, click Combo box (Form Control).
Or
-
Under ActiveX Controls, click Combo Box (ActiveX Control).
-
-
Click the cell where you want to add the combo box and drag to draw it.
Tips:
-
To resize the box, point to one of the resize handles, and drag the edge of the control until it reaches the height or width you want.
-
To move a combo box to another worksheet location, select the box and drag it to another location.
Format a Form Control combo box
-
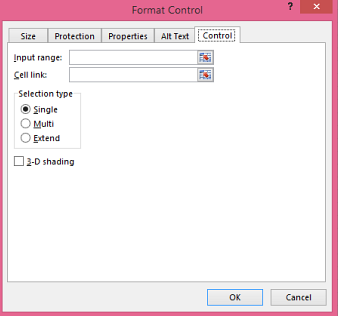
Right-click the combo box and pick Format Control.
-
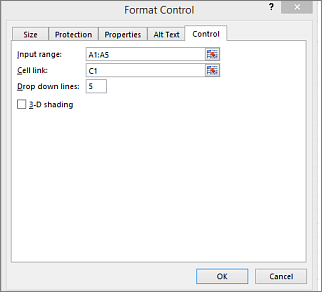
Click Control and set the following options:
-
Input range: Type the range of cells containing the list of items.
-
Cell link: The combo box can be linked to a cell where the item number is displayed when you select an item from the list. Type the cell number where you want the item number displayed.
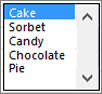
For example, cell C1 displays 3 when the item Sorbet is selected, because it's the third item in our list.
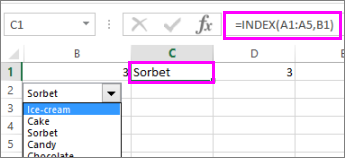
Tip: You can use the INDEX function to show an item name instead of a number. In our example, the combo box is linked to cell B1 and the cell range for the list is A1:A2. If the following formula, is typed into cell C1: =INDEX(A1:A5,B1), when we select the item "Sorbet" is displayed in C1.
-
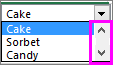
Drop-down lines: The number of lines you want displayed when the down arrow is clicked. For example, if your list has 10 items and you don't want to scroll you can change the default number to 10. If you type a number that's less than the number of items in your list, a scroll bar is displayed.
-
-
Click OK.
Format an ActiveX combo box
-
Click Developer > Design Mode.
-
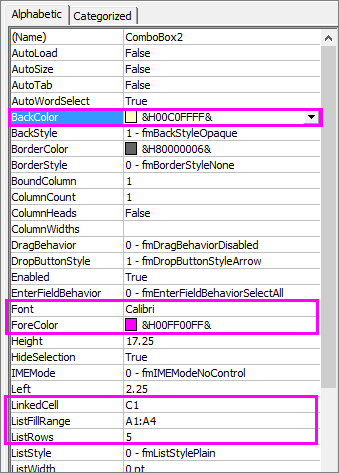
Right-click the combo box and pick Properties, click Alphabetic, and change any property setting that you want.
Here's how to set properties for the combo box in this picture:

To set this property
Do this
Fill color
Click BackColor > the down arrow > Pallet, and then pick a color.
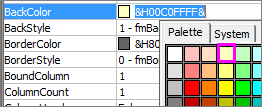
Font type, style or size
Click Font > the... button and pick font type, size, or style.

Font color
Click ForeColor > the down arrow > Pallet, and then pick a color.
Link a cell to display selected list value.
Click LinkedCell
Link Combo Box to a list
Click the box next to ListFillRange and type the cell range for the list.
Change the number of list items displayed
Click the ListRows box and type the number of items to be displayed.
-
Close the Property box and click Designer Mode.
-
After you complete the formatting, you can right-click the column that has the list and pick Hide.
Need more help?
You can always ask an expert in the Excel Tech Community, get support in the Answers community, or suggest a new feature or improvement on Excel User Voice.
See Also
Overview of forms, Form controls, and ActiveX controls on a worksheet
 and R to open a Run dialog, then type


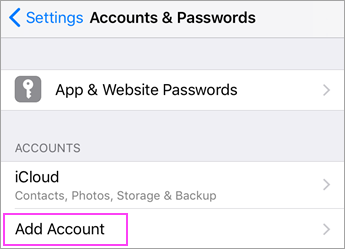
 > Add Account > Add Email Account.
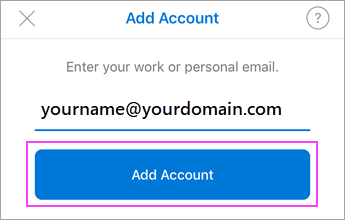


 > Mail > POP and IMAP.
 at the lower left corner of the page to go to the People page.