Friday, February 22, 2019

Enable users to find a record by selecting a value from a list

Enable users to find a record by selecting a value from a list

When you design a form in Access, you can create a list box or a combo box that can be used to find a record when a value is selected from the list. This makes it easier for users to quickly find existing records without having to type a value into the Find dialog box.

Notes: 

  • For this procedure to work, the form must be bound to a table or a saved query. Step 5 of the procedure contains more information about what to do if this is not the case.

  • This procedure might create code that will run only when the database is granted trusted status. For more information, see the article Decide whether to trust a database.

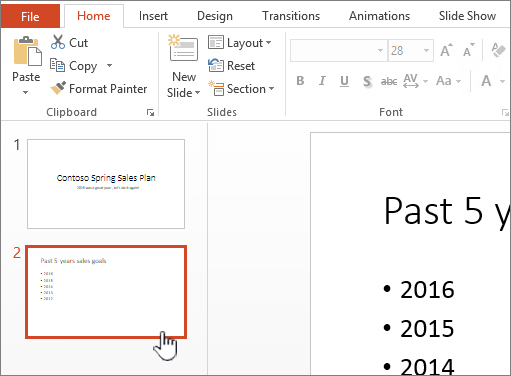
Create the list box or combo box

  1. Right-click the form in the Navigation Pane, and then click Design View.

  2. On the Design tab, in the Controls group, ensure that Use Control Wizards Button image is selected.

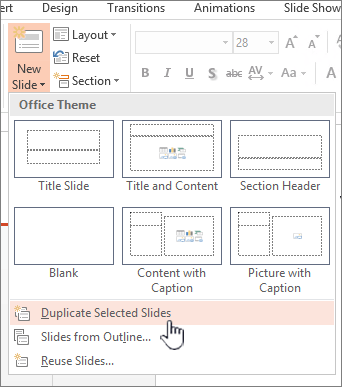
  3. In the Controls group, click List Box or Combo Box.

  4. On the form, click where you want to put the list box or combo box.

  5. On the first page of the wizard, click Find a record on my form based on the value I selected in my combo box/list box, and then click Next.

    The Find a record... option is not available.

    If the option Find a record on my form based on the value I selected in my combo box/list box is not displayed, it is likely because the form is not bound to a table or a saved query. The form must be bound to an object that is available in the Navigation Pane under Tables or Queries.

    Use the following procedure to check whether a form is bound to a table or saved query:

    1. Click Cancel to close the wizard.

    2. Right-click the list box or combo box that you created earlier, and then click Delete.

    3. If the Property Sheet task pane is not displayed, press F4 to display it.

    4. Select Form from the list at the top of the property sheet.

    5. On the Data tab of the property sheet, look at the Record Source property box. This box must contain the name of a table or saved query before you can use the procedure described in this article. If the box is blank, you can select an existing table or query as the record source, or you can create a new query to serve as the record source. If the box contains a SELECT statement, you have the additional option of converting that statement to a saved query. Once you have completed one of these tasks, the next time you run the Combo Box/List Box wizard, it will display the Find a record... option.

      Follow one of these procedures based on what you want to do:

      • Select an existing table or query as the record source

        1. If you know that there is an existing table or query in your database that contains the records you want to find, use this procedure to bind the form to that object.

        2. Note: If the Record Source property box contains a SELECT statement, following this procedure will delete that statement permanently. You might want to copy the statement to a text file or other word processing program in case you want to restore it.

        3. Click in the Record Source property box, and then click the drop-down arrow that appears.

        4. Select one of the available tables or queries. If a suitable table or query is not available, you must create one before you can continue. For more information, see the articles Create a table and add fields or Create a simple select query.

        5. Save the form, and then repeat the procedure at the beginning of this article. The wizard should now display the Find a record on my form based on the value I selected in my combo box/list box option.

      • Create a new saved query, or convert a SELECT statement to a saved query

        If the data you want to find is contained in more than one table, you will need to bind the form to a query that selects the data from those tables.

        1. In the Record Source property box, click the Build button Builder button .

          Access opens the Query Builder.

          • If the Record Source property box originally was empty, the Query Builder displays the Show Table dialog box, and you can begin creating a new query. For more information, see the article Create a simple select query. When you are finished building the query, proceed with step 2.

          • If the Record Source property box originally contained a SELECT statement, that query is displayed in the Query Builder. Proceed with step 2 to convert it to a saved query.

        2. On the Design tab, in the Close group, click Save As.

        3. In the Save As dialog box, type a name for the query in the Save 'Queryn' to: box.

        4. Make sure that Query is selected in the As box, and then click OK.

        5. On the Design tab, in the Close group, click Close.

        6. Click Yes to save the changes made to the query and update the property.

          Access displays the form in Design view, and changes the Record Source property so that the new saved query name is displayed.

        7. Click Save on the Quick Access Toolbar.

        8. Repeat the procedure at the beginning of this article. The wizard should now display the Find a record on my form based on the value I selected in my combo box/list box option.

  6. Follow the directions in the wizard. On the last page of the wizard, click Finish to display the list box or combo box in Design view.

Top of Page

Thursday, February 21, 2019

Switch between languages using the Language bar

Switch between languages using the Language bar

After you enable the keyboard layout for two or more languages in the Windows operating system, you can use the Language bar to switch between languages that use different keyboard layouts.

Note: If you just want to insert a few symbols or foreign characters, and you only type in languages with a Latin alphabet, such as English or Spanish, you can insert symbols without switching to a different keyboard layout.

For more information about adding additional editing languages and keyboard layouts see Change the language Office uses in its menus and proofing tools.

Using the Language bar to Switch Keyboard Layouts

When you switch a language by using the Language bar, the keyboard layout changes to the keyboard for that language.

Use the Language bar when you:

  • Want to switch between languages with a Latin alphabet, such as English, Spanish, or French, and a language with a non-Latin alphabet, such as Arabic or Chinese.

  • Want to switch between languages with a non-Latin alphabet, such as Greek or Russian.

  • Prefer to use native keyboard layouts when you type in different languages that have a Latin alphabet.

  1. After you have enabled the keyboard language that you want, open your document and place the cursor in the document where you want to start to type text in a different language.

  2. Click the language icon English keyboard indicator on the Language bar, which should appear on your task bar near where the clock is, and then click the language that you want to use.

    Keyboard shortcut:  To switch between keyboard layouts, press Alt+Shift.

    Note: The English keyboard indicator icon is just an example; it shows that English is the language of the active keyboard layout. The actual icon shown on your computer depends on the language of the active keyboard layout and version of Windows.

    If you have set up more than one keyboard layout for a single language, you can switch between layouts by clicking the keyboard layout icon on the Language bar and then clicking the keyboard layout that you want to use. The name on the indicator changes to reflect the active keyboard layout.

  3. Repeat steps 1 and 2 to switch between different languages.

I don't see the Language bar

In most cases, the Language bar automatically appears on your desktop or in the taskbar after you enable two or more keyboard layouts in the Windows operating system. You cannot see the Language bar if it is hidden or only one keyboard layout is enabled in the Windows operating system.

If you don't see the Language bar, do the following to check to see if the Language bar is hidden:

In Windows 10 and Windows 8

  1. Press the Windows logo key and type Control to search for the Control Panel app.

  2. Click Control Panel.

  3. Under Clock, Language, and Region, click Change input methods.

  4. Click Advanced settings.

  5. Under Switching input methods, select the Use the desktop language bar when it's available check box, and then click Options.

    Office 2016 Windows 8 Switching Input Methods

  6. In the Text Services and Input Languages dialog box, click the Language Bar tab, and make sure that either the Floating On Desktop or the Docked in the taskbar option is selected.

    Office 2016 Windows 8 Text Services & Input Languages

In Windows 7

  1. Click Start, and then click Control Panel.

  2. Under Clock, Language, and Region, click Change keyboard or other input methods.

  3. In the Region and Language dialog box, click Change keyboards.

  4. In the Text Services and Input Languages dialog box, click the Language Bar tab.

    Language Bar tab

  5. Under Language Bar, check if the Hidden option is selected. If it is, select either Floating on Desktop or Docked in the taskbar.

In Windows Vista

  1. Click Start, and then click Control Panel.

  2. Under Clock, Language, and Regional Options, click Change keyboard or other input methods.

  3. In the Regional and Language Options dialog box, click Change keyboards.

  4. In the Text Services and Input Languages dialog box, click the Language Bar tab.

    Language Bar tab

  5. Under Language Bar, check if the Hidden option is clicked. If it is, click either Floating on Desktop or Docked in the taskbar.

See Also

Check spelling and grammar in a different language in Office

Insert a check mark or other symbol

Create an alert or subscribe to an RSS Feed

Create an alert or subscribe to an RSS Feed

Do you want to know when your team creates a new document or when someone changes a document that you created? You can choose from several different ways to stay updated on changes.

In this article

Overview

Create an alert for a list or library

Create an alert for a folder, file, or list item

Subscribe to an RSS Feed for a list or library

Subscribe to an RSS Feed for a view

Overview

If you want to stay up-to-date on changes to documents and list items, you have two options. You can receive updates as e-mail alerts, if your site is set up to send alerts, or as RSS Feeds, if you have access to an RSS reader.

Both alerts and RSS Feeds inform you about updates, and both allow you to customize how much information you receive. They differ in how you receive the updates.

Alerts come in e-mail, at the interval you specify, and let you know when specific items change. For example, if you want to know each time someone adds new files to a library, you can create an alert for yourself or even for a co-worker.

RSS Feeds come at periodic intervals, and appear in an RSS reader, where you might already manage subscriptions to other types of information, such as news. There are several types of readers, including stand-alone readers, some browsers, and some e-mail programs.

Alerts

Alerts can be set up for different types of information, so that you can learn about the changes you are most interested in. You can set up an alert for a list, library, folder, file, or list item. For example, you can set up an alert for a folder in a library, without receiving alerts when changes occur to the rest of the library.

You can set up alerts for different types of changes, ranging from every single change to only changes that occur to the files you created. Alerts appear as messages in your e-mail inbox.

RSS Feeds

RSS Feeds appear in an RSS reader with updates and subscriptions from other sites. RSS is a technology that enables you to receive updates in a standardized format from several sites at once.

You can view and subscribe to RSS Feeds for a list or library, or even a view where you have filtered the information or customized the columns.

Top of Page

Create an alert for a list or library

  1. If the list or library is not already open, click its name on the Quick Launch.

    If the name of your list or library does not appear, click View All Site Content, and then click the name of your list or library.

  2. On the Actions menu Menu image , click Alert Me.

  3. On the New Alert page, in the Alert Title section, change the title for the alert if you want.

    The title appears in the subject line of the alert e-mail message and is also used for managing alerts.

  4. In the Send Alerts To section, verify that your contact information is correct.

    Tip: If you have permission to manage alerts, you can also create an alert for another person by typing his or her information into the Users box.

  5. If the Change Type section is available, choose the types of changes that you want to be notified about. For example, you can receive alerts about all changes or only when items are deleted.

  6. In the Send Alerts for These Changes section, specify whether you want to be alerted for all types of changes, or for specific changes, such as when anything changes or only when someone changes an item that you created or recently changed.

  7. In the When to Send Alerts section, choose how frequently you want to receive the alerts, such as immediately or in a daily or weekly summary, and at what days or times.

  8. Click OK.

Note: Depending on how your site and servers are set up, the person you created an alert for may receive an e-mail message that confirms that you created an alert. The alert e-mail message may provide links to the list or library, alert settings, the name of the person who created the alert, a mobile view, and other information and commands.

Top of Page

Create an alert for a folder, file, or list item

  1. If the list or library is not already open, click its name on the Quick Launch.

    If the name of your list or library does not appear, click View All Site Content, and then click the name of your list or library.

  2. Point to the item for which you want to create an alert, click the arrow that appears, and then click Alert Me.

    In some views, such as a view of items in a calendar, you may need to click the item, and then click Alert Me.

  3. On the New Alert page, in the Alert Title section, change the title for the alert if you want.

    The title appears in the subject line of the alert e-mail message and is also used for managing alerts.

  4. In the Send Alerts To section verify that your contact information is correct.

    Tip: If you have permission to manage alerts, you can create an alert for another person by typing his or her information into the Users box.

  5. If the Change Type section is available, choose the types of changes that you want to be notified about. For example, you can receive alerts about all changes or only when items are deleted.

  6. In the Send Alerts for These Changes section, specify whether you want to be alerted for all types of changes, or for specific changes, such as when anything changes or only when someone changes an item that you created or recently changed.

  7. In the When to Send Alerts section, choose how frequently you want to receive the alerts, such as immediately or in a daily or weekly summary, and at what days or times.

  8. Click OK.

Note: Depending on how your site and servers are set up, the person you created an alert for may receive an e-mail message that confirms that you created an alert. The alert e-mail message may provide links to the list or library, alert settings, the name of the person who created the alert, a mobile view, and other information and commands.

Top of Page

Subscribe to an RSS Feed for a list or library

Note: Depending on your browser or how your system is set up, this procedure may not be available or the steps may differ. For more information, see your site owner or administrator.

  1. If the list or library is not already open, click its name on the Quick Launch.

    If the name of your list or library does not appear, click View All Site Content, and then click the name of your list or library.

    Tip: If your Web browser enables you to subscribe to a view, an RSS toolbar button may become enabled at this point. If so, you may be able to click it to subscribe directly to the list or library. If this feature is not available in your browser, then you can follow the steps in the rest of this procedure.

  2. On the Actions menu Menu image , click View RSS Feed.

    The Feed appears in a browser window.

  3. On the page that appears, follow the instructions for how to subscribe to the Feed. For example, you be may see the text Subscribe to this feed.

  4. Follow any additional instructions in your RSS reader, browser, or e-mail program.

Note: If subscribing to the feed by using the subscription link doesn't work for your reader, follow the instructions in your RSS reader to copy and paste the URL of the feed into your reader.

Top of Page

Subscribe to an RSS Feed for a view

If you have permission to modify a view, you can subscribe to an RSS Feed for a particular view. This enables you to receive updates on changes that occur to information that appears only in that view.

Some Web browsers enable you to subscribe to a view by clicking an RSS button in the browser toolbar.

  1. If the list or library is not already open, click its name on the Quick Launch.

    If the name of your list or library does not appear, click View All Site Content, and then click the name of your list or library.

  2. Open the view that you want to subscribe to.

    Tip: If your Web browser enables you to subscribe to a view, an RSS toolbar button may become enabled at this point. If so, you may be able to click it to subscribe directly to the view. If this feature is not available, then you can follow the steps in the rest of this procedure.

  3. On the View menu view menu , click Modify this View.

    Note: If Modify this View does not appear on the View menu, you do not have permission to edit the view and therefore you cannot use this method to subscribe to the RSS Feed of the view. Try subscribing to the view from the Actions menu or from a Web browser.

  4. In the Name section, click the RSS button Button image .

  5. On the page that appears, click Subscribe to this feed.

  6. Follow any additional instructions in your RSS reader, browser, or e-mail program.

Note: If subscribing to the feed by using the subscription link doesn't work for your reader, follow the instructions in your RSS reader to copy and paste the URL of the feed into your reader.

Top of Page

Duplicate slides within a PowerPoint presentation

Duplicate slides within a PowerPoint presentation

To add a slide that contains the content of an existing slide in a presentation, you can duplicate the slide.

Important: If you need paste recovery, which allows you to keep the formatting of the duplicated slide's content, you will want to copy and paste your slides.

Duplicate slides within a presentation

  1. In Normal view, select the slide thumbnails of one or more slides that you want to duplicate. To select multiple slides, click a slide thumbnail, and then press and hold Ctrl while you click the other slide thumbnails.

    Normal view with slide thumbnail selected
  2. On the Home tab, in the Slides group, click the arrow next to New Slide, and then click Duplicate Selected Slides.

    New slide menu with duplicate slide selected

    The duplicated slides are inserted directly underneath the lowermost slide that you selected.

Duplicate slides within a presentation in PowerPoint 2010

To add a slide that contains the content of an existing slide in a presentation, you can duplicate the slide.

  1. In the pane that contains the Outline and Slides tabs, click the Slides tab.

    The pane that contains the Outline and Slides tabs
  2. Select one or more slides that you want to duplicate. To select multiple slides, click a slide, and then press and hold Ctrl while you click the other slides.

  3. On the Home tab, in the Slides group, click the arrow next to New Slide, and then click Duplicate Selected Slides.

    Note: The duplicated slides are inserted directly underneath the lowermost slide that you selected.

Duplicate slides within a presentation in PowerPoint 2007

  1. In the pane that contains the Outline and Slides tabs, click the Slides tab.

  2. Select one or more slides that you want to duplicate.

  3. On the Home tab, in the Slides group, click New Slide.

  4. In the layout gallery, click Duplicate Selected Slides.

    Note: The duplicated slides are inserted directly below the lowermost slide that you selected.

Outlook for Mac 2011 Help

Outlook for Mac 2011 Help

Customer support and troubleshooting for Office for Mac 2011 ends October 2017. To get all the latest features, upgrade to Office 2016 for Mac. Make a one-time purchase, or buy an Office 365 subscription and stay up to date.

Link to buy or try Office

Set up your accounts

Title

Description

Set up email in Outlook for Mac 2011

Learn how to configure POP and IMAP e-mail accounts from e-mail service providers such as AOL, Gmail, MobileMe, and Windows Live Hotmail.

Add an email account to Outlook

Connect to the Microsoft Exchange account provided by your company or organization.

Import a .pst file into Outlook for Mac from Outlook for Windows

Watch this short overview on how to import an Outlook for Windows Data File (.pst).

Work with mail, calendar, and address book

Title

Description

Insert pictures in Office for Mac

Make your e-mail messages more interesting by including a picture as part of the message.

Create and insert a signature in Outlook for Mac

Add a signature manually or automatically to each message that you send.

Create a meeting or appointment

Learn the difference between a meeting and an appointment and how to create each on your calendar.

Create a contact group (also called a distribution list)

Learn how to create a distribution list so that you can send a message to everyone in a group without typing each recipient's address.

Organize and search for items

Title

Description

Add or remove folders

Create additional folders to organize your messages, contacts, tasks, and notes.

Find items in Outlook by doing a basic search

Quickly search the current folder, and expand the search to include additional folders or item types.

Create a rule

Create a rule to automatically sort incoming messages into folders.

Synchronize and share

Title

Description

Open a shared calendar, address book, or e-mail folder

Open a Microsoft Exchange calendar, address book, or e-mail folder that you have permission to open.

Add and manage delegates in Outlook for Mac

Give a delegate access to and set permissions on your Microsoft Exchange calendar, inbox, and address book.

Manage junk e-mail, security, and privacy

Title

Description

Customize junk e-mail protection

Adjust the junk e-mail filter to classify more or fewer messages as "junk."

Send a digitally signed or encrypted message

Make your messages more secure by using digital signatures and encryption.

Outlook for Mac 2011 Help

Use Information Rights Management (IRM) to restrict permission to a message, for example, prevent recipients from forwarding the message.

Troubleshooting

Title

Description

Create and insert a signature in Outlook for Mac

Explore common causes and solutions for e-mail issues.

Rebuild the Office database

Learn how to use the Microsoft Database Utility to rebuild a damaged Office database.

Explore other useful resources

Title

Description

Make Outlook your default application for e-mail, calendar, and contacts

Set up Outlook to open automatically when you click a link in a document or on a Web page to send e-mail (also known as a "mailto" link).

Outlook keyboard shortcuts

See the full list of keyboard shortcuts, organized into logical categories.

Customize the Outlook window

Learn the main elements of the Outlook window and how to customize each one.

End of support for Office 2007

End of support for Office 2007

Support for Office 2007 ended on October 10, 2017. All of your Office 2007 apps will continue to function. However, you could expose yourself to serious and potentially harmful security risks. Upgrade to a newer version of Office so you can stay up to date with all the latest features, patches, and security updates.

Link to buy or try Office

Obtain a digital certificate and create a digital signature

Obtain a digital certificate and create a digital signature

This article explains how you can get or create a digital signature for use in Office documents. To learn more about how to use them in Office documents, see Add or remove a digital signature in Office files.

What is a digital signature?

A digital signature or ID is more commonly known as a digital certificate. To digitally sign an Office document, you must have a current (not expired) digital certificate. Digital certificates are typically issued by a certificate authority (CA), which is a trusted third-party entity that issues digital certificates for use by other parties. There are many commercial third-party certificate authorities from which you can either purchase a digital certificate or obtain a free digital certificate. Many institutions, governments, and corporations can also issue their own certificates.

A digital certificate is necessary for a digital signature because it provides the public key that can be used to validate the private key that is associated with a digital signature. Digital certificates make it possible for digital signatures to be used as a way to authenticate digital information.

Get a digital signature from a certificate authority or a Microsoft partner

If you plan to exchange digitally-signed documents together with other people, and you want the recipients of your documents to be able to verify the authenticity of your digital signature, you can obtain a digital certificate from a reputable third-party certificate authority (CA). For more information, see Find digital ID or digital signature services.

Create a digital certificate to digitally sign a document immediately

If you do not want to purchase a digital certificate from a third-party certificate authority (CA), or if you want to digitally sign your document immediately, you can create your own digital certificate.

  1. Go to C:\Program Files (x86)\Microsoft Office\root\ (or C:\Program Files\Microsoft Office\root\Office16 if you're running the 64-bit version of Office)

    .

  2. Click SelfCert.exe. The Create Digital Certificate box appears.

    Create Digital Signature dialog

  3. In the Your certificate's name box, type a descriptive name for the certificate.

  4. Click OK.

  5. When the SelfCert Success message appears, click OK.

  1. Go to C:\Program Files\Microsoft Office\<Office version>\.

  2. Click SelfCert.exe. The Create Digital Certificate box appears.

    Create Digital Signature dialog

  3. In the Your certificate's name box, type a descriptive name for the certificate.

  4. Click OK.

  5. When the SelfCert Success message appears, click OK.

  1. Click Start, point to All Programs, click Microsoft Office, click Microsoft Office Tools, and then click Digital Certificate for VBA Projects. The Create Digital Certificate box appears.

    Create Digital Signature dialog

  2. In the Your certificate's name box, type a descriptive name for the certificate.

  3. Click OK.

  4. When the SelfCert Success message appears, click OK.

To view the certificate in the Personal Certificates store, do the following:

  1. Open Internet Explorer.

  2. On the Tools menu, click Internet Options, and then click the Content tab.

  3. Click Certificates, and then click the Personal tab.

Important: If you digitally sign a document by using a digital certificate that you created, and then you share the digitally-signed file, other people cannot verify the authenticity of your digital signature without manually deciding to trust your self-signed certificate.

Top of page

How can I get my own digital signature?

If you try to digitally sign an Office 2007 document without a digital certificate, the Get a Digital ID dialog box appears, and you are asked to select how you want to get your own digital signature.

You have two options for getting a digital signature:

To learn more about each option, see the following sections.

Get a digital signature from a Microsoft partner

If you select the option Get a digital ID from a Microsoft partner in the Get a Digital ID dialog box, you are redirected to the Microsoft Office website, where you can purchase a digital certificate from one of the third-party certificate authorities (CAs).

If you plan to exchange digitally signed documents with other people, and you want the recipients of your documents to be able to verify the authenticity of your digital signature, it is a good idea to obtain a digital certificate from a reputable third-party certificate authority (CA).

Create your own digital signature

If you do not want to purchase a digital certificate from a third-party certificate authority, or if you want to digitally sign your document immediately, you can create your own digital certificate by selecting the Create your own digital ID option in the Get a Digital ID dialog box.

To create your own digital certificate

  1. In the Get a Digital ID dialog box, select Create your own digital ID.

    Important: The Get a Digital ID dialog box appears only if you attempt to digitally sign a document without a digital certificate.

  2. In the Create a Digital ID dialog box, type the following information to include in your digital signature:

    • In the Name box, type your name.

    • In the E-mail address box, type your e-mail address.

    • In the Organization box, type the name of your organization or company.

    • In the Location box, type your geographic location.

  3. Click Create.

    Note: If you digitally sign a document by using a digital certificate that you created, and then you share the digitally signed file, other people cannot verify the authenticity of your digital signature. Your digital signature can be authenticated only on the computer on which you created the digital signature.

Top of page

See also

Add or remove a digital signature in Office files

Get a digital ID

Find digital ID or digital signature services

Dashboard Features in PerformancePoint Services

Dashboard Features in PerformancePoint Services

PerformancePoint Services in Microsoft SharePoint Server 2010 provides you with several new and improved features to help you monitor and analyze performance in your organization. You can use dashboards that include more sophisticated key performance indicators (KPIs) in scorecards. You can use new reports, such as a KPI Details report. And, you can open a Decomposition Tree from a value in an analytic report or a scorecard. You can also apply value filters, such as a "Top 10" filter, to view more specific information in some kinds of scorecards and reports.

Read this article to learn more about what's new in PerformancePoint dashboards.

In this article

Enhancements in KPIs and scorecards

Scorecards that have Drill Down and Drill Up capabilities

Scorecards that have KPIs on columns

Scorecards that have more sophisticated KPIs

Calculated Metrics

Multiple Actuals

Time Intelligence

Variance

New report types and views

KPI Details report

Analytic pie charts

Decomposition Tree

Value filters

Top 10 value filters

User-specified value filters

Enhancements in KPIs and scorecards

PerformancePoint scorecards new include more sophisticated KPIs and other advanced functionality to make it easier to monitor and analyze organizational performance. For example, you can use Drill Down and Drill Up to view lower or higher levels of detail in your scorecards. And, you can use scorecards that have KPIs on columns. You can also use more advanced scorecards that use Time Intelligence, calculated metrics, and multiple actuals to measure performance.

Scorecards that have Drill Down and Drill Up capabilities

Depending on how your scorecard is configured, you can expand or collapse rows in your scorecard to see lower or higher levels of detail.

For example, if you have a scorecard that measures product sales profitability across different products in a retail organization, your scorecard might resemble the following image:

Scorecard that was created by using PerformancePoint Dashboard Designer

If you want to see the next level of detail for a particular category, such as GAMES & TOYS you can click the plus sign (+) next to that category and the scorecard will automatically expand to show the next level of detail. Then, your scorecard might resemble the following image:

PerformancePoint Services

You can continue expanding the scorecard until you get to the lowest level of detail. The following image shows the Download Games subcategory expanded to list individual products, which is the lowest level of detail for this particular scorecard.

PerformancePoint Services

In the preceding example, the categories, subcategories, and individual products are dynamically populated. That is, as the data changes, the scorecard remains up to date to show the current data.

In addition to clicking the plus sign (+) or minus sign (-) next to an item in the scorecard, you can also use Drill Down and Drill Up commands, as shown in the following image:

PerformancePoint Services

To use the Drill Up or Drill Down commands, right-click an item, and then click Drill Up or Drill Down.

Use Drill Up to view a higher level of detail.

Use Drill Down to view a lower level of detail.

Top of Page

Scorecards that have KPIs on columns

You can now have scorecards that include multiple KPIs on columns, enabling you to view more than one set of metrics for each row in your scorecard. A scorecard with KPIs on columns might resemble the following image:

Scorecard that was created by using PerformancePoint Dashboard Designer

In the preceding example, the scorecard contains two KPIs on columns: Sales Performance and Sales Margins.

Top of Page

Scorecards that have more sophisticated KPIs

You can now use scorecards that contain more advanced KPIs. For example, you might have KPIs that use formulas and calculations to measure performance (such KPIs are said to use calculated metrics). Or, you might have KPIs that compare multiple values to an overall target (such KPIs are said to use multiple actuals). You can even have KPIs that use special formulas to show information for dynamic time periods, such as "Last Six Months" or "Year to Date" (such KPIs are said to use Time Intelligence). And, you can now have KPIs that show how far off performance is from a goal (such KPIs are said to display Variance).

Although you can have advanced KPIs in your scorecards, your scorecards can remain simple and easy to use. For example, a scorecard that includes such sophisticated KPIs might resemble the following image:

Scorecard that was created by using PerformancePoint Dashboard Designer

Calculated Metrics

In the following image, the Sales Margins KPI is highlighted. This KPI uses calculated metrics to determine whether performance is on or off target.

PerformancePoint Services

When calculated metrics are used in KPIs, SharePoint Server applies one or more formulas to the data as it is retrieved from the underlying database(s). This capability also enables the use of multiple data sources in a single KPI.

Multiple Actuals

In the following image, the Sales Performance KPI is highlighted. This KPI uses multiple actuals to determine whether overall performance is on or off target.

PerformancePoint Services

Time Intelligence

In the following image, one column of the Sales Performance KPI is highlighted. This KPI uses Time Intelligence to show Year to Date performance.

PerformancePoint Services

As time progresses, the scorecard remains up to date without requiring the dashboard administrator to make any changes to the scorecard or its underlying queries.

Variance

In the following image, one column in the Sales Margins KPI is highlighted. This KPI is configured to show whether performance is on or off target as well as how far above or below target.

PerformancePoint Services

Top of Page

New report types and views

You can now use three new PerformancePoint view types in your dashboards: the KPI Details report, analytic pie charts, and the Decomposition Tree.

KPI Details report

You can use a KPI Details report in your dashboard to view additional information about scorecard KPIs. For example, you can view the following information in a KPI Details report:

  • The kinds of metrics that are used for KPIs

  • How performance scores are calculated and what the thresholds are for individual scores

  • Comments that were posted by other scorecard users

A KPI Details report might resemble the following image:

A KPI Details report provides additional information about values in a PerformancePoint scorecard

A KPI Details report is always accompanied by a scorecard in a dashboard page. This is because all the information that you view in the KPI Details report is determined by what you click in the scorecard. To view information in a KPI Details report, you click any value in a scorecard. To see how scores are calculated in a scorecard, click a cell in a Target value column.

Top of Page

Analytic pie charts

You can now use analytic pie charts in your dashboards. Similar to an analytic line or bar chart, you can use an analytic pie chart to view higher or lower levels of detail. You can also drill into the data to view a different dimension in the underlying SQL Server Analysis Services data cube.

An analytic pie chart might resemble the following image:

PerformancePoint analytic pie chart

Decomposition Tree

You can open a Decomposition Tree to explore data in some kinds of scorecards and reports. The Decomposition Tree is available as an action that you can apply to PerformancePoint analytic reports and scorecards that use Analysis Services data.

You would typically use a Decomposition Tree to see how an individual value in a report or a scorecard can be broken down into its contributing members. The Decomposition Tree automatically sorts results and applies an inline Pareto chart to the data, so you can quickly see the highest contributors to a particular report value. You can also see trends across individual members that contribute to an overall value.

Note:  In order to open and use the Decomposition Tree, you must have Microsoft Silverlight 2 or Silverlight 3 installed on your computer. In addition, depending on how a scorecard or an analytic view is configured, you might not be able to open the Decomposition Tree.

To open the Decomposition Tree, right-click an individual value, such as a point in a line chart, a bar in a bar chart, a wedge in a pie chart, or a cell in a grid or a scorecard. Then, you can select Decomposition Tree. The Decomposition Tree opens in a new window, where you can either drill down to the next level of detail, or drill into the data to view a different dimension in the data cube.

A Decomposition Tree might resemble the following image:

Analytic view that is available in PerformancePoint Services

Using the Decomposition Tree, you can also view member properties for a particular dimension member, as shown in the following image:

PerformancePoint Services

Top of Page

Value filters

In addition to value filters that you might see across the top of a dashboard page, you can now apply value filters to most scorecards and reports. There are two main groups of value filters available for PerformancePoint dashboard items: Top 10 value filters and user-specified value filters.

  • Top 10 value filters. Use the Top 10 value filter to display the number of top (or bottom) members in a group. You can keep the default setting of 10, or you can specify a different number of items to display.

  • User-specified value filters. Use Value Filter to specify the criteria for the items that you want to display. For example, you can configure the filter to display items that have values less than (or greater than) a numeric value that you specify. Or, you can configure the filter to display items that have values within a particular range that you specify.

You can apply Top 10 and user-specified value filters to most of your dashboard items.

Tip:  When you apply value filters to scorecards and reports, your changes are not saved to SharePoint Server. You might want to export your results to Microsoft PowerPoint or Microsoft Excel to save your work.

Top 10 value filters

As its name implies, the Top 10 value filter enables you to easily display results for the 10 best members in a particular group. However, you are not necessarily restricted to displaying only the Top 10 members in a group. You can specify criteria for the Top 10. For example, you can configure the Top 10 filter to show the Bottom 10 items in a group. Or, you can type a different number to display, such as the Top (or Bottom) 3 items.

The Top 10 value filter enables you to quickly focus on just the items that you want to see in a dashboard. For example, suppose that you are using an analytic chart that shows sales amounts for different product categories. Depending on the number of product categories your organization sells, your analytic chart might resemble the following image:

PerformancePoint Services

You can easily apply value filters to simplify the information in this report. For example, you can use a Top 10 filter to display just the 10 best-selling product groups. To do this, you right-click on the chart, click Filter, and then click Top 10. Your chart refreshes to display the results, as shown in the following image:

PerformancePoint Services

Top of Page

User-specified value filters

Similar to Top 10 value filters, user-specified value filters enable you to easily see information for particular items in a report or scorecard. These filters are called "user-specified value filters" because you specify the criteria. For example, suppose that you are using an analytic chart that shows sales amounts for different product categories, and that your chart resembles the following image:

PerformancePoint Services

If you are interested in product sales that are within a particular range and not necessarily the top or bottom-selling items, you can apply a user-specified value filter. To do this, right-click on the analytic view, click Filter, and then click Value Filters. A Value Filter dialog box opens, where you can specify the results that you want to see, as shown in the following image:

Analytic view created by using PerformancePoint Services

Top of Page