Getting started with Office 365 for Small Business
Note: This article has done its job, and will be retiring soon. To prevent "Page not found" woes, we're removing links we know about. If you've created links to this page, please remove them, and together we'll keep the web connected.
Note: This article applies to Office 365 operated by 21Vianet in China.
As a small business owner or manager, you want to spend your time generating business, not managing an IT system. But you probably do want a professional web presence, email, calendar, and a central place to store and share documents that are easily accessible from anywhere for both you and your users. If you or your users work remotely, you may also want easy online conferencing.
Once you've signed up for Office 365, getting started is easy. Here are instructions to help you.
-
Sign in. Go to the Office 365 portal and sign in your user ID and password. When you sign in, you'll be prompted to provide information to help you set up your account.
-
Once you've signed in, you'll see that at the top of each page, you have easy access to your services and settings.

-
Your Exchange Online services, including your email in Outlook Web App, your calendar, and People, where your personal contacts are stored
-
Your SharePoint Online services, including Newsfeed, OneDrive for Business, and Sites
-
Links to the Office store and Office.com
-
A link to the Admin home page where you manage Office 365 for your organization
-
Links to your personal SharePoint profile, Sign out, your personal Office 365 settings (
 ), and Help.
-
-
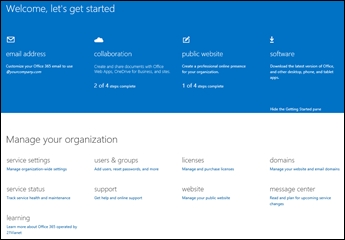
Also after signing in, you'll see the Getting started page. To get back to this page anytime, click Admin at the top of the page.

Note: The SharePoint Online Public Website information in this article only applies if your organization purchased Office 365 prior to March 9, 2015.
Let's get started
| What do you want to do? | Location on the Getting started page |
| Keep the domain name that comes with Office 365, or set up your own domain. | Click Manage your website and email domains under Domains |
| Add users, assign permissions, and assign licenses Add users. You will need to add your users to the system, and Assign to them so they can use all or some of Office 365 features. As you're adding users, you can also assign admin permissions as necessary. | Click Add users, reset passwords, and more under Users & groups |
| Customize your email address If you are using your own domain, you can set up your email address with that domain and create accounts for people who work with you. | Click Email address |
| Get started with SharePoint Online collaboration tools In the office and on the go, everyone can create and share Office documents using Office Online, OneDrive for Business, and team sites. | Click Collaboration |
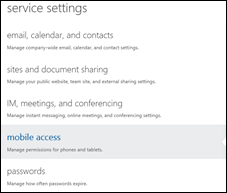
| Manage mobile access In Office 365, everyone in your organization can set up their mobile phones and tablets to use Office 365 email unless you turn off the option. | Click Manage your organization-wide settings under Service settings, and then click Mobile access |
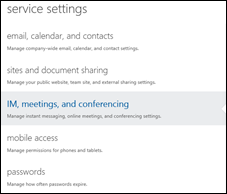
| Set up Skype for Business Get started now by reviewing Start using Skype for Business for IM and online meetings. | Click Manage your organization-wide settings under Service settings, and then click IM, meetings, and conferencing |
| Set up your public website Establish a professional online presence by creating your own public website. See Get started with the Public Website. | Click Public website |
| Set up Microsoft Office You can use the latest version of Office, or set up Office 365 to use an existing installation. See Install Office on your PC or Mac with Office 365. | Click Software |
| Get everybody ready | |
| Get help or more information
| For help topics, click ? at the upper right of your portal For the Support overview page, click Get help and online support under Support |


No comments:
Post a Comment