Frequently asked questions about Office Delve
Here are answers to some common questions about Delve. For more information, see What is Office Delve?
I see very few or no documents in Delve - What can I do?
To make Delve a great experience for everyone in your network, make sure that you and your colleagues store and share your documents where Delve can get to them: in OneDrive for Business or SharePoint in Office 365.
To share your documents, create a folder in OneDrive for Business and invite people you work with.

-
At the top of the page, select the app launcher
 , and then select OneDrive.
 -
Click new > New folder.
Type a name for the folder, for example Shared with my colleagues.
-
Click Invite people, and enter names or email addresses.
Click Create.
-
Click the folder to open it and upload existing documents or create new ones.
When you add documents to this folder, only you and the people you invite will be able to see the documents in Delve and work on them together. Other people will not be able to see them.
Learn more:
Why can't I change all my profile information?
Some information in your profile, such as your name or title, may be collected from other systems that your IT or human resources department maintain. To update those details, you have to contact the relevant department or your admin.
Learn more:
Can anyone see my content?
No. Only people who already have access to see your documents in OneDrive for Business or SharePoint can see them in Delve.
Delve never changes any permissions. Only you can see your private documents. What you see is different from what other people see.
Learn more:
How do I change my profile photo?
-
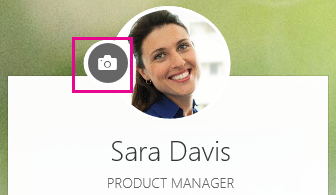
In Delve, on your profile page, click the camera icon next to your picture.
-
Click Upload a new photo.
-
Choose the file you want to use, and click Open to upload.
-
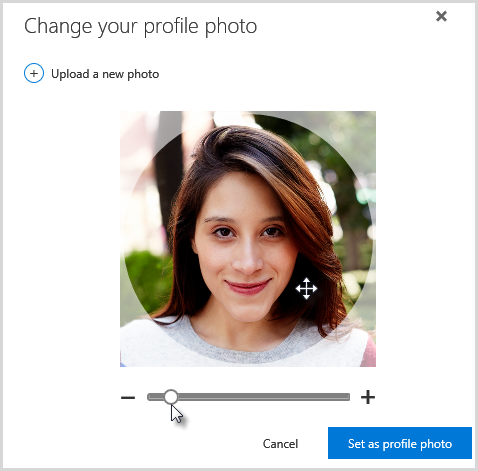
If you want to reposition the photo, click inside the circle and drag the pointer. To zoom in or out, use the slider below the photo.
-
To save, click Set as profile photo and then Close.
How can I change the cover photo?
In Delve, on your profile page, click Change cover photo in the top right corner, and then choose a photo from the list.

For now, you can't upload your own photo here.
How can I change the language in Delve?
-
In Delve, on your profile page, click Update profile.
-
Click the link under How can I change language and regional settings?
-
On the Edit details page, click the ellipsis (...) and then choose Language and region.
-
Set your Language preferences.
-
Click Save all and close.
Learn more:
How can I change my password?
You can't change your password in Delve. To change your password, you have to go to your Office 365 settings.
-
Go to Settings
 > Office 365 settings > Password > Change password.
 -
Type your old password, and then type a new password and confirm it.
-
Click Submit.
Some users can't change their password in Office 365 because their organization creates and maintains their accounts. If you don't see a link to change your password on the Password page, you can't change your work or school account password in Office 365.
Learn more:
Can I delete a document from Delve?
Documents are not stored in Delve, so you can't delete documents from Delve directly. The documents are stored other places in Office 365, for example in OneDrive for Business or in SharePoint. Only people who already have access to a document, can see it in Delve.
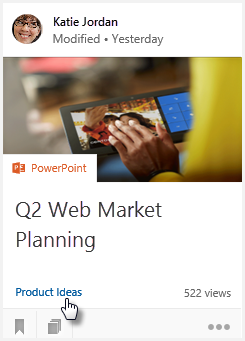
To delete a document, or prevent it from showing up in Delve, use the link in the lower left of the content card to go to the location where the document is stored.
From there:
-
Delete the document. Or:
-
To prevent others from seeing the document in Delve, change the permissions so only you have access to the document.
-
To prevent the document from showing up in Delve at all, move the document outside Office 365, for example to the Documents folder on your PC.
If you're an admin, and you want to prevent specific documents from appearing in Delve, follow the steps in Hide documents from Delve. You can keep storing the documents in Office 365, and people can still find them through search - they just won't show up in Delve.
How do I add a document to my favorites?
Click the icon in the lower left corner of a content card to add the document to your Favorites.

Only you can see what documents you've added to your favorites.
Note: Not all document types can be added to favorites yet. If you don't see the icon on a card, you can't add that document type to favorites.
How's the picture on a content card selected?
The picture on the card is extracted from the content of the document, and will often give you a hint about what the document is about and make it easier to find back to the document later. If a document has several pictures, we try to show the best one based on things like resolution and size.
Shapes in PowerPoint will not be extracted as a picture.
If a document doesn't have a picture, or we can't show the picture, we show a default image illustrating the file type.
What decides the title on a content card?
Delve picks up the title from the document based on a set of rules. Here are some guidelines and best practices for titles and what to expect for different document types.
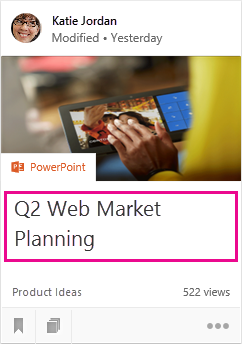
For Word documents, Delve decides which title to use on the card based on the styles used in the document:
-
Text using Title style.
-
Text using Heading 1 style.
-
Test using a large font. Even if you have a Title style or Heading 1, text in a larger font than what's used in the styles can be picked up as the title.
-
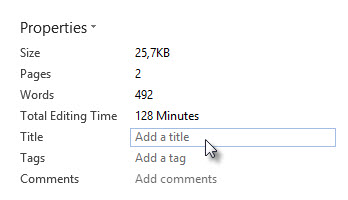
If there's no likely title found in the document, the Title property is used. The Title property is the same as the SharePoint title.
To change the Title property in Word Online, click the File tab, then click Info. Add or change the title.
-
If the Title property is empty, the file name is used instead.
In PowerPoint documents, Delve also chooses the title based on styles in the slide layouts. If you use one of the default templates with a Title layout slide, there should be no surprises:
-
Title from the Title layout slide.
Tip: Do not use a title slide for a "Thank you" or similar for the last slide. This can overrule smaller titles from slides earlier in the presentation.
-
The Title from the first slide.
-
Text using a large font. Even if you have a Title from Title layout or first slide Title, text in a larger font than what's used in the styles can be picked up as the title.
-
If there's no likely title found in the document, the Title property is used. The Title property is usually prefilled with "PowerPoint presentation" unless you change the Title property when you upload the document to SharePoint.
-
If you haven't set the Title property, the file name is used.
In Excel documents, Delve will use the Title property you have specified for the workbook as the title.
If you haven't set the Title property, the file name is used.
See also: View or change the properties for an Office document
What is MyAnalytics?
Learn about MyAnalytics here: Microsoft MyAnalytics personal dashboard
Are there any known issues?
-
Chrome for Mac: The Skype chat button on other people's profiles currently doesn't work.
Microsoft Office Tutorials: Frequently Asked Questions About Office Delve >>>>> Download Now
ReplyDelete>>>>> Download Full
Microsoft Office Tutorials: Frequently Asked Questions About Office Delve >>>>> Download LINK
>>>>> Download Now
Microsoft Office Tutorials: Frequently Asked Questions About Office Delve >>>>> Download Full
>>>>> Download LINK d2