Customize the My Site host
The My Site host controls the appearance and behavior of the Newsfeed and About me pages on all personal sites in your organization. As the tenant admin, you can create a template for these sites in order to achieve a particular look and feel, ensure a consistent user experience across all personal sites, and limit the type of information shared. This template is what is what your users will follow when they create their personal sites.
When you create the template on the My Site host, you'll use apps and web parts. Apps and web parts are packaged features that add functionality to your sites. Adding apps and web parts to the My Site host is the most efficient way to create your template because you create it in one place and apply it to all.
How to find the My Site host
The URL of the My Site host looks something like this: Contoso-my.sharepoint.cn
The –my indicates that you are on the My Site host.
To access the My Site host:
-
Sign in to the Office 365 Admin Center.
-
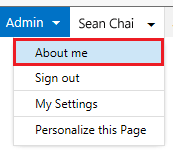
Click Newsfeed or About me under your name in the header.


Add an app
The first step is to add the app to your app gallery and then to add it to the Newsfeed or About me page on the My Site host.
To add an app to your app gallery:
-
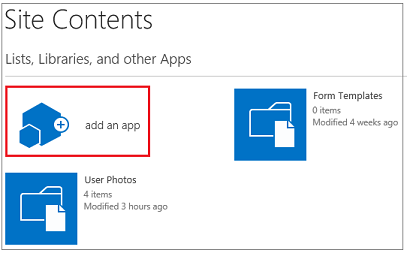
From either the Newsfeed or About me page on the My Site host, click Settings
 > Add an app.
 -
Select the desired app from the list.

-
Type a name for the app in the box provided, and then, optionally, click Advanced Options to add a description.
-
Click Create. The app is now included in your app part gallery.
To add the app to the Newsfeed or About me page on the My Site host:
-
From either the Newsfeed or About me page on the My Site host, click Settings
 > Edit page.
 -
Find the web part zone where you want to install the app and click Add a Web Part.
-
In the Categories box, select Apps.
-
In the Parts box, select the app that you just added to your gallery.
-
Click Add.
If you can't edit the My Site page on the IE browser, go to Tools > Compatibility View Settings > Add this website > Add to add the web page to the Compatibility View. The web page will refresh automatically and become editable.
To delete the app from the Newsfeed or About me page on the My Site host:
-
From either the Newsfeed or About me page on the My Site host, click Settings
 > Edit page.
 -
Mouse-over the right side of the web part zone that contains the app you want to delete, click the down arrow, and click Delete. You can only delete the apps that you previously added.
-
Click OK to confirm.
Tip: You can add an app to your personal My Site without propagating it to other site users in your organization by choosing Settings > Add an app. Notice that when you choose this option, /personal appears in the URL. For example: contoso-my.sharepoint.cn/personal.
Add a web part
Web parts are similar to apps in that they provide additional features or functionality for your sites. Examples include Activity Feed, Memberships, and My Links.
To add a web part to the My Site host:
-
From either the Newsfeed or About me page on the My Site host, click Settings
 > Edit page.
 -
Find the web part zone where you want to install the web part and click Add a Web Part.
-
In the Categories box, select a category. For example, select Search to add a search feature to the page.
-
In the Parts box, select a part, such as Search Box.
-
Click Add.
To edit the web part on the My Site host:
-
From either the Newsfeed or About me page on the My Site host, click Settings
 > Edit page.
 -
Mouse over the right side of the web part zone that contains the web part you want to edit, click the down arrow, and then click Edit Web Part. You can only edit web parts that you previously added.
-
Use the editing bar on the far right to change the Custom Properties, Appearance, Layout, and other aspects of the web part as needed.
-
Click Apply, and then click OK.
To delete the Web part from the My Site host:
-
From either the Newsfeed or About me page on the My Site host, click Settings
 > Edit page.
 -
Mouse over the right side of the web part zone that contains the web part you want to delete, click the down arrow, and click Delete. You can only delete web parts that you previously added.
-
Click OK to confirm.
Customizations required after update
If your tenant has just been through an update, you might notice that the personal sites have a new look. The biggest change is the page layout, and you'll find that web part zones are now confined to the middle and bottom portions of the page. Any custom web parts you had added to the My Site host in previous versions will need to be re-added to these available zones. You can re-add them by following the steps above.
No comments:
Post a Comment