Excel gives you the ability to protect your work, whether it's to prevent someone from opening a workbook without a password, granting Read-Only access to a workbook, or even just protecting a worksheet so you don't inadvertently delete any formulas. In this topic we'll discuss the various ways you can utilize the primary options to protect and distribute your Excel files.
Warning:
If you forget or lose your password, Microsoft can't retrieve it for you.
You should not assume that just because you protect a workbook or worksheet with a password that it is secure - you should always think twice before distributing Excel workbooks that could contain sensitive personal information like credit card numbers, Social Security Number, employee identification, to name a few.
Worksheet level protection is not intended as a security feature. It simply prevents users from modifying locked cells within the worksheet.
Following are the different options available for protecting your Excel data:
File-level: This refers to the ability to lock down your Excel file by specifying a password so that users can't open or modify it. You have two choices here:
File encryption: When you choose this option, you specify a password and lock the Excel file. This prevents other users from opening the file. For more information, see Protect an Excel file.
Setting a password to open or modify a file: You specify a password to open or modify a file. Use this option when you need to give Read-only or edit access to different users. For more information, see Protect an Excel file.
Note: To add a digital signature, you need a valid certificate from a certificate authority (CA).
Workbook-level: You can lock the structure of your workbook by specifying a password. Locking the workbook structure prevents other users from adding, moving, deleting, hiding, and renaming worksheets. For more information on protecting workbooks, see Protect a workbook.
Worksheet-level: With sheet protection, you can control how a user can work within worksheets. You can specify what exactly a user can do within a sheet, thereby making sure that none of the important data in your worksheet are affected. For example, you might want a user to only add rows and columns, or only sort and use AutoFilter. Once sheet protection is enabled, you can protect other elements such as cells, ranges, formulas, and ActiveX or Form controls. For more information on protecting worksheets, see Protect a worksheet.
Which level of protection should I use?
To control the level of access users should have to an Excel file, use file-level protection. Let's say you have a weekly status report of your team members in an Excel file. You don't want anyone outside your team to be even able to open the file. There are two options available:
If you don't want others to open your file: You can encrypt the Excel file, which is the most common technique used. This basically means you lock it with a password and nobody except you can open it.
If you want to enable Read-only or editing access to different users: Maybe, you want the managers in your team to be able to edit the weekly status report, but team members should only have Read-only access. You can protect the Excel file by specifying two passwords: one to open, and the other to modify. You can later share the appropriate passwords with the team depending on the access they should be given.
To control how users should work with worksheets inside a your workbook's structure, use workbook-level protection. Let's say your status report workbook has multiple worksheets, and each worksheet is named after a team member. You want to make sure each team member can add data to their own worksheet, but not be able to modify any of the worksheets in the workbook, whether it be adding a new worksheet, or moving worksheets around within the workbook.
To control how users should work within an individual worksheet, use worksheet-level protection. Let's say each worksheet in your status report workbook contains data that is common to all worksheets, like header rows or a specific report layout, and you really don't want anyone to change it. By protecting your worksheet, you can specify that users can only perform specific functions in a sheet. For example, you can give users the ability to enter data, but keep them from deleting rows or columns, or only insert hyperlinks or sort data.
You can use one or more levels of protection for your Excel data depending on your/your organization's needs. You can choose to use all of the available options or a combination of options—it's completely up to the level of security you want for your Excel data. For example, you may choose to encrypt a shared Excel file, as well as enable workbook and worksheet protection, while only using worksheet protection on a personal workbook just so you don't accidentally delete any formulas.
With Microsoft 365, you can securely share files, edit together in real time, and be productive wherever you are, on any device. Check out Best practices for collaborating to learn more.
Share files
To share a file from an Office app like Word, Excel, or PowerPoint:
Select Share on the ribbon.
Enter a name or email address.
Note: To change permissions, select the drop-down. Allow editing is checked by default. To change to view only, uncheck this box and select Apply.
Select Send.
Collaborate with others
After you share your file, you can work on it with others at the same time.
You can co-author with others in the Office for the web, mobile, and desktop apps.
Returns the Percentage Points (probability) for the Student t-distribution where a numeric value (x) is a calculated value of t for which the Percentage Points are to be computed. The t-distribution is used in the hypothesis testing of small sample data sets. Use this function in place of a table of critical values for the t-distribution.
Syntax
TDIST(x,degrees_freedom,tails)
X is the numeric value at which to evaluate the distribution.
Degrees_freedom is an integer indicating the number of degrees of freedom.
Tails specifies the number of distribution tails to return. If tails = 1, TDIST returns the one-tailed distribution. If tails = 2, TDIST returns the two-tailed distribution.
Remarks
If any argument is nonnumeric, TDIST returns the #VALUE! error value.
If degrees_freedom < 1, TDIST returns the #NUM! error value.
The degrees_freedom and tails arguments are truncated to integers.
If tails is any value other than 1 or 2, TDIST returns the #NUM! error value.
TDIST is calculated as TDIST = p( x<abs(X)), where X is a random variable that follows the t-distribution.
Examples
X
Degrees
Formula
Description (Result)
1.96
60
=TDIST([X],[Degrees],2)
Two-tailed distribution (0.054644927 or 5.46 percent)
1.96
60
=TDIST([X],[Degrees],1)
One-tailed distribution (0.027322463 or 2.73 percent)
Planning an internal company event requires input and sign-off from a variety of stakeholders. You need an easy way to bring everyone together to plan the event, create materials for it, and troubleshoot issues during execution.
Details
Whether you're planning a company picnic or a job fair, you can plan it more easily in Microsoft Teams. Work together in real time to come up with ideas for the event, create messaging, and work through details. Use @mentions to let stakeholders know you need their input. Once an idea is in place, add Project to a Teams tab to assign tasks and manage deadlines.
Teams is available on your mobile device, so you can say connected with your team during the event to easily troubleshoot issues no matter where you are. Keep everyone on the team, including vendors and external partners, updated with the latest news with chat, or hop on an audio or video call to work through issues in real time. You can also use Yammer as a Q&A and feedback channel for the event.
Highlights
Plan event messaging, manage logistics, and store documents in one place.
Assign and track tasks to keep event logistics on track.
Use chat and audio or video calling to troubleshoot issues during the event from your mobile device.
It's easy to attach pictures, files, contacts, emails and many other items to your Outlook messages. Outlook keeps track of the documents you've recently worked on, whether they're stored on your computer or saved in OneDrive (cloud only). And no matter where they're stored, Outlook lets you quickly choose whether to send the document as a traditional attachment or upload it to OneDrive and share a link to the file. You can also set permissions on any file sent from OneDrive that allow message recipients to view and edit them, or share them with others.
Outlook keeps track of the files you have worked on recently and suggests them whenever you decide you want to attach a file to an email message. Some file types are blocked from being sent or received. See Blocked attachments in Outlook for the complete list.
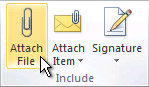
In a new message, a reply, or a forwarded message, select Attach File from the Message ribbon or the Insert ribbon.
Select your file from one of the following locations:
Recent items The 12 most recent files you've worked on will be displayed here. These files may be on your computer, on OneDrive, SharePoint, or another online document library. Select a file to attach it to your email.
Browse Web Locations Locations include OneDrive, SharePoint sites, or other locations such as a groups document library that you've accessed before. Select one of the locations to open a new window and then select your attachment.
Browse This PC Opens a File Explorer window where you can choose a file from your computer.
If you selected a file on your local computer or group document library, a copy of the file is attached to the email. Selecting a OneDrive or SharePoint file, however, provides you with additional permission options and information.
Send a link or send a copy Sending a link to the OneDrive or SharePoint file keeps the size of your email message small. If you choose to send a copy of the file, the entire file is attached to the email, just like it would be if you selected a file on your computer. If you choose to send a link to the file, you can also set the permissions on your file.
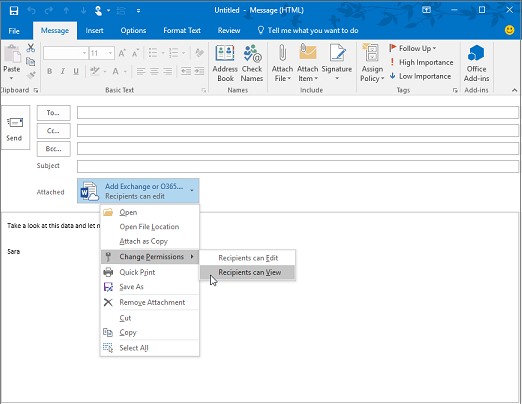
By default, if you're in a business environment, everyone within your organization can edit the linked file. To change these permissions, select the arrow at the right of the attachment name to display a drop-down menu with a variety of permission options.
Organization can Edit if you want anyone in your organization to be able to modify the file.
Organization can View, if you want anyone in your organization to be able to read, but not modify, the file.
Recipients can Edit if you want only the recipients of your email to be able to modify the file.
Recipients can View if you want only the recipients of your email to be able to read, but not modify, the file.
If Outlook detects that your recipients won't be able to view the file, for example if it's stored on a SharePoint site that's only accessible to you, you'll see a warning message directly under the file icon and name. Select Attach as copy to change the attachment from a linked file to a copy of the file.
Note: If you attach a file as a copy, any changes your recipient makes won't be synchronized with the version of the file in OneDrive or on SharePoint.
When you attach a document that is saved on your computer and not in an online location, you also can choose to upload the document to your OneDrive before sending the email. Uploading the attachment makes collaboration easy. You can be sure that everyone is collaborating on the same (and most up-to-date) version of the file. You may also choose to upload to OneDrive if the file is too large to share as a traditional attachment.
On the ribbon, click Attach File > Browse This PC, and choose the file you want to attach.
In your email message, select the down arrow for the attachment.
Choose Upload to OneDrive, and then choose the desired location for the file.
Note: You might see choices such as the OneDrive location for your work account, the OneDrive location for your personal account, and document libraries for various groups you belong to.
In your email message, select the down arrow for the attachment again.
Choose Change Permissions, and then choose one of the following:
Organization can Edit if you want anyone in your organization to be able to modify the file.
Organization can View, if you want anyone in your organization to be able to read, but not modify, the file.
Recipients can Edit if you want only the recipients of your email to be able to modify the file.
Recipients can View if you want only the recipients of your email to be able to read, but not modify, the file.
When sending pictures, you can either attach the picture to the email message or insert the picture in the message body. To insert a picture that displays in the body of an email message, use the following steps:
Position your cursor where you want the image in your message.
In the ribbon, select Insert > Pictures.
Browse your computer or online file locations for the picture you want to insert. Select the picture, then select Insert.
To resize the picture, drag the handles at one of the four corners toward the center of the image or away from the center.
In a new message, select Attach File from the ribbon.
Select the file you want to attach and then select Insert.
When sending pictures, you can either attach the picture to the email message or insert the picture in the message body. To insert a picture that displays in the body of an email message, use the following steps:
Position your cursor where you want the image in your message.
Select Insert > Pictures.
Browse your computer or online file locations for the picture you want to insert. Select the picture, then select Insert.
To resize the picture, drag the handles at one of the four corners toward the center of the image or away from the center.
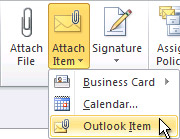
Business Card Choose an electronic business card from your contacts list.
Calendar Choose Date Range, Details, and other options as appropriate.
Outlook Item Choose one or more email messages from any of your email folders.
Select the item you want to attach, and then select Insert.
What would you like to do?
Create a message, or for an existing message, click Reply, Reply All, or Forward.
In the message window, on the Message tab, in the Include group, click Attach File.
Browse to and click the file that you want to attach, and then click Insert.
Note: When composing a message, you can also attach files by using the commands on the Insert tab in the Include group, or drag files from folders on your computer and drop them on the message window.
When sending pictures, you can either attach the picture to the email message or insert the picture in the message body. To insert a picture that displays in the body of an email message, use the following steps:
Position your cursor where you want the image in your message.
Select Insert > Pictures.
Browse your computer or online file locations for the picture you want to insert. Select the picture, then select Insert.
To resize the picture, drag the handles at one of the four corners toward the center of the image or away from the center.
You can attach Outlook items, such as other email messages, tasks, contacts, or calendar items to a message. This is the easiest way to forward multiple items or messages.
Create a message, or for an existing message, click Reply, Reply All, or Forward.
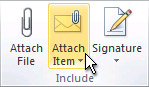
In the message window, on the Message tab, in the Include group, click Attach Item.
Do one of the following:
Point to Business Card, and then click Other Business Cards. Click a contact, and then click OK. To select multiple contacts, press and hold Ctrl as you click each contact.
Click Calendar. Choose the calendar, date range, and detail to include. For Advanced options, click Show. Click OK to add the calendar to your message.
Click Outlook Item. Browse through your folder list to find the folder that contains the item that you want to attach. Under Items, click the item, and then click OK.
Note: When composing a message, you also can attach files by using the commands on the Insert tab in the Include group. Or move files from folders on your computer to the message window by using a drag-and-drop operation.
Important: Office 2007 is no longer supported. Upgrade to Microsoft 365 to work anywhere from any device and continue to receive support.
On the File menu, click New, and then click Mail Message.
On the Message tab, in the Include group, click Attach File.
In the Insert File dialog box, browse to and choose the file that you want to attach, and then click Insert.
More information
If you don't see the file that you want in the appropriate folder, make sure that All files (*.*) is selected in the Files of type box, and that Windows Explorer is configured to show file name extensions.
You also canattach file from the new message's Insert tab.
By default, Outlook blocks potentially unsafe attachments (including .bat, .exe, .vbs, and .js files) that might contain viruses. If you attach such a file to an e-mail message, you will be asked whether you want to send a potentially unsafe attachment. If you answer Yes, Outlook will send the attachment. If you answer No, you can then remove the potentially unsafe attachment.
You can attach multiple files simultaneously by selecting the files and dragging them from a folder on your computer to an open message in Outlook.
When sending pictures, you can either attach the picture to the email message or insert the picture in the message body. To insert a picture that displays in the body of an email message, use the following steps:
Position your cursor where you want the image in your message.
Select Insert > Pictures.
Browse your computer or online file locations for the picture you want to insert. Select the picture, then select Insert.
To resize the picture, drag the handles at one of the four corners toward the center of the image or away from the center.
On the File menu, click New, and then click Mail Message.
On the Message tab, in the Include group, click Attach Item.
In the Look in list, click the folder that contains the item that you want to attach.
Click the item that you want, and then click OK.
Note: You also can attach an item from the new message's Insert tab.
Where attachments appear in your message depends on the format in which you compose the message.
If the message format is HTML or plain text, attachments appear in the attachment box below the Subject line.
If the message format is Rich Text, attachments appear in the body of the message. Even though the file appears to be embedded in the message, it is actually still a separate attachment.
The format in which a message is composed is indicated in the title bar at the top of the message.
Outlook does not impose any size limit on attachments. However, most e-mail server administrators and Internet service providers (ISPs) do set limits on the overall message size, which is the sum of all attachments plus the content of the message itself. Typically, premium-level services provide more e-mail file storage space and allow larger messages than standard-level services. For more information on the maximum allowed message size, contact your ISP or the e-mail server administrator in your organization.
If you're attaching a very large file, you should first compress the file by using a zip program. Outlook files that are saved in the default Open XML Formats with the following file extensions are automatically zipped: .docx, .dotx, .xlsx, .xltx, .pptx, .potx, and .ppsx.
If files that you attach are zipped when you do not expect them to be, check to see whether a .zip utility has been installed in Outlook as a COM add-in. You can disable this sort of add-in by doing the following:
On the Tools menu, click Trust Center, and then click Add-ins.
In the Manage list, click COM Add-Ins, and then click Go.
In the COM Add-ins dialog box, clear the check box next to the add-in name, and then click OK.
Why can't I attach a file? Outlook tells me the file is unsafe. Outlook blocks numerous file types that have the potential to spread computer viruses. To send a file that Outlook identifies as unsafe, zip the file first, then attach the zipped file. To zip a file, navigate to the folder on your computer or in the cloud that contains the file, right-click the file, and select Send to compressed (zipped) folder. You should then be able to send the zipped file. For more information, see Blocked attachments in Outlook.
Why do my attachments show up in the message body and not below the subject line? Outlook allows you to send email messages in three formats: HTML, plain text, and rich text. If you use rich text format (RTF), any files you attach will show up in the message body. See Change your message format for instructions on how to switch your message format to HTML or plain text. You can check your message format by looking at the title bar of the message.
The Insert > Pictures option is grayed out. If you can't select Pictures from the Insert tab on the ribbon, your message is probably in plain text format. Change your message format to HTML or rich text to insert pictures. You can check your message format by looking at the title bar of the message.
This article describes the formula syntax and usage of the SKEW function in Microsoft Excel.
Description
Returns the skewness of a distribution. Skewness characterizes the degree of asymmetry of a distribution around its mean. Positive skewness indicates a distribution with an asymmetric tail extending toward more positive values. Negative skewness indicates a distribution with an asymmetric tail extending toward more negative values.
Syntax
SKEW(number1, [number2], ...)
The SKEW function syntax has the following arguments:
Number1, number2, ... Number1 is required, subsequent numbers are optional. 1 to 255 arguments for which you want to calculate skewness. You can also use a single array or a reference to an array instead of arguments separated by commas.
Remarks
Arguments can either be numbers or names, arrays, or references that contain numbers.
Logical values and text representations of numbers that you type directly into the list of arguments are counted.
If an array or reference argument contains text, logical values, or empty cells, those values are ignored; however, cells with the value zero are included.
Arguments that are error values or text that cannot be translated into numbers cause errors.
If there are fewer than three data points, or the sample standard deviation is zero, SKEW returns the #DIV/0! error value.
The equation for skewness is defined as:
Example
Copy the example data in the following table, and paste it in cell A1 of a new Excel worksheet. For formulas to show results, select them, press F2, and then press Enter. If you need to, you can adjust the column widths to see all the data.
Data
3
4
5
2
3
4
5
6
4
7
Formula
Description
Result
=SKEW(A2:A11)
Skewness of a distribution of the data set in A2:A11.
If people open your project file, they may accidentally change task status, deadlines, or other critical information. You can prevent that by adding a password to the file when you save it.
Click File > Save As.
Pick a place to save the file — computer, OneDrive, or a website — and then click Browse.
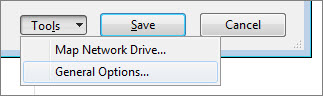
In the Save As dialog box, click Tools > General Options.
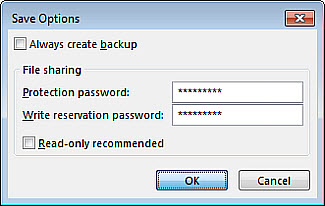
In the Save Options dialog box, under File sharing, add passwords for your file:
Protection password: People need this password to open the file.
Write-reservation password: Anyone can read the file, but only people with this password can make changes.
Retype the passwords in the Confirm Password dialog box, and then save your file.
Tip: Use strong passwords — the longer the better. Mix uppercase and lowercase letters, numbers, and symbols.
Project Web App automatically adds security to project files, so you don't have to add a password to files you store there.
As an admin of a group using Teams Free (classic), you may be asked to help people in the group get copies of, remove, or manage their personal data that's used in Teams Free (classic). Under the General Data Protection Regulation (GDPR), this is called a Data Subject Request (DSR).
Here's how to gain access to the data and complete a DSR:
Get admin access
You need to be an admin or team owner in order to complete a Data Subject Request (DSR). You're automatically an admin if you created the Teams Free (classic) org, or if another admin changed your role to admin.
So, if you're not the admin or the owner of the team, you need to contact the admin or team owner. But, if you're the first person to set up the team (but you don't have admin access) you can get it yourself by finding the admin email address.
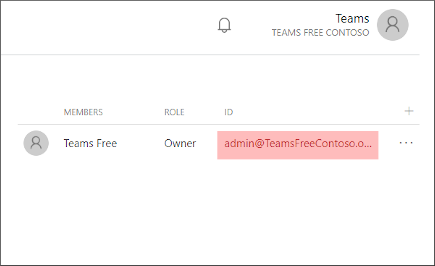
Get your admin email address
Go here to get your admin email address. Choose Groups, select Groups I own, and then find the admin email address on the right.
Note: Your admin email address will look similar to admin@yourfreeorgname.onmicrosoft.com.
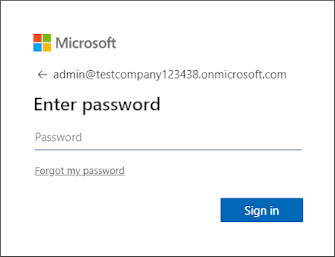
Complete the password reset procedure
Once you have the admin email address for your Teams Free (classic) org, go to the Microsoft 365 Admin Center. When prompted to sign in, choose Forgot my password.
Then complete the password reset procedure using the admin email address that you obtained in Step 2.
Complete the verification steps.
You will receive an email with a code that you can use to set a new password.
Enter the code to complete the verification process.
Delete or export your data
Delete your data
Open an Incognito browser window (or possibly Private or inPrivate, depending on your browser). That will make sure you aren't logged in to any accounts when you start this process.
Using your admin email address and your new admin password, log in to the Azure Portal, choose the Show portal menu in the upper-left of the screen, and then select Azure Active Directory in the left column.
Choose Users from the left column and then click on thename of the user you want to delete. Once the page loads, select the Delete button near the top of the screen.
When you're asked to confirm that you want to delete the user, choose Yes.
Export your data
To export content (such Word, Excel, or PowerPoint files), you can log into Teams and download all the files manually from any Team channels and chats that might contain those files.
To export usage data and activity logs, follow these steps:
Open an Incognito browser window (or possibly Private or inPrivate, depending on your browser). That will make sure you aren't logged in to any accounts when you start this process.
Using your admin email address and your new admin password, log in to the Azure Portal.
Using the top search bar, type "policy" and wait for the results.
Select User policy in the left column and choose Add export request.
Type in name of user for export request.
If you have an Azure subscription, select it. If you don't, select Create Subscription and sign up for a free trial, (This will open in a new tab.)
Return to the Azure portal export data request tab. Refresh the tab, then choose Add export request.
Type in the user name. The Azure subscription you just created should now be automatically showing. Select it from the list.
Next, if no storage option is listed, select Create new.
Fill in the form. (Leave default values in place.)
Return to the Azure portal export data request tab. Refresh the tab, then choose Add export request.
Type in the user name again. Now, the storage option you just created should be automatically showing. Select it from the list.
Choose the Create button at the bottom of the window.
You will receive notification that the request has been successfully completed.
When you apply a font scheme, Publisher changes the styles in your publication to use one of the two fonts in the font scheme instead of the default fonts for those styles.
You can select the options to control which text attributes, such as font and font size, will change when you apply a font scheme.
Apply a font scheme
Click Page Design, and then click Fonts.
Click a font scheme from the list.
Control text attributes that are affected by font schemes
Click Page Design, and then click Fonts.
Click Font Scheme Options, and then check or uncheck the options you want.
This article is for people with visual impairments who use a screen reader program with the Office products and is part of the Office Accessibility content set. For more general help, see Microsoft Support home.
Use Visio with your keyboard and a screen reader to create a detailed and polished diagram using either a Data Visualizer template or an Excel workbook. We have tested it with Narrator and JAWS, but it might work with other screen readers as long as they follow common accessibility standards and techniques.
Notes:
New Microsoft 365 features are released gradually to Microsoft 365 subscribers, so your app might not have these features yet. To learn how you can get new features faster, join the Office Insider program.
To create a Data Visualizer diagram, you work in both Visio and Excel. First you choose a Data Visualizer template in Visio, then create an associated workbook with the diagram data in Excel, and then return to Visio to complete the diagram creation.
Data Visualizer templates are supported in Visio Plan 2.
Choose a Data Visualizer template
You can choose from two Data Visualizer templates:
basic flowchart
cross functional flowchart
Open Visio.
Tip: If you're already editing a diagram, press Alt+F, N. You hear: "Selected, New tab item."
To choose the template, do one of the following:
To choose the Basic Flowchart - Data Visualizer template, press Alt+Z, 2.
To choose the Cross Functional Flowchart - Data Visualizer template, press Alt+Z, 7.
Press Enter. You hear "Template preview," followed by the template name.
Create the associated Excel workbook
Use the pre-defined Excel table to quickly add and modify the input data for your diagram.
In the Visio Template preview of the selected template, press the Tab key until you hear "Excel data template, hyperlink," and then press Enter. The focus moves to Excel, where the template opens as a new workbook.
Note: To seamlessly convert the data in Excel to the Visio diagram, familiarize yourself with the data mapping guidelines. In the Excel template, press F6 until you hear "Selected, sheet tab, Visio Data Visualizer," and then press the Right arrow key. You hear: "Selected, sheet tab, Understand the process map." Press Enter. The mapping info tab opens. Navigate through and read the contents.
To be able to edit the new Excel workbook, save the template to your computer, network server, or SharePoint document library. For detailed instructions, go to Save your work.
To move to the pre-defined Process Map table, press F6 until you hear "Selected, sheet tab," followed by the currently selected tab. Press the Left or Right arrow key until you hear "Process map," and then press Enter.
In the Process Map tab, navigate through the table and type your input data in the cells. If the automatic saving is not enabled, press Ctrl+S to save your work.
Complete the diagram with the Visio wizard
Complete the diagram creation process in Visio using the Create Diagram from Data wizard.
In the Visio Template preview, press the Tab key until you hear "Create," followed by the selected template," and then press Enter. The Create Diagram from Data wizard opens.
Press the Tab key until you hear "What diagram do you want to create from data," followed by the first diagram type in the list. Press the Down arrow key until you hear the diagram option you want, and then press Enter.
To select the Excel workbook you just created, press the Tab key until you hear "Browse, button," and then press Enter. The Create Diagram from Data dialog opens. Navigate to the correct Excel file, and then press Alt+O.
You hear "Select a table or a custom range in the workbook," followed by the first table in the list. Press the Down arrow key until you hear the table you want to use, for example, "Process Map Data," and then press Enter.
To finalize the diagram, press Alt+F. Visio uses default values to fill in the other pages of the wizard and creates the diagram.
To save your diagram, press Alt+F, A. You hear: "File, Save As." Press the Tab key. You hear: "Saving features," followed by the first saving location in the list. Press the arrow keys and the Tab key until you hear the location you want, name the file, and then press Alt+S.
Tip: It's a good idea to keep the Visio and Excel files in the same location because they work hand-in-hand.
Create a diagram from Excel data
You can create a workbook in Excel and then use Visio to convert the data in the workbook into a diagram.
For the conversion to work seamlessly, the Excel table column headers and values must meet specific requirements. To familiarize yourself with the data mapping guidelines, go to How Excel columns interact with Visio flowchart components.
If you prefer, you can also use pre-defined Excel sample templates to insert your data. To download a sample template, select the one you want below and save it to your device:
Once you're done inserting your data, save the worksheet. To learn how to save your worksheet, go to Save your work.
Complete the diagram in Visio
Complete the diagram creation process in Visio using the Create Diagram from Data wizard.
Open Visio.
To select and open a basic diagram, press Alt+L. A blank basic diagram opens in the main content area.
Press Alt+A, C, 1. The Create Diagram from Data wizard opens.
Press the Tab key until you hear "What diagram do you want to create from data," followed by the first diagram type in the list. Press the Down arrow key until you hear the diagram option you want, and then press Enter.
To select the Excel workbook you just created, press the Tab key until you hear "Browse, button," and then press Enter. The Create Diagram from Data dialog opens. Navigate to the correct Excel file, and then press Alt+O.
You hear "Select a table or a custom range in the workbook," followed by the first table in the list. Press the Down arrow key until you hear the table you want to use, for example, "Process Map Data," and then press Enter.
To finalize the diagram, press Alt+F. Visio uses default values to fill in the other pages of the wizard and creates the diagram.
To save your diagram, press Alt+F, A. You hear: "File, Save As." Press the Tab key. You hear: "Saving features," followed by the first saving location in the list. Press the arrow keys and the Tab key until you hear the location you want, name the file, and then press Alt+S.
Tip: It's a good idea to keep the Visio and Excel files in the same location because they work hand-in-hand.
Microsoft wants to provide the best possible experience for all our customers. If you have a disability or questions related to accessibility, please contact the Microsoft Disability Answer Desk for technical assistance. The Disability Answer Desk support team is trained in using many popular assistive technologies and can offer assistance in English, Spanish, French, and American Sign Language. Please go to the Microsoft Disability Answer Desk site to find out the contact details for your region.
 Share on the ribbon.


 in the upper-left of the screen, and then select Azure Active Directory in the left column.
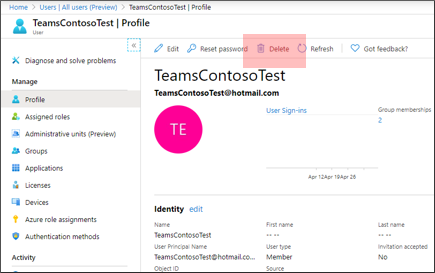


 Screen reader content