When you are finished designing a form template, you must publish it so that users can fill out forms based on the form template. Users must have access to the location where the form is published. This topic described the different options to publish an InfoPath 2010 form.
In this article
Publish versus save
Publishing a form template is not the same as saving a form template. When a form template is saved, you are saving it to preserve your work, just as you do when you save a file on your computer. The publishing process modifies the form template for distribution by adding the publish location and processing instructions sections so that users can open forms that are based on this form template. The processing instructions allow forms that are based on this form template to be automatically updated if you make changes to the form template after publishing it.
Publish options
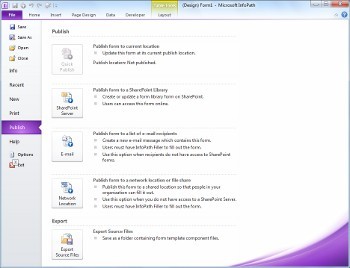
There are a number of different ways that you can publish your InfoPath forms. To publish a form, click the File tab, and then click Publish to be presented with the following options:
-
Quick Publish Publish form to current location
If you are updating a form that has already been published, or are publishing a SharePoint list or workflow form for the first time, you can use quick publish to publish the form without having to indicate how and where it will be published. When you click Quick Publish, InfoPath 2010 automatically re-publishes or publishes the form to its previous or indicated location.
Note: If a publish location has not been specified, Quick Publish is disabled.
-
SharePoint Server Publish form to a SharePoint Library
If you want to publish an InfoPath form to SharePoint so that users can fill it out in a Web browser or in InfoPath filler then you can publish it to a SharePoint library. Users will then be able to access the form online, fill it out, and save the results as an InfoPath document in the library.
-
E-mail Publish form to a list of e-mail recipients
You can create a new e-mail message that contains an InfoPath form. This option is useful when the recipients do not have access to a SharePoint site.
Note: InfoPath Filler is required for forms that have been published in e-mail messages.
-
Network Location Publish form to a network location or file share
This publishes the form to a network location or file share which allows the users to be able to navigate to the share (such as //MyShare/Path/FormLocation) and fill out the form in InfoPath Filler.
Note: InfoPath Filler is required for forms that have been published to a network location.
SharePoint library or list?
In previous versions of InfoPath, you could publish a form to a SharePoint library, and, when users filled out the form, it would save their responses as documents within that library. While you can still do this, you can now use InfoPath 2010 to customize the form used to create, read and edit items in a SharePoint list so that responses are saved as items in the list. To do this, click Customize Form in SharePoint, or create a new SharePoint list from within InfoPath.
There are some distinct advantages to using a SharePoint list, instead of a document library, as follows:
-
You can manage the responses in the same way that you do with any items in a SharePoint list.
-
You do not have to specify how to connect to the SharePoint server when publishing the form because this is automatic.
-
When you are done customizing the list form, you only need to click Quick Publish to publish the form.
Publish to a SharePoint Library
To publish an InfoPath form to a SharePoint library, perform the following steps:
-
Click File.
-
Click Publish.
-
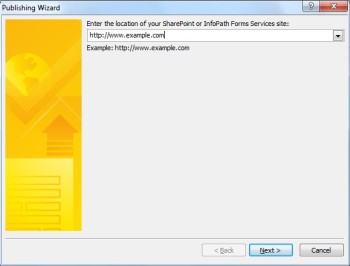
Click SharePoint Server.
-
Enter the Web address of the SharePoint site in the text box.
-
Click Next
-
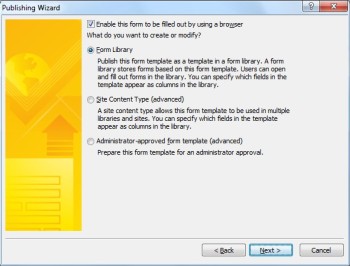
Select how to publish the form. For most scenarios, select Form Library. For more information regarding the Site Content Type or Administrator-approved form template options, see the Advanced concepts section.
-
Click Next
-
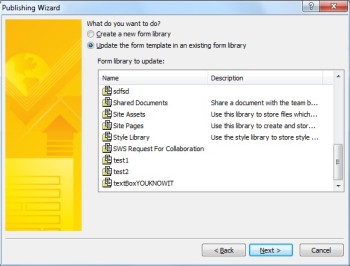
Click a pre-existing form library for the InfoPath form if one has already been created or click Create a new form library to create a new one.
-
Click Next
-
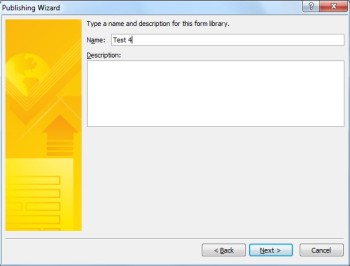
If you are creating a new SharePoint library, enter the name of the library in the Name text box and a description for the library in the Description text box.
-
Click Next
-
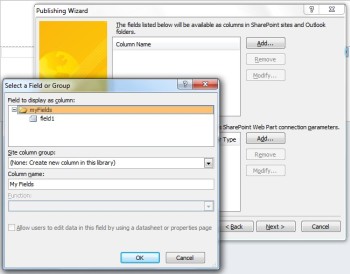
To display data from your form as a column in the form library, use property promotion. To do this, click Add, select a desired field, and then type a name for the column in the Column name box.
-
If you selected a repeating field, click a value in the Function list to define how to display the field in the form library, and then click OK.
Note: You can choose whether to display the first value in the field, the last value, or a count of all the occurrences of the field, or whether to merge all the values together.
-
Repeat steps 12 and 13 as necessary for each field in the form that you want to add as a SharePoint column, and then click Next.
-
Click Next.
-
Click Publish.
Publish to e-mail
To publish an InfoPath form to a list of e-mail recipients, perform the following steps:
-
Click File.
-
Click Publish.
-
Click E-mail.
-
If you have not already saved the form, click OK to save the form.
-
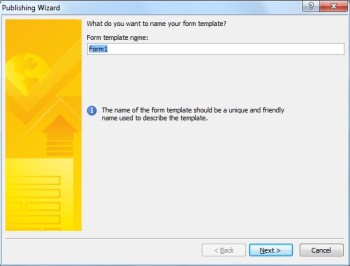
Enter a name for the form in the Form template name text box, and then click Next.
-
To display data from your form as a column in an InfoPath form item folder, use property promotion. To do this, click Add, and then select a desired field then type a name for the column in the Column name box.
-
If you selected a repeating field, click a value in the Function list to define how to display the field in the form library, and then click OK.
Note: You can choose whether to display the first value in the field, the last value, or a count of all the occurrences of the field, or whether to merge all the values together.
-
Repeat steps 6 and 7 as necessary for each field in the form that you want to add as a column in Outlook, and then click Next.
-
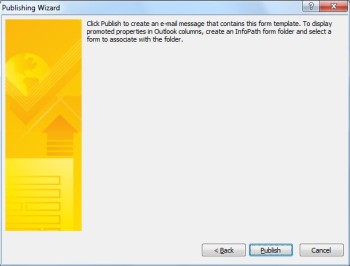
Click Publish when you are finished to open the form as an e-mail message.
-
Enter the recipients in the To, Cc, and Bcc boxes.
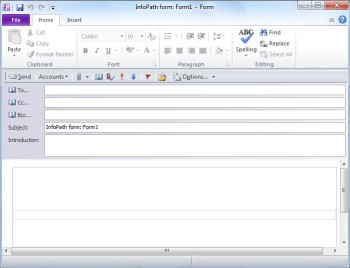
-
Customize the contents of the Subject field.
-
The Introduction text box provides a place for form instructions and an explanation to users on why they have received the form.
-
Click Send.
Publish to a Network Location
To publish an InfoPath form to a UNC or non-SharePoint server on the network, perform the following steps:
-
Click File
-
Click Publish.
-
Click Network Location.
-
Enter the desired path and filename of the form in the first text box.
Note: This might be a location on your hard disk, or a file share, such as \\private\example\exampleform.xsn. This might also be a location on your computer, which would look like this: C:\examplefolder\exampleform.xsn.

-
Enter the name of the template in the Form template name text, and then click Next.
Note: The form name, which is used to identify the form if you update it or republish it, is also visible to users when they fill out the form.
-
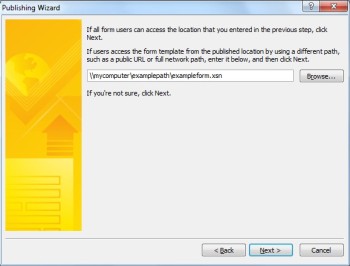
Enter a user-accessible path and file name in the text box.
Note: In most cases, the publish location and the alternate access path will be the same. In other cases, such as if the file was saved to the C drive, it would not be. For example, if you saved the form to C:\examplefolder\exampleform.xsn, then the user accessible path may look like \\mycomputer\examplepath\exampleform.xsn. If the previous path was a user accessible path, such as \\private\example\form\exampleform.xsn, and both you and users can access it, then no action needs to be taken for this step.
-
Click Next again.
-
Click Publish.
Advanced concepts
Site content type
A content type defines a form template, a set of columns, and document management settings on the server, such as workflow or policy settings.
By creating content types, you can reuse form templates and settings across a site by publishing a form template as a site content type. When you update the content type, your change is automatically applied wherever that content type is used.
You can assign a single content type to multiple libraries across a site or assign multiple content types to a single library. For example, you can add a content type for status report forms to all of the libraries that are used by the sales department in your company, so that each sales team is collecting and reporting the same type of information to management. Alternatively, suppose that your department uses different form templates for travel request, trip report, and expense report forms. You can publish the three form templates as site content types and add them to a single library used for storing team travel-related information. When people create a new form from the library, they can then select which of these form templates they want to use.
Sandboxed Code in InfoPath forms
With InfoPath 2010, you can publish form library forms, with code, directly from the InfoPath Designer as long as the form is not a fully trusted form and you are a site collection administrator by using the Sandboxed Code service in SharePoint. Publishing forms with sandboxed code uses the same process as publishing a form to a form library or as a site content type.
Administrator-approved form templates (full trust forms)
Administrator-approved form templates are available to any site collection on the SharePoint site and can contain code that requires full trust. They are individually verified, uploaded, and activated by a SharePoint site administrator. Administrator-approved form templates are maintained in a special document library that can be accessed only by administrators. For information regarding administrator-approved form templates, refer to the following links:
HAVE YOU BEEN SCAMMED OF YOUR COINS AND WANTS TO GET IT RECOVERED BACK???
ReplyDeleteI invested a total of$95,000.00USD worth of Bitcoin with an online company who does trading and was guaranteed a payout of 25% a week. They ended up shutting down their company website but their website was still running. So I could still see my dashboard at that time and instead of paying weekly they ended up compounding my money. It ended up compounding to$179, 000USD so I requested for a withdrawal which was declined before they shutdown their website, I complained to my colleague at work who directed me about this recovery expert, Mr. Morris Ray, that helped him, I contacted him immediately, what surprised me most, was that I recovered my money that same week. You can contact him on his email at MorrisGray830 @ Gmail . com and on WhatsApp: + 1 (607) 698-0239 and he will assist you on the steps to recover your invested funds.
Just trying to help those who where scammed just the way I was too.
I know a professional Private Investigator named james who has worked for me before on something i can't disclose, he offers very legitimate services such as clearing of bad records online without being traced back to you, He clone/hack mobile phones, hack Facebook account, instagram, WhatsApp, emails, Twitter, bank accounts, Skype, FIXES CREDIT REPORTs, track calls. He also help retrieve accounts that have been taking by hackers. His charges are affordable, reliable and 100% safe. For his job well done this is my own way to show appreciation, Contact him via address ethicalhackers009@gmail.com
ReplyDeleteWhatsapp +14106350697
COVID really hit me hard financially as I’m sure has been a consistent theme here. I started my rebuilding in January of this year. Experian FICO 8 Score 576, 15 Hard Inquiries and 8 late payments. I had this mindset, I’ll be in the 700+ before the end of the year. I needed help and I found PINNACLE CREDIT SPECIALIST here, so I decided to give them a try. 6 days after they increased my score to 800+ across the 3 credit bureaus, they also removed all hard inquiries from the credit report and all late payment was marked as paid on time. I confirmed it myself. I can’t keep the GOOD NEWS to my help because I know so many people out there are looking forward to getting the same testimony. All thanks to PINNACLE CREDIT SPECIALIST. Reach them via: PINNACLECREDITSPECIALIST@GMAIL.COM OR TEXT (541) 286 5453.
ReplyDelete