Compare versions of a Word document in a document library
With Microsoft Office Word, you can compare two versions of a document that is stored in a document library and display what changed between the versions. The document library must have versioning turned on and must reside on a server running either Windows SharePoint Services 3.0 or later, or Microsoft Office SharePoint Server 2007 or later.
Important: The ability to compare versions of a server document in Word is available only in Microsoft Office Professional Plus 2007 and later, Microsoft Office Enterprise 2007 and later, Microsoft Office Ultimate, and in the stand-alone version of Microsoft Office Word 2007 or later.
In this article
Overview
When versioning is turned on in a document library, previous versions of a document are stored in the library. This helps you to better manage content as it is revised. Versioning is especially helpful when several people work together on projects, or when information goes through several stages of development and review, because you can compare the changes made between different versions.
You can use the integration between Windows SharePoint Services 3.0 and later or Office SharePoint Server 2007 and later and Office Word 2007 and later to compare a document with any of its previous versions. This integration provides the following options:
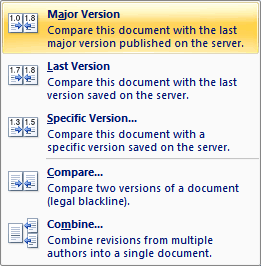
-
Major Version This option compares the current document with the last major version of the document.
-
Last Version This option compares the current document with the previous version. If the previous version is a minor version, you compare with that. If the previous version is a major version, you compare with that.
-
Specific Version This option compares the current document with any previous version that you choose. When you choose this option, you can also change the settings that Word uses to compare documents. For example, you can choose whether to compare comments, formatting, or case.
The following illustration shows the options available when you click the Compare button on the Ribbon, which is part of the Microsoft Office Fluent user interface. Note that these options are available only when you open a document that is saved in a document library that has versioning turned on.
When you compare versions, by default Word displays the two source documents — the original document and the version that you are comparing it with — in separate panes on the right side of the window. These documents scroll synchronously with the compared document so that you can see the changes in context. Note that the source documents that are being compared are not changed in any way, and you cannot edit them in these panes while you are comparing them. You can hide these documents if you want by clicking Show Source Documents on the Review tab or, in later versions, when you click the Compare button on the Ribbon. The compared document appears in a third pane, and tracked changes indicate differences between the original document and the revised document. You can accept or reject these changes and edit the compared document as you normally would.
When you finish accepting or rejecting changes in the compared document, you can use Save As to save the new, compared document to the document library. This document will begin with a fresh version history, which does not incorporate the version history of either of the source documents.
Compare the current document with the last major version
The document that you want to compare versions for must reside in a document library that has versioning turned on, and the document needs a version history with at least one previous major version.
To compare the current document with the last major version:
-
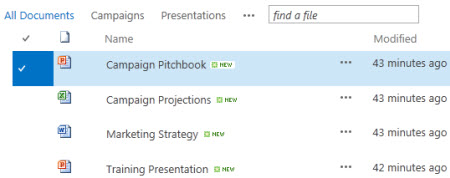
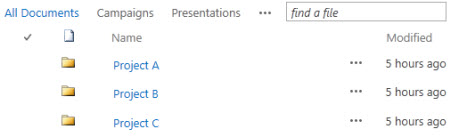
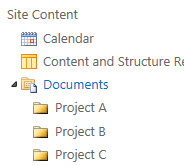
If the library is not already open, click its name on the Quick Launch.
If the name of your library does not appear on the Quick Launch, click to view all site content, and then click the name of your library.
-
Click the name of the file that you want to open. The document opens in Word.
Note: You do not need to check out the file.
-
In Word, on the Review tab, click Compare.
-
Click Major Version.
Word opens the last major version and compares the versions in a separate document.
Compare the current document with the last version
The document that you want to compare versions for must reside in a document library that has versioning turned on, and the document needs a version history with at least one previous version.
To compare the current document with the last version, whether the last version is a major or minor version:
-
If the library is not already open, click its name on the Quick Launch.
If the name of your library does not appear on the Quick Launch, click to view all site content, and then click the name of your library.
-
Click the name of the file that you want to open. The document opens in Word.
Note: You do not need to check out the file.
-
In Word, on the Review tab, click Compare.
-
Click Last Version.
Word opens the last version and compares the versions in a separate document.
Compare the current document with any previous version
The document that you want to compare versions for must reside in a document library that has versioning turned on, and the document needs a version history with at least one previous version.
To compare the current document with a specific version:
-
If the library is not already open, click its name on the Quick Launch.
If the name of your library does not appear on the Quick Launch, click to view all site content, and then click the name of your library.
-
Click the name of the file that you want to open. The document opens in Word.
Note: You do not need to check out the file.
-
In Word, on the Review tab, click Compare.
-
Click Specific Version.
-
In the Versions saved dialog box, click the version that you want to compare with the current document, and then click Compare.
Word opens the selected version and compares the versions in a separate document.
Change the comparison settings
In the Versions saved dialog box, click More to see the available comparison settings. These settings determine which elements of the documents are compared. By default, all the comparison settings are selected. Any changes that you make to these settings are then be used as the default settings in future comparisons.


 Í
Í