When you insert or select a picture in Microsoft Publisher 2010 the Picture Tools contextual tab will become available on the ribbon. This tab gives you the ability to quickly format the picture, including adjusting the picture, formatting the picture style from a gallery, applying effects, aligning and grouping, and cropping the picture.

Insert
To insert another picture, click Picture and in the Insert Picture dialog navigate to the picture you want to insert.

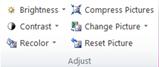
Adjust
The Adjust group gives you the ability to control the brightness, contrast, and color of the picture. You can also compress the picture to save space and swap the current picture for another or remove the picture entirely. Finally, you can remove all the adjustments that you've applied to the picture.
Brightness
You can increase or decrease the brightness of the selected picture by 10%, 20%, 30%, or 40%. Hover over each selection and Publisher will preview the effect on the selected picture.
Contrast
You can increase or decrease the contrast of the selected picture by 10%, 20%, 30%, or 40%. Hover over each selection and Publisher will preview the effect on the selected picture.
Recolor
You can simplify a color picture in Microsoft Publisher 2010 by reducing the number of colors in the picture. Doing so can reduce the picture's file size and reduce the cost of printing. Applying a uniform color and style to all pictures in your publication can also unify your publication.
Quickly change a picture to shades of a single color
-
Select the picture that you want to change, select the Picture Tools tab, and click Recolor.
-
Select one of the pre-defined recoloring modes, such as Sepia, Greyscale, or one of the light or dark variations. When you hover over a selection Publisher will preview the effect on the selected picture.
More Variations
-
Select the picture that you want to change, select the Picture Tools tab, and click Recolor.
-
Select More Variations.
-
In the Recolor Picture dialog box, click the arrow next to Color, and then click the color that you want or to see more color choices, click More Colors, select the options that you want, and then click OK.
Note: If your publication uses spot colors, More Colors is not available.
-
Do one of the following:
-
Click Recolor whole picture to apply tints of the selected color to the entire picture.
-
Click Leave black parts black to apply tints of the selected color to only those parts of the picture that are not black or white.
Set Transparent Color
To make a color in the picture transparent:
-
Select the picture that you want to change, select the Picture Tools tab, and click Recolor.
-
Click Set Transparent Color, the cursor changes to the transparency cursor. 
-
In the picture, click the transparency cursor on the color you want to make transparent.
Top of Page
Restore the picture's original colors
The picture's original color information remains stored with the image, so you can restore the picture's original colors at any time.
-
Select the picture that you want to change, select the Picture Tools tab, and click Recolor.
-
Click the No Recolor option.
Notes:
-
You can restore all of the picture's original settings by clicking the Restore Original Colorsbutton in the Recolor Picture dialog box.
-
If you update your color scheme the recoloring changes you have made may also change.
Compress Pictures
This tool will compress the selected picture or pictures to reduce the storage size in your publication.
-
Select the picture or pictures that you want to change, select the Picture Tools tab, and click Compress Pictures.
-
In the Compress Pictures dialog you will see information about the picture or pictures and options for compressing the pictures:
-
Compression Savings :
Current combined image size - Displays the current combined size of all pictures in the publication.
Estimated combined image size after compression - Displays the estimated combined size of all pictures in the publication after compression. (This value changes depending on other options that you select.)
-
Compression options:
Delete cropped areas of pictures - Select this check box to delete the pixel information that is normally stored for cropped areas of pictures. (The information that is associated with cropped areas is neither visible nor used.)
Remove OLE data - Select this check box to remove the 24-bit uncompressed bitmap that is part of a picture's OLE stream. The small viewable image that is part of the OLE stream is deleted, but the picture itself appears the same. (After you remove the OLE data from a picture, you are no longer able to open that picture by using the program originally used to create the picture).
Resample pictures - Select this check box to make a resized picture smaller by deleting the residual data from the picture's original size. (If a picture is resampled, and then stretched larger than the size rate at which it was resampled, the picture quality is reduced.)
Convert to JPEG where appropriate - Select this check box to convert the picture to a JPEG file.
Note:
Depending on the nature of the picture — such as whether it is a photo, how much noise or spiking is in the picture's histogram, and so on — the level of compression varies. The compression level of PNG pictures cannot be modified.
Pictures that are 100 KB or less are not compressed.
-
Target Output:
Commercial Printing - Click this option to compress the pictures to 300 pixels per inch (ppi). No JPEG compression is performed.
Desktop Printing - Click this option to compress the pictures to 220 ppi and a 95 JPEG quality level.
Web - Click this option to compress the pictures to 96 dots per inch (dpi) and a 75 JPEG quality level.
-
Apply compression settings now:
Apply to all pictures in the publication - Click this option to apply the compression settings to all of the pictures in your publication.
Apply to selected pictures only - Click this option to apply the compression settings to only the selected picture or pictures.
Change Picture
To replace the selected picture or pictures with different pictures:
-
Select the picture or pictures to change.
-
Click Change Picture and then select Change Picture.
-
In the Insert Picture dialog, navigate to the picture you want to insert.
-
To delete the selected pictures, Click Change Picture and then select Remove Picture, the pictures will be replaced by empty picture frames.
Reset Picture
To remove all formatting you have applied to the selected picture, click Reset Picture.
Top of Page
Swap
This tool allows you to swap the position or the formatting of two selected pictures.

Swap Positions
-
Click the first picture and then hold the CTRL or Shift key while clicking on the second picture to select them both.
-
Click Swap and then select Swap.
Swap Formatting
-
Click the first picture and then hold the CTRL key while clicking on the second picture to select them both.
-
Click Swap and then select Swap Formatting Only.
Picture Styles
The Picture Styles group gives you options for your picture's shape, border, and captions. You can apply pre-defined picture styles from a picture style gallery, or you can format the picture's shape and border manually.
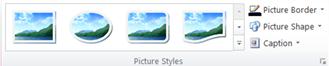
Picture Style Gallery
The style gallery contains four different shapes each with six different border options that you can apply to your pictures. When you hover over one of the gallery options the selected pictures will preview the style.
Apply a style
-
Select the picture or pictures you want to style.
-
Click the Picture Tools tab.
-
In the picture style gallery, select the style you want.
Note: To see all 24 available styles at once, click the More button  .
.
Clear a style
-
Select the picture or pictures you want to style.
-
Click the Picture Tools tab.
-
In the picture style gallery, click the More button .
-
Select Clear Picture Style.
Picture Border
You can manually select the color, line weight, and pattern of the border of the selected picture.
-
Select the picture or pictures you want to style.
-
Click the Picture Tools tab.
-
Click Picture Border and select the options you want:
Colors - Select the line color that you want from the palette. For more color options select More Outline Colors, this option opens the Colors dialog box. You can select a new color from the standard Microsoft Windows color palette, or you can select a custom color that you define by using the RGB, or CMYK color model. You can also select a Pantone color.
Note: PANTONE® Colors displayed herein may not match PANTONE-identified standards. Consult current PANTONE Color Publications for accurate color. PANTONE® and other Pantone, Inc. trademarks are the property of Pantone, Inc. © Pantone, Inc., 2007..
Weight – Select a line weight, or select More Lines and enter a line weight in the Weight box.Dashes – Select a dashed line style.Pattern – Opens the Patterned Lines dialog. On the Tint tab you can choose a new Base color and apply a tint of your base color. On the Pattern tab you can apply a pattern to your border.
Picture Shape
You can apply a shape to the selected picture or pictures. For more information on applying shapes to pictures, please see Apply an AutoShape to a picture.
Note: If you select more than one picture, the Picture Shape option will not be available.
Caption
You can apply a caption to your pictures from a gallery of caption styles.
-
Select the picture or pictures you want to style.
-
Click the Picture Tools tab.
-
Click Caption, and then select from the gallery of caption styles. When you hover over one of the gallery options the selected pictures will preview the style.
-
Publisher inserts a pre-formatted text box and you can then enter the caption text for your pictures.
Top of Page
Shadow Effects
The Shadow Effects group allows you to format a shadow to your pictures. The first row of the Picture Style gallery includes shadows.

-
Select the picture or pictures to which you want to apply a shadow.
-
Click the Picture Tools tab.
-
Click Shadow Effects, and then select the effect you want from the gallery of shadow effect styles.
-
To change the color of the shadow, select Shadow Color and select the color options you want.
-
To nudge the shadow distance, click the appropriate directional buttons  .
.
-
To turn the shadow effect on and off, click the center button.
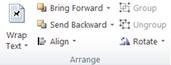
Arrange
The Arrange group enables you to set the text wrapping behavior around your picture, send the picture backwards or forwards relative to other objects on the page, align your picture on the page, group or ungroup the picture with other objects, and rotate the picture. For more information on arranging objects, please see:
Crop
Cropping is often used to hide or trim a part of a picture, either for emphasis or to remove unwanted portions. For more information on cropping, please see Cropping pictures.

Size
The Size group gives you control over the Shape Height and Shape Width of your pictures.

Top of Page

 .
. 

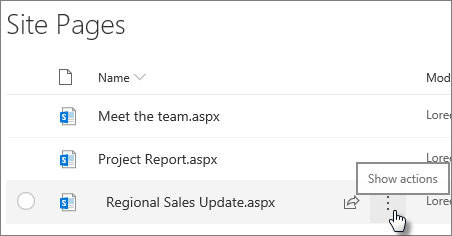
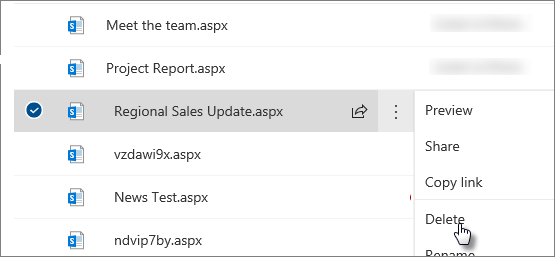
 in the upper right, then on the left side of the Site Contents page, click Pages.