Use the Part and Assembly Drawing template to draft the following:
| | | |
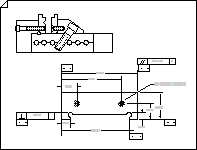
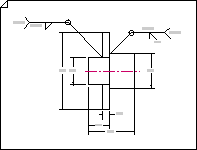
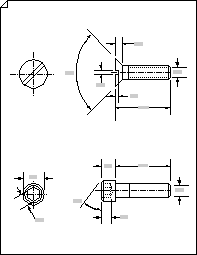
| Assembly drawings | Welding drawings | Fasteners and springs |
-
Open Visio.
-
Create a new drawing from the Part And Assembly Drawing template— which is located in the Engineering category.
This drawing type opens a scaled drawing page in landscape orientation
 . You can change page, ruler, and grid settings at any time.
 -
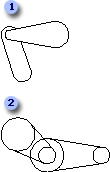
Drag shapes from Drawing Tool Shapes onto the drawing page to draw outlines of objects. For example, draw a belt system with the Circle tangents and Arc tangents shapes, and use the Rounded rectangle shape to represent tanks or vessels.
Use the Circle Tangents and Arc Tangents shapes
-
From Drawing Tool Shapes, drag either the Circle tangents or Arc tangents shape onto the drawing page.
Note: Use these shapes to draw belt systems, as shown in the illustration.
-
To resize a circle or change the radius of an arc, drag the control handles.
-
To change the length of a tangent line, drag an endpoint.
-
When drawing belt systems, glue the endpoints of one shape to the endpoints of another.

Draw belt systems using Arc tangents shapes (1) and Circle tangents shapes (2).
Use the Rounded Rectangle shape
-
From Drawing Tool Shapes, drag the Rounded rectangle shape onto the drawing page.
Note: Use the Rounded rectangle shape to represent a tank or vessel, as shown in the illustration.
-
To change the roundness of the ends, drag the control handle.
-
To resize the rectangle, drag the selection handles.

Tank with valve created with the Rounded rectangle shape and other drawing tools.
-
-
Drag shapes from Fasteners 1, Fasteners 2, and Springs And Bearings onto the drawing page. You can enter data for these shapes.
Enter shape data
-
Right-click the shape and select Shape > Shape Data.
-
In the Shape Data pane, click in each data field and type or select a value.
-
-
Add dimensions to your drawing by dragging shapes from Dimensioning-Engineering onto the drawing.
-
Add datum feature symbols and feature control frames.
Add a datum feature symbol
-
From Geometric Dimensioning and Tolerancing, drag one of the datum shapes onto the drawing page.
-
To change the text in the datum shape, double-click the shape, select the text you want to replace, and then type.
Create a feature control frame
-
From Geometric Dimensioning and Tolerancing, drag one of the datum frame shapes onto the drawing page.
-
Open the group window by double-clicking the datum frame shape.
Note: If necessary, tile the windows so that you can see the shapes.
-
From Geometric Dimensioning and Tolerancing, drag geometric characteristic symbols, such as Flatness, into the leftmost box of the datum frame shape in the group window.
-
To change the text in the datum frame shape, double-click the shape, select the text you want to replace, and then type.
-
Close the group window to return to the drawing page.
-
-
Add welding symbols to your drawing.
Create a welding symbol
-
From Welding Symbols, drag one of the arrow shapes onto the drawing page.
Position the arrow shape so that the arrow (leader) is pointing to the weld joint.
-
Configure the arrow shape by doing one or both of the following things:
-
Add a weld-all-around symbol by right-clicking the arrow shape and choosing Show All Around Circle.
-
Add a tail to the reference line by right-clicking the arrow shape and choosing Show Tail.
-
-
Open the arrow shape group window by double-clicking the arrow shape.
Note: If necessary, tile the windows so that you can see the shapes.
-
From Welding Symbols, drag weld symbols onto the arrow shape in the group window. Annotate by using callouts (on the Insert tab, click Callout).
Glue weld symbols and annotation symbols to the guides in the group window so the symbols will remain properly located if you resize the arrow.
-
To change the text of a weld symbol shape or an annotation, double-click the shape, select the text you want to replace, and then type.
-
To return to the drawing page, close the group window.
-


No comments:
Post a Comment