Tutorial for Visio
New to Visio? This tutorial will help get you started with Visio. We'll take you through starter diagrams to give you an idea of what diagrams look like. Then we'll take you through the four basic steps to creating your own diagram.
Start Visio
Click the Start button, type Visio, and then click the Visio icon to open the program. (If Visio is open already, click File > New.)
Look at the starter diagrams
Before you dig in and start making things yourself, let's show you a couple starter diagrams that Visio has made for you. That way you can get an idea of what diagrams look and feel like in the program.
-
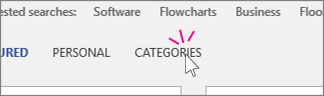
Click Categories.
-
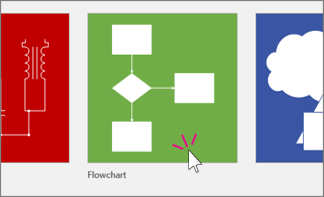
Click Flowchart.
-
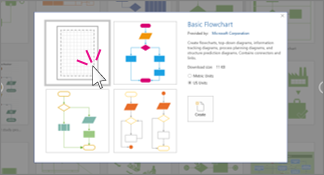
Now pay attention to this step: single-click the Basic Flowchart thumbnail.

-
Let's explain what this dialog is all about.

You choose the blank template when you have some experience with Visio (like after you've made a few practice diagrams). But if you don't have any experience, choose one of the other three starter diagrams.
-
Double-click one of the starter diagram thumbnails.
-
This is a starter diagram. Visio comes with many starter diagrams to give you ideas and examples. You can customize this starter diagram by typing your own text, adding your own shapes, and so on. Also, take a look at the tips and tricks. These help you work with the diagram.
-
Let's open another starter diagram. Click File > New > Categories > Network.
-
Single-click the Basic Network thumbnail.

-
Double-click one of the two starter diagram thumbnails.
This is just another example of what you can do with Visio. On your own, go to File > New > Categories and explore the various starter diagrams in Visio. Not all diagrams have them, but many of the most common ones do.
The three Visio basics
Ok, now to dig in and work with a diagram. As you saw from the above, there are many kinds of Visio diagrams, including organization charts, network diagrams, workflows, and home or office plans. But you use the same three basic steps to create nearly all of them:
-
Open a blank template.
-
Drag shapes and connect them together.
-
Add text to shapes.
In the following steps, you'll use these three basic functions to make a basic flowchart.
Step 1: Open a blank template
In Visio, a blank template is often what you start with. You don't have to start with a blank one, you could choose a starter diagram and modify it. But sometimes you want to start completely from scratch.
-
Click File > New > Categories > Flowchart.
-
Single-click Basic Flowchart, and then double-click the blank option:
-
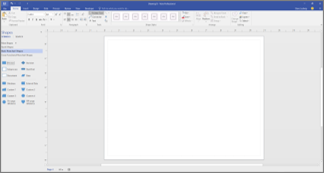
What you have now is a blank flowchart ready for action. Your screen will look similar to the following illustration.
-
There are three main areas of the Visio program: the ribbon, the Shapes window, and the page itself.
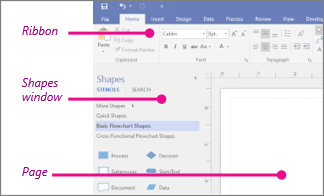
The ribbon contains all of the tabs in Visio. Things like changing text size, switching to different drawing tools, etc are here.
The Shapes window contains your stencils and shapes. More on those later.
The page itself is where you put shapes, connect them, and so on.
Tips: If your screen doesn't look like the above, try one or more of the following:
-
If you can't see the whole ribbon, double click the Home tab at the top.
-
If you can't see the Shapes window, click the expand arrow
 to make the Shapes window larger.
 -
Close any other panes and windows that may be open.
-
Maximize or resize the Visio window to make it larger on your screen.
-
On the View menu, click Fit to Window.
-
Step 2: Drag and connect shapes together
To create your diagram, you drag shapes from the Shapes window to start. Then you add shapes and connect them. There are several ways to connect shapes, but for now we'll show you how to use the AutoConnect arrows. You'll see what those are in a moment.
-
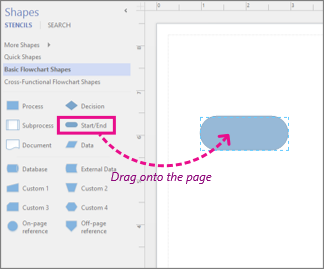
Drag the Start/End shape onto the drawing page, and then release the mouse button.
-
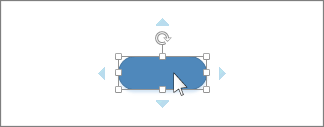
Hold the pointer over the shape so that the blue AutoConnect arrows show.
-
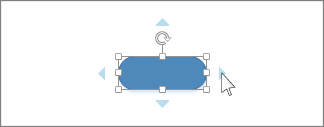
Move your pointer on top of the blue arrow that points toward where you want to place the second shape.
-
On the mini toolbar, click the square Process shape.
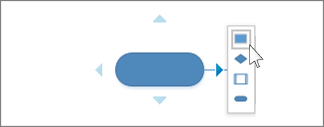
The Process shape is added to the diagram, automatically connected to the Start/End shape.
-
Keep adding shapes this way until you have about four or five on the page.
Tips:
-
If the shape you want to add isn't on the mini toolbar, you can drag the shape you want from the Shapes window and drop it on a blue arrow. That's right -- drop the shape on top of the blue AutoConnect arrow . The new shape is connected to the first shape as if you had clicked it on the mini toolbar.
-
Use the AutoConnect arrows also to connect two shapes already in your drawing. Drag an AutoConnect arrow from one shape and drop it on another shape. You get an arrow from the first shape to the second.
-
Step 3: Add text to shapes
-
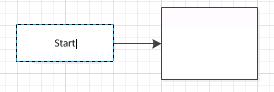
Click the shape and start typing. You don't need to double-click to add text to a shape; when you type, text is added to whichever shape is selected.
-
When you finish typing, click on a blank area of the drawing page or press ESC.
You can add text to almost any object – even connectors – by selecting it and typing.
There is more you can do in Visio. Play around with the shapes, connectors, and text. Then move on to the following procedures when you're ready.
Add text to the page
-
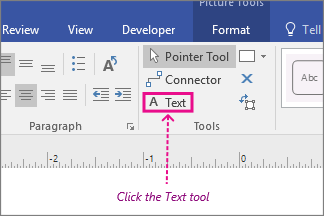
Click the Home tab, and then click the Text tool.
-
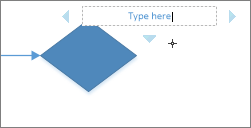
Click an empty area of the page.
A text box appears.
-
Type the text that you want to add to the page.
-
Press ESC.
-
On the Home tab, click the Pointer Tool to stop using the Text tool.
The text box now has the characteristics of other shapes. You can select it and type to change the text, you can drag it to another part of the page, and you can format the text by using the Font and Paragraph groups on the Home tab.
For more details about working with text, see Add, edit, move, or rotate text on shapes and Add text to a page.
To give your drawing a background
-
Click Design and then click Backgrounds.
-
Click a background.
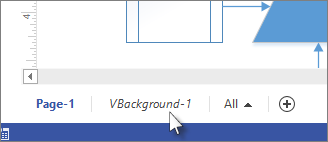
Your diagram gets a new background, and, a new background page called VBackground-1. This page you can see in the page tabs along the bottom of the diagramming area.
To apply a border or title
-
Click Design > Borders & Titles and click the title style that you want.
-
Click a title style.
The title and border appear on the background page.
-
At the bottom of the diagramming area, click the VBackground-1 tab.
-
Click the title text.
The entire border is selected, but when you start typing it changes the title text.
-
Type your title, then press ESC.
-
To edit other text in the border, first select the entire border, and then click the text you want to change and start typing. You may have to click more than once to get the text selected.
-
Click Page-1 in the lower-right corner of the page to return to the drawing.
To apply a theme to your diagram or drawing
-
On the Design tab, hover the mouse pointer over the various themes.
Visio temporarily applies each theme as you hover the mouse pointer over them.

-
To see other available themes, click More
 .
. -
Click the theme that you want to apply to the diagram.
Save a diagram
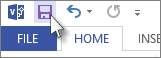
If the diagram has been saved before, simply click Save in the Quick Access Toolbar.
If you want to save the diagram in a different place or with a different name, use Save As.
To save your diagram in a different location
-
Click File and then click Save As.
-
Under Save As, click where you want to save the diagram.
For example, on your computer, online, or on OneDrive. Then click the folder that you want to save it in, or click Browse to find the folder that you want.
-
If you want, in the Save As dialog box, give the diagram a different name in the File name box.
-
Click Save.
To save as an image file, PDF, or other format
-
Click File and then click Save As.
-
Under Save As, click where you want to save the diagram.
-
In the Save As dialog box, open the Save as type drop-down list.
-
Click the format you want. Some example formats include:
-
Standard image file including JPG, PNG, and BMP formats.
-
Web page in HTM format. Image files and other resource files are saved in a subfolder of the location where you save the HTM file.
-
PDF or XPS file
-
AutoCAD drawing in DWG or DXF format.
-
Print your diagram or drawing
Printing your diagram or drawing in Visio is as easy as in other Office programs.
To print your diagram or drawing
-
Click the File tab.
-
In the side bar, click Print.
-
Select the printer and other settings, and then click Print.
Beyond the basics
After working with these basic tasks, take some next steps by exploring the following topics:
No comments:
Post a Comment