Mail merge with envelopes
When you have bulk mail to send to people on your mailing list, you can use mail merge to create a batch of addressed envelopes. Each envelope will contain an address in your mailing list. You can also create and print envelopes without using mail merge.
Notes:
-
If you're looking for how to create and print labels with mail merge, see Create and print labels using mail merge
-
Or, if you're looking to create letters using mail merge, see Use mail merge to personalize letters for bulk mailings
-
Or, if you want to create and send email using mail merge see, Use mail merge to send bulk email messages
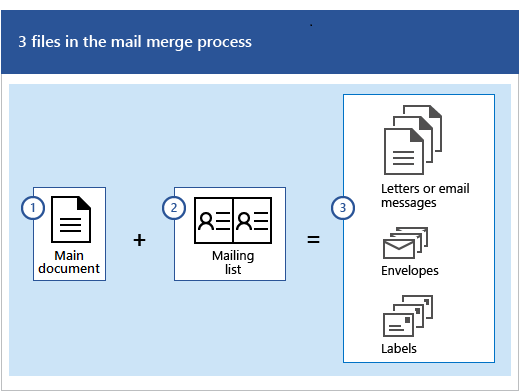
These are the documents involved in creating and printing envelopes using the mail merge process:
-
Your main document
This document contains text and graphics (a logo or an image, for example) that are identical for each version of the merged envelope. The return address on the envelope is an example of identical content. -
Your mailing list
This document contains the addresses to be printed on the envelopes.
When you combine those two documents using the steps below you'll have your addressed envelopes.
Step 1: Set up your mailing list
The mailing list is your data source. It can be an Excel spreadsheet, a directory of Outlook contacts, an Access database, or an Office address list. It contains the records Word pulls information from to build the addresses to be printed on the envelopes.
Tips
-
If you don't have a mailing list, you can create one during mail merge. Before you start the mail merge process, collect all of your address lists, and add them to your data source.
-
If you're using an Excel spreadsheet, make sure the column for ZIP Codes or postal codes is formatted as text so that you don't lose any zeros. For more information see Format mail merge numbers, dates, and other values in Excel
-
If you want to use your Outlook contacts, make sure Outlook is your default email program.
Step 2: Test your envelope layout
A preliminary step in the mail merge process is to set up the envelope for the merge. It's always a good practice to run a small test batch of envelopes before you do a real mail merge.
Note: If you're comfortable with printing envelopes on your system you can skip to step 3.
-
In Word, choose File > New > Blank document.
-
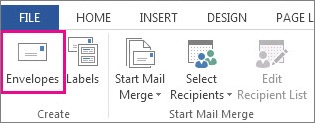
On the Mailings tab, in the Create group, choose Envelopes.
-
In the Delivery address box, type a sample address to test how an envelope will look when it's printed.
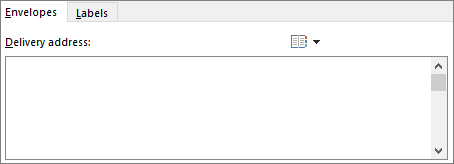
Note: The sample address won't show up in your mail merge.
-
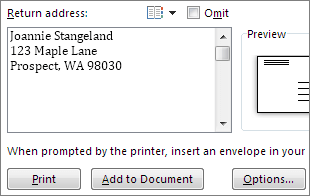
In the Return address box, type your address.
-
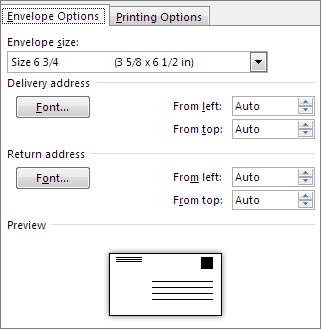
Choose Options > Envelope Options and do the following:
-
In the Envelope size drop-down list, choose the size that matches your envelope or choose Custom size.
Note: If you choose Custom size, enter the envelope dimensions in the Width and Height boxes. Choose OK when done.
-
Under Delivery address and Return address, choose a font and the left and top offset position for each address.
Note: Based on the preview of the envelope layout, make any necessary adjustments to your choices.
-
-
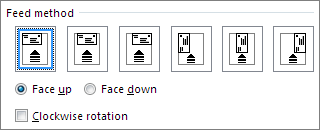
On the Printing Options tab, confirm the correct Feed method is selected, load the envelope to match the illustration, and then choose OK.
Note: Your printer sends Word information about which way the envelope should be loaded in the printer. This information appears under Feed method.
-
Choose Print, and then choose Yes to save the return address as the default address.
Note: If the envelope printed correctly, congratulations, you're ready to go to the next step in the mail merge process. If the envelope didn't print as you expected, go back to step 5 and readjust the envelope layout options and the Form Feed options as necessary.
Step 3: Start the mail merge
-
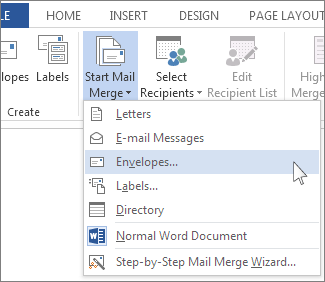
On the Mailings tab, in the Start Mail Merge group, choose Start Mail Merge > Envelopes.
-
In the Envelope Options dialog box, set up the envelope by choosing options as in Step 2: Test your envelope layout, and then choose OK.
Note: Word creates a document that's sized to the envelope dimensions and shows where the return address appears on the envelope.
-
If you'd like to add a return address, or logo, to your envelope now is a good time to add that.
-
Choose File > Save, and add a file name.
Step 4: Link your mailing list to your main document
Now you're ready to open the data source for your mailing list.
-
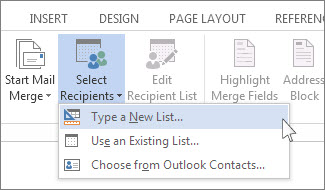
On the Mailings tab, in the Start Mail Merge group, choose Select Recipients, and then choose an option.
-
Do one of the following:
-
If you don't have a mailing list, choose Type a New List and create one.
or
-
If your mailing list is in an Excel spreadsheet, an Access database, or another type of data file, choose Use an Existing List. Then browse to your list and choose Open.
or
-
If you're using your Outlook contacts, choose Choose from Outlook Contacts.
-
-
Choose File > Save.
Edit your mailing list
If you're printing envelopes for everyone on your list, go to Step 5: Add the address block to the envelope. If you want to print envelopes for people on your list who live, for example, within 20 miles of an event you're hosting, then use a filter like a ZIP Code or a postal code to narrow the list. For more information on filtering your data see Sort and filter the data for a mail merge.
Tip: You may find it useful to use the filter feature to filter out contacts for whom you don't have a postal address. That way you don't waste envelopes that you won't be able to mail.
To choose individual people on your list that you would like to create envelopes for, do the following:
-
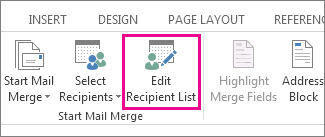
Choose Edit Recipient List.
-
Check the names of the people who you want to receive your mailing.
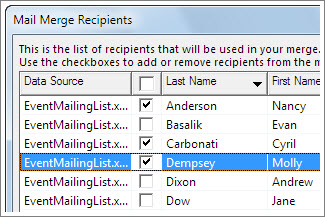
You also can sort or filter the list to make it easier to find names and addresses.
Step 5: Add the address block to the envelope
The address block is a mail merge field. Also known as a placeholder, you use the merge field to mark the place where you want addresses to appear on the envelope.
Note: It's often easier to properly align the address block if you turn on displaying paragraph marks (¶) first. To turn them on go to the Home tab of the Ribbon and click the Show /Hide ¶ button or press CTRL+SHIFT+8.
-
Place your cursor were you want the address block to go. If you have show paragraph marks turned on, click immediately after the paragraph mark (¶) that Word has placed in the middle of the envelope.
-
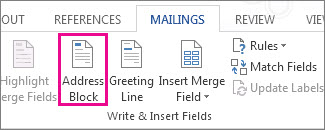
On the Mailings tab, in the Write & Insert Fields group, choose Address Block.
-
In the Insert Address Block dialog box, choose a format for the recipient's name as it will appear on the envelope.

Note: Under Preview, choose the Next
 or Previous
  record button to move through records in your data source and view how an address will appear on the envelope.
 -
Choose OK.
-
Choose File > Save to save your merge document before proceeding.
Verify merge field names
Make sure Word puts the names and addresses from your mailing list in the right places on your envelope.
-
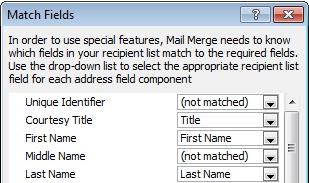
On the Mailings tab, in the Write & Insert Fields group, choose Match Fields.
-
In the Match Fields dialog box, the column on the left are the field names that Word uses in an Address Block. The column on the right lets you match up fields in your data source to those field names. Verify that the field names that appear on the left side match the names of column headings for records in your mailing list so Word can put the correct data in the correct place on your envelope.
-
Do one of the following:
-
If the field names shown match column headings you used for records in your mailing list data source, do nothing.
or
-
If (not matched) appears in a field name that you expected to match a column heading in your data source, choose the drop-down arrow, and then choose the field name in your mailing list data source. Repeat as necessary.
-
-
Choose OK.
Step 6: Preview and print the envelopes
Do a final check before you print the envelopes.
-
Choose Preview Results, and then choose the Next
or Previous record button to make sure the names and addresses on all the envelopes look right.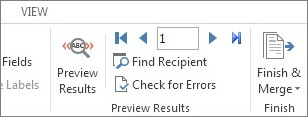
Tip: To go to the start of the list, choose the First
 record button, and to go to the end of the list, choose the Last
  record button.
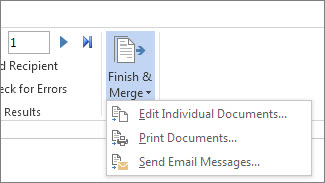
 -
Choose Finish & Merge > Print Documents.
Step 7: Save your mail merge envelope document
When you save the mail merge envelope document, it stays connected to your mailing list so that you can use it for your next bulk mailing.
To reuse your envelope mail merge document
-
Open the mail merge document for envelopes and choose Yes when Word prompts you to keep the connection.
To change addresses in the envelope mail merge document
-
Open the mail merge document for envelopes and choose Edit Recipient List to sort, filter, and choose specific addresses.
See also
Do you have a question about Word mail merge that we didn't answer here?
Help us improve Word
Do you have suggestions about how we can improve mail merge (or any other feature) of Word? If so, please visit Word User Voice and let us know!
Great tips
ReplyDeleteMailing Envelopes
ReplyDeletePrint an envelope. The trick to printing an envelope is knowing which way to feed the envelope into your printer. Word gets
information from youre printer and shows you the right feed option. Go to Mailings
Envelopes, and enter delivery andreturn addresses.
Perfect guidance! First time I have ever tried to use Mail Merge. It worked! So happy.
ReplyDeleteVery clear, easy to follow, and with screen captures.
ReplyDeleteExcellent. Soo helpful.
Your blog provided us with valuable information to your post. Thanks a lot for sharing
ReplyDeleteEnvelope Printing
midnight goods delivery service
ReplyDeleteI'm stuck on how to move the address block into the correct position. Not even discussed here.
ReplyDeleteThanks for sharing nice blog with us. At PrintMagic , Customers have the best option to personalize the Window Envelopes in standard required sizes, and color options. All you have to do is upload your custom design to the website, add the necessary text, company logo, return addresses and then choose envelope printing options.
ReplyDeleteMicrosoft Office Tutorials: Mail Merge With Envelopes >>>>> Download Now
ReplyDelete>>>>> Download Full
Microsoft Office Tutorials: Mail Merge With Envelopes >>>>> Download LINK
>>>>> Download Now
Microsoft Office Tutorials: Mail Merge With Envelopes >>>>> Download Full
>>>>> Download LINK a9
Thanks for posting nice blog with us. PrintMagic Also Avail Design Services for Standard Envelope and by adding it to the above calculator. Send us your required specifications and we’ll create the custom design from scratch, very unique, and matching your needs and for brand messaging. Once you approve the custom design, we will get them printed and will deliver them to your doorstep! If you are looking to design a Custom Standard Envelopes on your own, choose from our predefined print layout templates available in formats like PDF, AI, InDesign and Photoshop. These layouts are with perfect bleed and will guide you in creating an envelope and with your specific design requirements.
ReplyDeleteYour blog provided us with valuable information to your post. Thanks a lot for sharing. PrintMagic Also Avail Design Services for window envelopes and by adding it to the above calculator. Send us your required full specifications and we’ll create the custom design from scratch, very unique, and by matching your needs and for brand messaging. Once you approve the final design, we will get them printed and will deliver them to your doorstep! If you are looking for designing a envelope printing on your own, choose from our predefined print layout #10 window envelope template available in formats like PDF, AI, InDesign and Photoshop. These 10 window envelope template layouts are with perfect bleed and will guide you in creating an envelope with your specific design requirements.
ReplyDeleteThanks for posting nice information. These 8.75" x 5.75" Print A9 Envelopes from PrintMagic and are printed in full color or one color front basis your requirements and can be customized by adding your company logo, multiple returns address through Variable Envelope Printing urging the users to open your envelopes. You can even customize these by adding a small window to show the recipient's name and address, or adding a custom flap instead of the regular rectangle one, or even adding foils to your envelopes. All you need to do is fill the custom envelope printing quote form here. Our Print Magic team of experts will be able to create the desired A9 envelopes you wish for!
ReplyDelete