Change the margins between text and the edge of a text box or shape
When you need to squeeze more text into a text box or shape without changing the shape's or font's size, change the margin between the text and the edge of the text box or shape.
Note: If you're looking for information about setting page margins in Office programs, see the related links below.
-
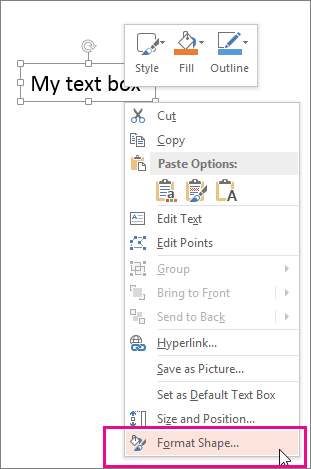
Right-click the border of the shape or text box you want to adjust the margin for and then click Format Shape.

-
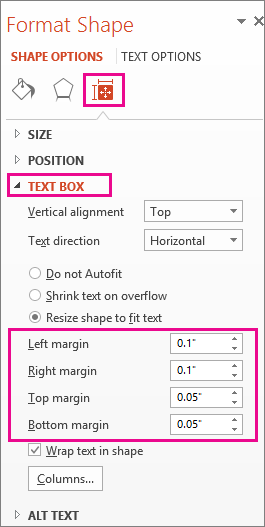
Click the Size & Properties icon (Layout & Properties in Word)
 , and then click Text Box.
-
In the box for each margin, click the down arrow to decrease the distance. The change is applied immediately, so you can tell when you've got it right.
Tip: In PowerPoint, you can reduce the size of the text to fit it into the shape or text box by clicking Shrink text on overflow.
For more information about text boxes
Add, copy, or delete a text box
Set text direction and position in a shape or text box in Word
For information about page margins
-
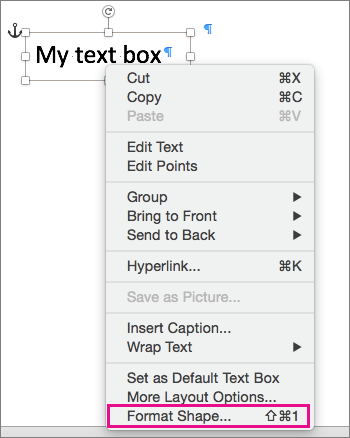
Ctrl+Click the border of the shape or text box you want to adjust the margin for, and then click Format Shape.

-
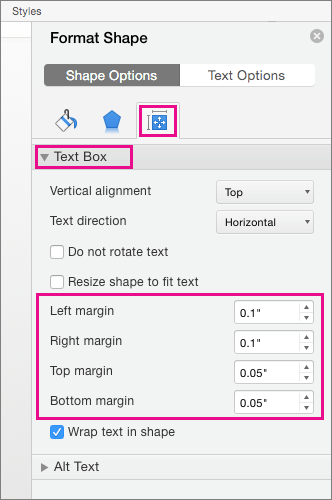
On the Shape Options tab, click the Layout & Properties icon and then click Text Box.

-
In the box for each margin, click the down arrow to decrease the distance. The change is applied immediately, so you can tell when you've got it right.
Office Online doesn't support the ability to edit margins in shapes and text boxes.
My "Format Shape" menu only has an option for "Alt Text", nothing else.
ReplyDelete