Require approval of items in a site list or library
Lists and libraries can often contain sensitive information, such as projected marketing campaigns or human resources initiatives. It can be important to have only "official" versions of items or files viewable by users. To do this you can require approval of an item or file before the content becomes visible to most site users. By requiring approval, the organization can apply a significant level of quality and security to the content in the lists and libraries.
What do you want to do?
Specify that items in a library require approval
-
Go to the library for which you want to require approval.
-
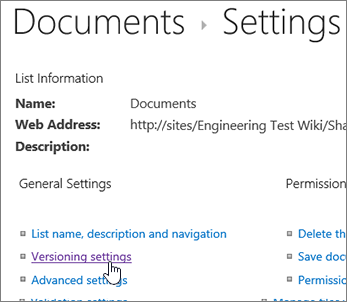
Click Settings
 , Library Settings.
If you don't see these menu items, click Library on the ribbon, and then click
Library settings in the Settings group.
-
Under General Settings, select Versioning settings to open the Versioning Settings page.
-
In the Content Approval section, select Yes in answer to the Require content approval for submitted items? In the Document Version History section, specify whether you want SharePoint to create versions when a file is edited. You can also choose to limit the number of versions that are retained.
-
In the Draft Item Security section, determine which users can see draft items in the document library.
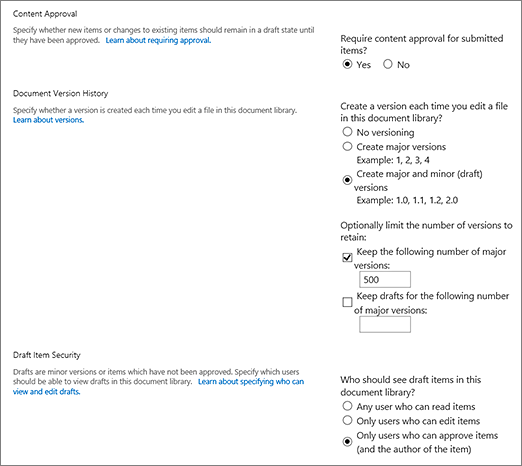
Tip: If you require content approval for a list or library that already contains items, all of the items in the library are marked Approved.
-
You can choose any of the following:
-
Users who can read items in the list
-
Only users who can edit items in the list
-
Only users who can approve items in the list, and the item author
-
-
Click OK.
Specify that items in a list require approval
-
Go to the list for which you want to require approval.
-
On the ribbon, click the List tab.
-
Click List settings.
-
Under General Settings, select Versioning settings to open the Versioning Settings page.
-
In the Content Approval section, select Yes in answer to the Require content approval for submitted items? In the Item Version History section, specify whether you want SharePoint to create versions when an item is edited. You can also choose to limit the number of versions that are retained.
-
In the Draft Item Security section, determine which users can see draft items in the list.
Tip: If you require content approval for a list or library that already contains items, all of the items in the library are marked Approved.
-
You can choose any of the following:
-
Users who can read items in the list
-
Only users who can edit items in the list
-
Only users who can approve items in the list, and the item author
-
-
Click OK.
Approval status
If someone submits an item to a list or library that requires approvals, it is in Pending status until someone (who has at least Manage Lists permissions level) approves it. While it is awaiting approval, it remains in Pending status.
Usually, when an item is in Pending status, only the item originator and the people who have permissions to manage lists and libraries can see it. After its status changes from Pending to Approved, it becomes visible to anyone who has permission to view the list or library. Rejected articles stay in the list or library until the originator—or someone else who has the necessary permissions—deletes them. Any items or files that already exist in the list or library are granted Approved status automatically.
Important: If security in the site library is configured to allow any user to read items, then anyone who has Read permissions to the site can see all items in the list or library, whether the items are in Approved status.
Only persons who have Full Control or Design permissions can alter List or Library settings.
Approving a document or list item
To approve a document that has been uploaded or added to a library that requires approvals, follow these steps:
-
Click the ellipses (...) next to the item you want to approve.
-
Click Advanced.
-
Click Approve/Reject. If Approve/Reject doesn't appear, click Advanced, and then click Approve/Reject. If the option doesn't appear at all, versioning may not be enabled, or you may not have permissions to approve a document.
-
Click Approved or Rejected under approval status. Optionally you can add comments in the comment section.
-
Click OK.
What do you want to do?
Specify that items or files in a list or library require approval
If someone submits an item or file to a list or library that requires approvals, it is in Pending status until someone who has the necessary permissions to do so approves it. While it is awaiting approval, it remains in Pending status.
Usually, when an item or file is in Pending status, only the originator of the item or file and the people who have permissions to manage lists and libraries can see it. After its status changes from Pending to Approved, it becomes visible to anyone who has permission to view the list or library. Rejected articles stay in the list or library until the originator—or someone else who has the necessary permissions—deletes them. Any items or files that already exist in the list or library are granted Approved status automatically.
Important: If security in the site library is configured to allow any user to read items, then anyone who has Read permissions to the site can see all items in the list or library, whether or not the items are in Approved status.
Only persons who have Full Control or Design permissions can alter List or Library settings.
To set up required approval of items or files
-
If the site list or library is not already open, click its name in the Quick Launch pane.
-
On the ribbon, click the Library tab in the Library Tools or List Tools group.
-
If you are working in a library, click Library Settings. If you are working in a list, click List settings. In this example, the Library Settings page opens.
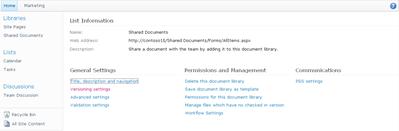
-
Under General Settings, select Versioning settings. The Versioning Settings page opens.
-
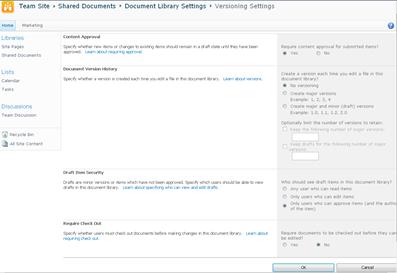
In the Content Approval section, select Yes in answer to the Require content approval for submitted items? question.
-
In the Draft Item Security section, determine which users can see draft items in the document library. In this example, Only users who can approve items (and the author of the item) is selected.
-
Click OK.
The following example shows Approved items in a library after the Require content approval option was set to Yes. Because these files were already in the library, they were approved automatically.

Remove approval requirement from a site list or library
Your organization might, eventually, find it inconvenient or unnecessary to require approval for every item of file in a particular list or library. That requirement not only demands time from the person who has to grant or deny approval, but it also prevents people from easily collaborating on a file or item. If you determine that your organization no longer needs to have every item or file approved, you can remove the requirement.
To remove the requirement for approval of items or files in a list or library
-
If the site list or library is not already open, click its name in the Quick Launch pane.
-
On the ribbon, click the Library tab in the Library Tools group or the List tab in the List Tools group.
-
If you are working in a library, click Library Settings. If you are working in a list, click List Settings. In this example, the Library Settings page opens.
-
Under General Settings, select Versioning settings. The Versioning Settings page opens.
-
In the Content Approval section, select No in answer to the Require content approval for submitted items? question. A warning message pops up.
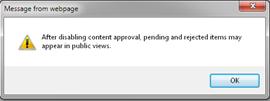
-
Click OK to close the message.
-
Click OK to close the Versioning Settings dialog box. When you return to your list or library, Approval Status is no longer available on the page. All users who have permission to view the list or library can view all content that resides there.
No comments:
Post a Comment