Add a site mailbox to keep email in context
Using email is a great way to work and communicate with your team. Adding a mailbox to your site can help by providing a central place to file email and documents that can only be accessed and edited by those with the appropriate site permissions.
Important: The site mailbox feature in SharePoint Online is being deprecated beginning in March, 2017. This feature will be removed entirely in a future release. New SharePoint Online organizations no longer have access to the site mailbox feature. Existing SharePoint Online organizations can no longer create new site mailboxes. Any site mailbox that was set up and deployed before March, 2017 will continue to function.
We will provide a process to help transition your existing site mailbox sites to an Office 365 Group in September, 2017. If you currently use the site mailbox feature in SharePoint Online, you should consider changing to Office 365 Groups instead to support your email collaborative scenarios. For more information, see Use Office 365 Groups instead of Site Mailboxes.
Note: The site mailbox feature is still available in SharePoint Server 2016, SharePoint 2013 and SharePoint 2010 products.
To get started with a site mailbox, you first need to add the Site Mailbox app.
Note: Once you've created a site mailbox, you can't change its email address. Since the email address for a site mailbox is the display name of the site, when you name the site, choose a name that will also work well as the email address.
After adding the app, you can change the Mailbox link on the Quick Launch so that it is conveniently available if you intend to use the mailbox frequently. The first time you open the mailbox, you will be prompted to set up the language and time zone options.
Tip: Want to learn more about how to leverage site mailboxes in your organization? Take a look at Overview: Use a site mailbox to collaborate with your team. There's also a great blog post about site mailboxes.
Add the Site Mailbox app to your site
There are two ways to add the Site Mailbox app to your site. The quickest way is to click the Keep email in context tile on the Get started with your site web part.

After you click this tile, click Add It on the screen that follows.
If your site doesn't use the Get started with your site web part, the other way to add the Site Mailbox app is by doing the following.
-
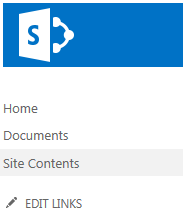
On the Quick Launch, click Site Contents.
-
On the Site Contents page, click Add an App.

-
On the Your Apps page, click Site Mailbox.
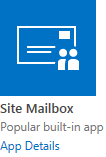
After adding the Site Mailbox app to the site, you may want to change its location on the Quick Launch. Then, the first time you open it, you will be prompted to set up the site mailbox.
Change the Mailbox link on the Quick Launch (optional)
After you have added the Site Mailbox app to your site, it can be helpful to include a link to it on the Quick Launch, so that it can be easily accessed by those who use your site. By default, after being initially installed, it is included on the Quick Launch under Recent.
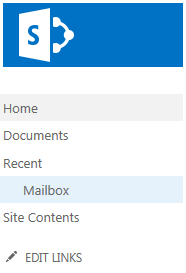
However, it might make more sense to give it a more "permanent" spot on the Quick Launch.
Note: Quick Launch links can be removed or rearranged at any time. The steps included in this section simply move the Mailbox link out from under the Recent heading.
To move the link to the Site Mailbox app on the Quick Launch:
-
On the Quick Launch, click Edit Links.
-
Drag the Mailbox link to the location where you want it to be listed on the Quick Launch.
-
Click the X to the right of the Recent link to remove it from the Quick Launch.
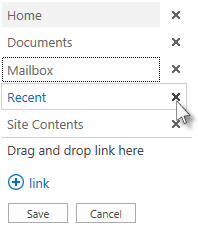
Note: If there are other links listed below Recent, it may make more sense to leave it on the Quick Launch, rather than remove it.
-
Click Save.
Set up the site mailbox
After you have added the Site Mailbox app to your site, the next step is to set up the site mailbox itself. You only need to do this step one time.
-
On the Quick Launch, click Mailbox.
-
When the site mailbox is created, click Mailbox on the Quick Launch again, and then, on the Exchange Admin Center page, choose your Language and Time zone.
-
Click Save to finish setting up your site mailbox.
It can take up to 30 minutes for this setup process to complete. When the site mailbox is fully configured, an email message is sent to everyone in the site's Default Owners and Default Members lists. While you wait, you can continue using your site.
Note: If you have multiple domains, the site mailbox uses the domain specified as the default domain.
If a person who will be using the site mailbox is also using Outlook, there are some additional setup considerations. To see which versions of Outlook are supported, and to understand how to add users to SharePoint groups in order for them to access the site mailbox in Outlook, see Use Office 365 Groups instead of Site Mailboxes.
Tips:
-
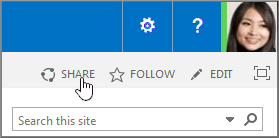
Want to share your site mailbox with others? Click Share in the top-right corner of your site, and then enter the names or email addresses of the people you want to invite.
-
No comments:
Post a Comment