Create forms that users complete or print in Word
You can create a form in Microsoft Word by starting with a blank document or template and adding content controls, including check boxes, text boxes, date pickers, and drop-down lists. Other people can use Word to fill out the form on their computer. In an advanced scenario, any content controls that you add to a form can also be linked to data.
Note: You can print a form that was created by using content controls, but the boxes around the content controls will not be printed.
Follow these steps to create a form in Word.
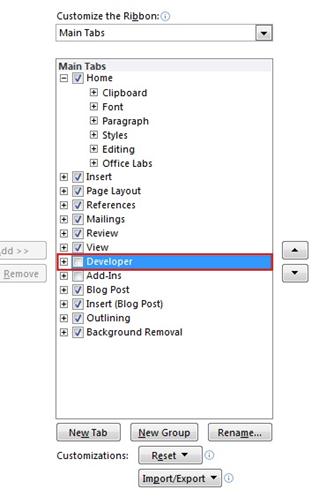
Step 1: Show the Developer tab
-
Click the File tab.
-
Click Options.
-
Click Customize Ribbon.
-
Under Customize the Ribbon, click Main Tabs.
-
In the list, select the Developer check box, and then click OK.
Step 2: Open a template or a document on which to base the form
To save time, you can start with a form template. Or you can start with a blank document and save as either a document or template to re-use in the future.
Start with a form template
-
Click the File tab.
-
Click New.
-
Search for Forms in the Templates search box.
-
Click the form that matches the type you want to create.
-
Click Download if you're using Word 2010, or Create if you're using Word 2013 or 2016.
-
Click the File tab again, click Save As and pick a location to save the form.
-
In the Save As dialog box, type a name for the new template or document, and then click Save.
Start with a blank document
If you want to create your own template, start with a new document and save the new document as a template.
-
In the form document you've created, click the File tab.
-
Click Save As.
-
Under Save as type, select Word template from the menu.
-
In the Save As dialog box, type a file name for the new template, and then click Save.
Step 3: Add content to the form
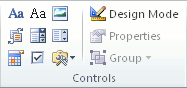
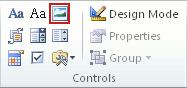
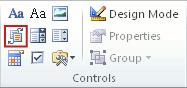
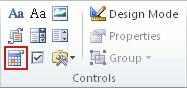
On the Developer tab, in the Controls group, click Design Mode, and then insert the controls that you want.
Do any of the following:
Insert a text control where users can enter text
Insert a building block control
Insert a combo box or a drop-down list
Insert a text control where users can enter text
In a rich text content control, users can format text as bold or italic, and they can type multiple paragraphs. If you want to limit what users add, insert the plain text content control.
-
Click where you want to insert the control.
-
On the Developer tab, in the Controls group, click Rich Text Content Control
 or Plain Text Content Control
  .
.
To set specific properties on the control, see Step 4: Set or change properties for content controls.
Insert a picture control
Note: July 11, 2016: If you try to use the picture content control as a template in Office 2016, but you're unable to, update to Office 2016 build 16.0.6965.2063. To get the update immediately, open any Office 2016 app and click File > Account > Update Options >Update Now. To find out more, go to our release notes page, and under Channel, click Current.
A picture control is often used for templates, but you can also add a picture control to a form.
-
Click where you want to insert the control.
-
On the Developer tab, in the Controls group, click Picture Content Control.
To set specific properties on the control, see Step 4: Set or change properties for content controls.
Insert a building block control
You can use building block controls when you want people to choose a specific block of text. For example, building block controls are helpful if you're setting up a contract template, and you need to add different boilerplate text depending on the contract's specific requirements. You can create rich text content controls for each version of the boilerplate text, and then you can use a building block control as the container for the rich text content controls.
You can also use a building block control in a form.
-
Click where you want to insert the control.
-
On the Developer tab, in the Controls group, click Building Block Content Control (in Word 2016, this is labeled Building Block Gallery Content Control).
To set specific properties on the control, see Step 4: Set or change properties for content controls.
Insert a combo box or a drop-down list
In a combo box, users can select from a list of choices that you provide or they can type in their own information. In a drop-down list, users can only select from the list of choices.
-
On the Developer tab, in the Controls group, click the Combo Box Content Control
 or Drop-Down List Content Control
  .
. -
Select the content control, and then on the Developer tab, in the Controls group, click Properties.
-
To create a list of choices, under Drop-Down List Properties, click Add.
-
Type a choice in the Display Name box, such as Yes, No, or Maybe.
Repeat this step until all of the choices are in the drop-down list.
-
Fill in any other properties that you want.
Note: If you select the Contents cannot be edited check box, users won't be able to click a choice.
Insert a date picker
-
Click where you want to insert the date picker control.
-
On the Developer tab, in the Controls group, click the Date Picker Content Control.
To set specific properties on the control, see Step 4: Set or change properties for content controls.
Insert a check box
-
Click where you want to insert the check box control.
-
On the Developer tab, in the Controls group, click the Check Box Content Control.

To set specific properties on the control, see Step 4: Set or change properties for content controls.
Use the legacy form controls
-
Click where you want to insert a legacy control.
-
On the Developer tab, in the Controls group, click the Legacy Forms drop-down.
-
Select the Legacy Form control or Active X Control that you want to include.
Step 4: Set or change properties for content controls
Each content control has properties that you can set or change. For example, the Date Picker control offers options for the format you want to use to display the date.
-
Click the content control that you want to change.
-
On the Developer tab, in the Controls group, click Properties, and change the properties that you want.
Step 5: Add instructional text to the form
Instructional text can enhance the usability of the form you create and distribute. You can change the default instructional text in content controls.
To customize the default instructional text for your form users, do the following:
-
On the Developer tab, in the Controls group, click Design Mode.
-
Click the content control where you want to revise the placeholder instructional text.
-
Edit the placeholder text and format it any way you want.
-
On the Developer tab, in the Controls group, click Design Mode to turn off the design feature and save the instructional text.
Note: Do not select the Contents cannot be edited check box if you want form users to replace the instructional text with their own text.
Step 6: Add protection to a form
Protecting a form means it can't be changed; people can fill out a protected form, but they can't change the controls or control properties. Add protection to your form by making all the form content into a group.
Tip: If you want, you can test the form prior to distributing it. Open the form, fill it out as the user would, and then save a copy in a location that you want.
-
Open the form that you want to add protection to.
-
On the Home tab, in the Editing group, click Select, and then click Select All.

Keyboard shortcut: Click in the document and press CTRL+A.
-
On the Developer tab, in the Controls group, click Group, and then, if prompted, click Group again.
Follow these steps to create a form in Word.
Step 1: Set up Word for creating forms
-
Click the Microsoft Office Button
 , and then click Word Options.
 -
Click Popular.
-
Select the Show Developer tab in the Ribbon check box, and then click OK.
Note: The Ribbon is a component of the Microsoft Office Fluent user interface.
Step 2: Open a template or a document on which to base the form
-
Click the Microsoft Office Button
, and then click New. -
Under Templates, click My templates.
-
Double-click Normal, and then click Template or Document under Create New.
-
Click the Microsoft Office Button
, and then click Save As. -
In the Save As dialog box, give the new template or document a file name, and then click Save.
Step 3: Add content controls to the form
Design the form by sketching a layout first, or use an existing form as a guide. In your form, you can add content controls, tables, and other graphics elements.
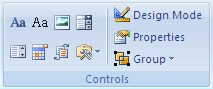
On the Developer tab, in the Controls group, click Design Mode, and then click where you want to insert a control.
Do any of the following:
Insert a text control where users can enter textrtext
Insert a drop-down list that restricts available choices to those you specify
Insert a text control where users can enter text
-
On the Developer tab, in the Controls group, click the Rich Text control
or the Text control .
Insert a text fill-in field
Important: Spell Check will not flag any errors that are typed in the text form field. If you want to run Spell Check, use the Rich Text control or the Text control.
-
On the Developer tab, in the Controls group, click Legacy Tools.
-
Click Text Form Field.
-
In the Controls group, click Design Mode, and then do any of the following:
-
To add a line under the field, select the field, and then click Underline in the Font group on the Home tab.
-
To limit the amount of information a person can type in the field, set a maximum width by selecting the field, clicking Properties in the Controls group, and entering a value under Maximum length.
-
To make the field look as long as its maximum length, add instructional text by clicking Properties in the Controls group, and typing text, such as Type your first name here, under Default text.
-
Insert a drop-down list that restricts available choices to those you specify
-
On the Developer tab, in the Controls group, click the Drop-Down List control
. -
Select the content control, and then on the Developer tab, in the Controls group, click Properties.
-
To create a list of choices, under Drop-Down List Properties, click Add.
-
Type a choice in the Display Name box, such as Yes, No, or Maybe.
Repeat this step until all of the choices are in the drop-down list.
Insert a check box
-
On the Developer tab, in the Controls group, click Legacy Tools.
-
Click Check Box Form Field.
-
Type a space, and then type a label for the check box.
-
To remove the shading from the check box, click Legacy Tools, and then click Shading.
Note: You won't be able to select or clear the check box until you protect the form.
Step 4: Set or change properties for content controls
Each content control has properties that you can set or change. For example, the Date Picker control offers options for the format you want to use to display the date.
-
Right-click the content control that you want to change.
-
Click Properties, and change the properties that you want.
Step 5: Add instructional text to the form
Instructional text can enhance the usability of the form you create and distribute. You can change the default instructional text in content controls.
To customize the default instructional text for your form users, do the following:
-
On the Developer tab, in the Controls group, click Design Mode.
-
Click the content control where you want to revise the placeholder instructional text.
-
Edit the placeholder text and format it any way you want.
-
If you want the content control to disappear when someone types in their own content to replace your instructions in a Rich Text control or a Text control, click Properties in the Controls group, and then select the Remove content control when contents are edited check box.
-
On the Developer tab, in the Controls group, click Design Mode to turn off the design feature and save the instructional text.
Note: Do not select the Contents cannot be edited check box if you want form users to replace the instructional text with their own text.
Step 6: Add protection to a form
You can protect individual content controls in a form template to help prevent someone from deleting or editing a particular content control or group of controls, or you can prepare a form to be distributed and filled out by locking it. You can help protect all of the form template content with a password.
Tip: If you want, you can test the form prior to distributing it. Open the form, fill it out as the user would, and then save a copy in a location that you want.
-
Open the form that you want to protect.
-
Select the content control or the group of controls to which you want to restrict changes.
To group several controls, select the controls by pressing SHIFT and clicking each control that you want to group. On the Developer tab, in the Controls group, click Group, and then click Group.
-
On the Developer tab, in the Controls group, click Properties.
-
In the Content Control Properties dialog box, under Locking, do either of the following:
-
Select the Content control cannot be deleted check box, which allows the content of the control to be edited but the control itself cannot be deleted from the template or a document that is based on the template.
-
Select the Contents cannot be edited check box, which allows you to delete the control but does not allow you to edit the content in the control.
Note: This option is not available for all controls.
-
Step 7: Prepare a form for distribution
-
Open the form that you want to lock so that it can be filled out.
-
On the Developer tab, in the Protect group, click Protect Document, and then click Restrict Formatting and Editing.

-
In the Protect Document task pane, under Editing restrictions, select the Allow only this type of editing in the document check box.
-
In the list of editing restrictions, select Filling in forms.
-
Under Start enforcement, click Yes, Start Enforcing Protection.
-
To assign a password to the document so that only reviewers who know the password can remove the protection, type a password in the Enter new password (optional) box, and then confirm the password.
Important: If you choose not to use a password, anyone can change your editing restrictions.
Use strong passwords that combine uppercase and lowercase letters, numbers, and symbols. Weak passwords don't mix these elements. Strong password: Y6dh!et5. Weak password: House27. Passwords should be 8 or more characters in length. A pass phrase that uses 14 or more characters is better.
It is critical that you remember your password. If you forget your password, Microsoft cannot retrieve it. Store the passwords that you write down in a secure place away from the information that they help protect.
No comments:
Post a Comment