Add or remove page numbers in Word for Mac
Page numbers appear in the header or footer at the top or bottom of the page.
Add page numbers
-
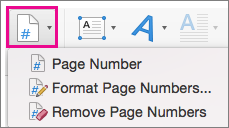
On the Insert tab, click the Page Number icon, and then click Page Number.
-
In the Page Numbers dialog box, select a location, such as Bottom of page (Footer)) and then pick an alignment style. Word automatically numbers every page, except designated title pages.
-
To change the numbering style, in the Page Numbers dialog box, click Format and then choose the formatting you want to use.
-
Click OK twice to close both dialog boxes.
Remove page numbers
Caution: If you have headers or footers set up, using this option might remove them entirely. Instead, open the header or footer, select the page number, and then press Delete. You might need to temporarily move or resize any objects that are on top of the page number so you can select it.
-
On the Insert tab, click the Page Number icon, and then click Remove Page Numbers.
Note: If the Remove Page Numbers button is not available, double-click in the header or footer, select the page number, and press Delete.
Tips
-
Page numbers can be formatted for each section individually. To change the format or style or start number for a section, put your cursor somewhere in that section, and then on the Insert tab, select the Page Number icon, and then select Format Page Numbers.
-
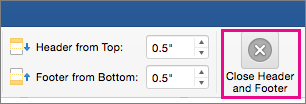
Sometimes when you work with page numbers, the header or footer area might stay open. To close the header or footer, on the Header & Footer tab, click Close Header and Footer, or double-click anywhere outside the header and footer area.
See also
Add page number X of Y to a document
Add page numbers
-
On the View menu, click Print Layout.
-
On the Document Elements tab, under Header and Footer, click Page #.
-
Select the options that you want.
Position page numbers anywhere on the page
Word inserts page numbers in frame, which you can position anywhere on the page.
-
On the View menu, click Print Layout.
-
On the Insert menu, click Page Numbers, and then click OK.
-
On the View menu, click Header and Footer.
-
Click the page number to display the frame around the page number, and then drag the frame that contains the page number to a new location.
-
To return to your document, click
 .
.Tip: If you move the page numbers outside the header area or footer area, the page numbers are still part of the header or footer, even though they seem to be on a different part of the page. To edit or format the page numbers, on the View menu, click Header and Footer.
Remove page numbers
-
On the View menu, click Print Layout.
-
On the View menu, click Header and Footer.
-
Select the page number, and then click the frame around the page number, so that the resize handles appear.
-
Press DELETE .
Note: To remove page numbers from part of a document, divide the document into sections. For more information, see Insert, delete, or change a section break.
Hide the page number on the first page
Sometimes you want to suppress the page number on the first page. For example, a title page or a cover page usually has no page number.
-
On the Document Elements tab, under Header and Footer, click Page #.
-
Clear the Show number on first page check box.
Note: If your document is divided into sections, select the sections in which you want to hide the page number on the first page of the section.
No comments:
Post a Comment