Introduction to Excel Web Access Web Part
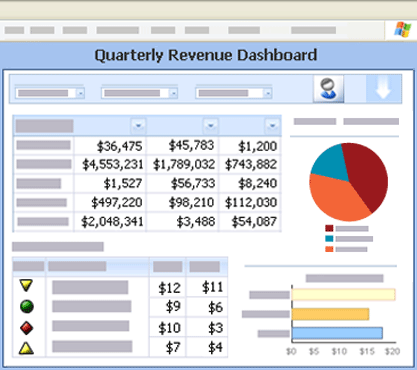
An Excel Access Web Part is a SharePoint technology that displays an Excel workbook from a document library. You can connect an Excel Web Access Web Part to any workbook in a SharePoint document library, and then use it on a dashboard or other SharePoint page. For example, you might want to display selected elements of a quarterly report on a dashboard.

You can display all of a, multi-sheet workbook in a single Excel Web Access Web Part, or select only one element of a workbook to publish as a named item. For example, you can divide a source workbook into multiple sections (based on single worksheets, named items, or other objects), and publish those sections separately. Then, you can connect the separated sections to individual Web Parts, and can control access to workbook sections by configuring permissions to the Web Part page. In addition, you can connect published Web Parts to one another, which enables cross-filtering and dynamic data refresh. Finally, an Excel Web Access Web Part is re-usable; if you want, you can use the same Excel Web Access Web Part on many Web pages.
When you use an Excel Access Web Part, you can easily and securely share reports together with other users, and analyze and explore data.
In this article
What is an Excel Web Access Web Part?
A workbook in an Excel Web Access Web Part is very similar in appearance and behavior to a workbook in Microsoft Excel. For example, a workbook in an Excel Web Access Web Part can have sheet tabs, outline buttons, and drop-down arrows. There are several ways to customize the Web Part.

1. The top section contains the title and a toolbar that has several menus, commands, and a drop-down list.
2. The main window displays one or more worksheets (in Worksheet view) or a named item such as a chart or an Excel table (in Named Item view). In addition, the main window might display an outline of the workbook contents.
3. The Parameters Pane, which appears when the parameters are defined in the source workbook, has labeled text boxes for data entry of defined parameters and optional tool tips that provide more information about each parameter.
4. The bottom section displays refresh data messages.
To display a workbook in an Excel Web Access Web Part, you must add the Web Part to a page and then connect the workbook to the Web Part. As a final step, you can customize the Web Part by selecting properties in the Excel Web Access tool pane for the Web Part. By configuring properties, you can control the size and layout of the Web Part, and control the ways that users can interact with the workbook.
Add an Excel Web Access Web Part to a page
This procedure describes the specific steps that you have to take to add an Excel Web Access Web Part to an existing Web Part page. To add a Web Part to a page, you must belong to the default <Site Name> Members SharePoint group for the site.
If no appropriate page exists, you might have to create a site page.
To add an Excel Web Access Web Part to a Web Part page, follow these steps.
-
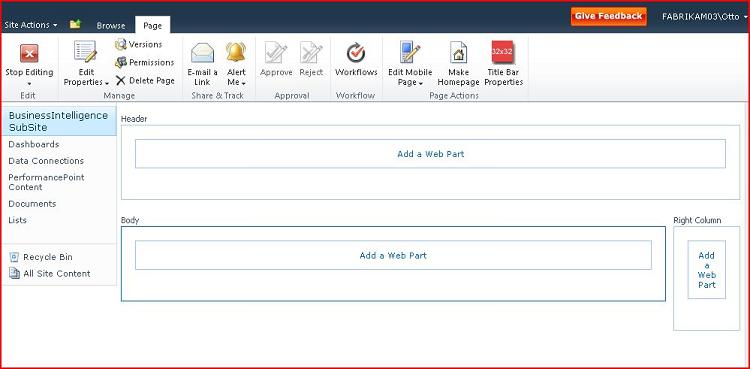
From the Web Part page where you want to add an Excel Web Access Web Part, locate the Web Part zone that you want to use. In the zone, click Add a Web Part. .
-
 The following illustration shows an example of a newly created Web Part page. The page contains a Header zone and one Body zone. Each zone contains the Add a Web Part box.
 -
In the zone where you want to add the Excel Web Access Web Part, click Add a Web Part to display the Create dialog box.
-
In the Create dialog box, select Excel Web Access. Then, click Add.
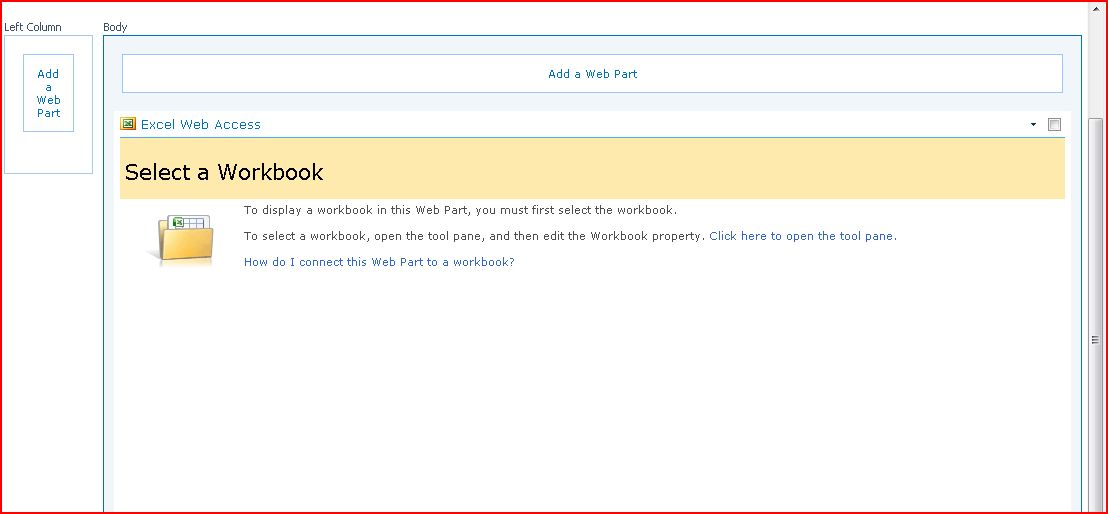
This adds the Web Part to the page and displays the Select a Workbook pane.
Connect a workbook to a Web Part
-
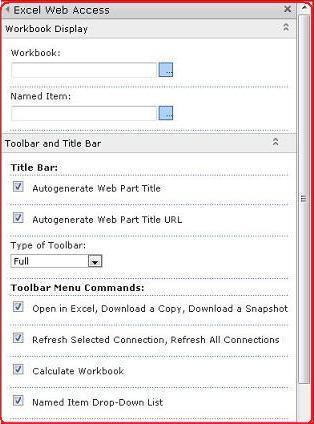
In the Excel Web Access Select a Workbook pane, click the link Click here to open the tool pane. The page changes to Edit mode, and displays the Excel Web Access tool pane.

-
 In the Workbook Display section in the Workbook text box, enter the URL or UNC of the workbook. If you do not know the URL, you can click the browse button, and then select the workbook that you want to use.
 -
In the Toolbar and Title Bar section and in the Navigation and Interactivity section, select one or more properties that you want to enable. If you want to disable a property, clear the associated check box.
To save changes and exit Web Part Edit mode, you can click OK at the bottom of the Web Part tool pane. Or, to stop editing and view the workbook in Display mode, click Stop Editing.
This displays the Web Part that you configured to use its associated workbook on the page.
No comments:
Post a Comment