Sunday, January 1, 2017

Get a digital ID

Get a digital ID

A digital ID enables you to send digitally signed messages using Microsoft Outlook. A digital ID—also known as a digital certificate—helps prove your identity and helps prevent message tampering to protect the authenticity of an email message. You also can encrypt messages for greater privacy.

Note: A digital signature isn't the same as a message signature, which is a customizable salutation. A digital signature adds unique code to a message that only comes from the digital ID held by the true sender.

What would you like to do?

A digital ID is issued by an independent certification authority. By using this procedure, you'll get a list of several certification authorities in your web browser. Your organization, however, may have policies that require a different procedure. See your network administrator for more information.

  1. On the File tab, click Options > Trust Center.

  2. Under Microsoft Outlook Trust Center, click Trust Center Settings.

  3. On the E-mail Security tab, under Digital IDs (Certificates), click Get a Digital ID.

    Note: Your web browser opens and displays a webpage on the Microsoft Office Online website that lists several certification authorities. Click the one that you want to use and follow the instructions on the webpage to register for a digital ID. The certification authority will then send you a digital ID and instructions via email.

You might choose to have more than one digital ID—one for your digital signature, which in many areas can have legal significance, and another for encryption.

  1. On the File tab, click Options > Trust Center.

  2. Under Microsoft Outlook Trust Center, click Trust Center Settings.

  3. On the E-mail Security tab, under Encrypted e-mail, click Settings.
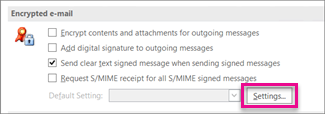
    Settings

    Note: If you have a digital ID, the settings to use the digital ID are automatically configured for you. If you want to use a different digital ID, follow the remaining steps in this procedure.

  4. Under Security Setting Preferences, click New.

  5. In the Security Settings Name box, enter a name.

  6. In the Cryptography Format list, click S/MIME. Depending on your certificate type, you can choose Exchange Security instead.

  7. Next to the Signing Certificate box, click Choose, and then select a certificate that is valid for digital signing.

    Note: To learn if the certificate is intended for digital signing and encryption, in the Select Certificate dialog box, click View Certificate. An appropriate certificate for cryptographic messaging (such as digital signing) might state, for example, "Protects email messages."

  8. Select the Send these certificates with signed messages check box unless you'll be sending and receiving signed messages only within your organization.

    Note: The settings that you choose become the default when you send cryptographic messages. If you don't want these settings to be used by default for all cryptographic messages, clear the Default Security Setting for this cryptographic message format check box.

To send and receive encrypted email messages, both the sender and the receiver must share their digital ID certificates with each other.

  1. Open a message that is digitally signed as indicated in the message list by a Signature icon.

  2. Right-click the name in the From box, and then click Add to Outlook Contacts.

  3. If you already have an entry for this person, in the Duplicate Contact Detected dialog box, select Update information of selected Contact.

    Notes: 

    • A backup copy is saved in the Deleted Items folder.

    • The certificate is now stored with your contact entry for this recipient. You can now send encrypted messages to this person.

    • To view the certificate for a contact, double-click the person's name, and then click the Certificates tab.

View a certificate for a contact

  1. On the Navigation bar, click People.

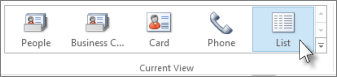
  2. On the Home tab, click List.

    Change the current view to 'List'

  3. Double-click the person's name, and then on the Contact tab, click Certificates.
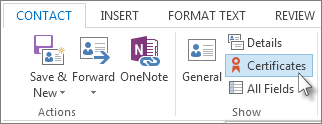
    Show the certificates of a specific person

Note: This feature requires a Microsoft Exchange Server account.

To get an Exchange Server digital ID—for example, through Key Management Service—the administrator of your Exchange account must have security running on the server and give you a special password, which is known as a token. For more information, see your Exchange administrator.

  1. On the File tab, > Options > Trust Center

  2. Under Microsoft Outlook Trust Center, click Trust Center Settings.

  3. On the E-mail Security tab, under Digital IDs (Certificates), click Get a Digital ID.

  4. Click Set up Security for me on the Exchange > OK

  5. In the Digital ID Name box, type your name.

  6. In the Token box, type the special password that your Exchange administrator assigned to you.

  7. In the Microsoft Office Outlook Security Password dialog box, type a different password for the digital ID, and then type the password again in the Confirm box.

    Note: You'll receive a message in your Inbox from the Exchange administrator which requires you to enter the password created in this step.

  8. In the dialog box that appears, enter your password, select the Remember password for check box, and then enter the number of minutes that you want Outlook to remember your password.

  9. In the Root Certificate Store message that appears, click Yes.

What would you like to do?

  1. On the Tools menu, click Trust Center, and then click E-mail Security.

  2. Under Digital IDs (Certificates), click Get a Digital ID.

  3. Click Get an S/MIME certificate from an external Certification Authority, and then click OK.

    Outlook starts your web browser and opens a webpage on the Microsoft Office Online website that lists several certification authorities. Click the one that you want to use and follow the instructions on the webpage to register for a digital ID. The certification authority will then send you a digital ID and instructions via e-mail.

  1. On the Tools menu, click Trust Center, and then click E-mail Security.

  2. Under Encrypted e-mail, click Settings.

    Note: If you have a digital ID, the settings to use the digital ID are automatically configured for you. If you want to use a different digital ID, specify the digital ID by following the remaining steps in this procedure.

  3. At the bottom of the Security Setting Preferences section, click New.

  4. In the Security Settings Name box, enter a name.

  5. In the Cryptography Format list, click S/MIME. Depending on your certificate type, you can choose Exchange Security instead.

  6. Next to the Signing Certificate box, click Choose, and then select a certificate that is valid for digital signing.

    Note: To learn if the certificate is intended for digital signing and encryption, on the Select Certificate dialog box, click View Certificate. An appropriate certificate for cryptographic messaging (such as digital signing) might say, for example, "Protects e-mail messages."

  7. Next to the Encryption Certificate box, click Choose, and then select a certificate that is valid for encryption.

  8. Select the Send these certificates with signed messages check box unless you will be sending and receiving signed messages only within your organization.

    Note: The settings that you choose become the default whenever you send cryptographic messages. If you do not want these settings to be used by default for all your cryptographic messages, clear the Default Security Setting for all cryptographic messages check box.

  1. Open a message that has been digitally signed.

  2. Right-click the name in the From box, and then click Add to Outlook Contacts on the shortcut menu.

  3. If you already have an entry for this person, in the Duplicate Contact Detected dialog box, select Update information of selected Contact. A backup copy will be saved in Deleted Items Folder.

    The certificate is now stored with your contact entry for this recipient. You can now send encrypted e-mail messages to this person.

    To view the certificate for a contact, double-click the person's name, and then click the Certificates tab.

This feature requires you to use a Microsoft Exchange Server 2000, Exchange Server 2003, or Exchange Server 2007 account. Most home and personal accounts don't use Microsoft Exchange.

To get an Exchange digital ID—for example, through Key Management Service—your Exchange administrator must have security running on the server and must give you a special password, called a token. Your Exchange will then send you a message verifying your token. For more information, see your Exchange administrator.

  1. On the Tools menu, click Trust Center, and then click E-mail Security.

  2. Under Digital IDs (Certificates), click Get a Digital ID.

  3. Click Set up Security for me on the Exchange.

  4. Click OK.

  5. In the Digital ID Name box, type your name.

  6. In the Token box, type the special password that your Exchange administrator assigned to you.

  7. In the Microsoft Office Outlook Security Password dialog box, type a different password for the digital ID, and then type the password again in the Confirm box.

    You will receive a message in your Inbox from your Exchange administrator that will require you to enter the password you created in this step.

  8. In the dialog box that appears, enter your password, click the Remember password for check box, and then enter the number of minutes for which you want Outlook to remember your password.

  9. In the Root Certificate Store message that appears, click Yes.

Create and send e-mail publications by using Publisher

Create and send e-mail publications by using Publisher

E-mail can be an efficient and cost-effective way to keep in touch with customers. When you use Microsoft Office Outlook 2007 as your e-mail program, you can quickly and easily send a publication in e-mail while you work in Microsoft Office Publisher 2007.

In this article

Choose the best e-mail delivery method

Create your e-mail publication

Send your e-mail publication

Choose the best e-mail delivery method

You can use Office Publisher 2007 to send professional-looking e-mail messages in any of the following ways:

  • Send a single-page e-mail message by using Office Outlook 2007.

  • Create an e-mail merge with content that is personalized for each recipient on your mailing list.

  • Send your publication as an attachment, whether as a publication, as a PDF file, or as an XPS file.

Before you decide which option to use, think about your content, your tools, and the needs of your audience. Use the following table to help you determine which e-mail option can best serve your purposes.

Your goals and audience needs

Send as message

Create e-mail merge

Send as publication

Send as PDF or XPS

You don't know which HTML-enabled e-mail programs the recipients of your message use

X

X

X

You don't know whether the recipients have Publisher

X

X

X

You know that the recipients have Publisher

X

You want the recipients to read and print the content in its original format

X

X

You want to send each recipient a personalized message

X

You want to send your publication by using an e-mail program that isn't Outlook

X

X

Send a message

When you send a publication as an e-mail message, recipients can read your message in HTML-enabled mail clients — such as Windows Live Hotmail, MSN Hotmail, AOL, and Yahoo, and in Microsoft Outlook, Outlook Express, and Windows Mail. Recipients do not need to have Publisher installed to view the message, because the page that you send appears in the body of the e-mail message.

Important: This option requires that you use Microsoft Office Outlook 2007, Microsoft Office Outlook 2003, Outlook Express (version 5.0 or later), or Windows Mail as your default e-mail program.

How do I set my default program for e-mail?

Windows Vista

  1. Click the Start button Button image , and then click Control Panel.
  2. In Control Panel Home, click Network and Internet, and then click Internet Options, or in Classic View, double-click Internet Options.

  3. In the Internet Properties dialog box, click the Programs tab.

  4. On the Programs tab, click Set programs.

  5. In the Default Programs window, click Set your default programs.

    • Under Programs, click the program that you want to use as your default e-mail program, click Set this program as default, and then click OK.

Microsoft Windows XP

  1. Click Start, and then click Control Panel.
  2. In Category View, click Network and Internet Connections, and then click Internet Options, or in Classic View, double-click Internet Options.

  3. In the Internet Properties dialog box, click the Programs tab.

  4. In the E-mail list, click the arrow to select the e-mail program that you want to use, and then click OK.

Note: Making a program the default program for e-mail, contacts, and calendar does not automatically add or configure e-mail accounts in your Outlook profile. Before you can send or read e-mail messages in Outlook, you must add and configure the e-mail account as well. For more information about adding and configuring e-mail accounts, see the links in the See Also section.

Newsetter as e-mail message

Send an attachment

When you send a publication as an e-mail attachment, the recipient must have the appropriate program that will open the attachment to view the publication, whether it is Office Publisher 2007 or Microsoft Publisher 2003 for a publication, Adobe Acrobat Reader for a PDF file, or Microsoft Windows XP or Windows Vista for an XPS file.

Top of Page

Create your e-mail publication

You can create a publication to send as an e-mail message in three different ways:

  • You can send an existing publication as your e-mail message.

  • You can start with one of the many predesigned e-mail publications.

  • You can start with a blank publication.

    Important: To use the Send E-mail command in Office Publisher 2007, you must have one of the following programs installed on your computer:

    • Microsoft Office Outlook 2007

    • Microsoft Office Outlook 2003

    • Outlook Express (version 5.0 or later)

    • Windows Mail

Using e-mail merge

No matter how you create the publication in Office Publisher 2007, you can insert a personalized note for each recipient by creating an e-mail merge. Create an e-mail merge when you want to send a large number of messages that are mostly identical but you also want to include some unique information in each message. For more information about e-mail merge, see Create an e-mail merge.

Base an e-mail message on an existing publication

If you already created specific print publications for keeping in touch with your customers, you can easily broaden the reach of your communications by sending one of these publications as a single-page e-mail message. For example, if you create a newsletter for customers, send it — with all of your top stories — as an e-mail message.

When you send an e-mail message in Office Publisher 2007, Publisher does the work for you. If your publication has multiple pages, you are given the option to send the current page or all pages. If you choose to send all pages, Publisher combines the contents of all pages onto one e-mail page. You can preview this page and rearrange the text and graphics. You also can insert the content that Publisher left in the Extra Content task pane because Publisher could not determine where to insert it.

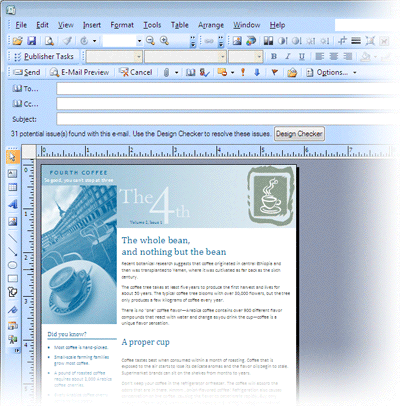
Before you send the e-mail message, Design Checker checks your message for potential issues, such as fonts that don't display well online (non-Web-ready fonts) and text that will be exported as an image (which increases the file size of the e-mail message). Design Checker suggests fixes for each of the issues that it finds.

Send an existing publication as an e-mail message

  1. Open the publication that contains the page or pages that you want to send as an e-mail message.

  2. On the File menu, point to Send E-mail, and then click Send as Message.

  3. In the Send as Message dialog box, click Send all pages or Send current page only, and then click OK.

    Note: If your publication has only one page, the Send as Message dialog box does not appear.

  4. If you clicked Send all pages, choose whether to save the current publication before it is formatted for e-mail, and then click OK.

  5. Publisher arranges your content on a single page. You can rearrange the text boxes, pictures, and other objects as you can in any publication. If you have content in the Extra Content task pane on the left, do one of the following:

    • To delete an item in the Extra Content task pane, click the arrow to the right of the item, and then click Delete.

    • To insert the extra content from the task pane into your publication, click the arrow to the right of each item, and then click Insert.

    • To move the extra content to the Content Library, click the arrow to the right of each item, and then click Move to Content Library.

  6. Click Design Checker above the top ruler in your e-mail publication. In the Design Checker task pane on the left, confirm that Run e-mail checks (current page only) is selected, and then review the list of items to fix and how to fix them.

Start with a predesigned e-mail publication

Office Publisher 2007 includes many designs for attractive, high-impact e-mail publications that you can easily send as messages.

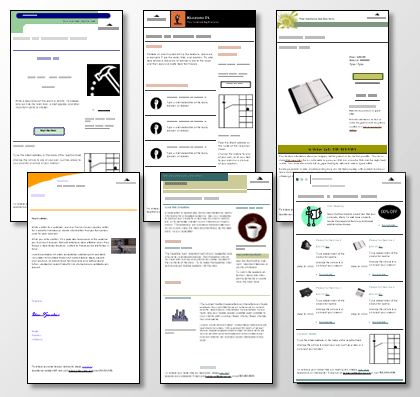
The e-mail publication types include newsletters, letters, event notices, and product lists. For each of these e-mail publication types, you can choose from among 45 master designs to create e-mail that is consistent with the other business communications and marketing materials that you create in Office Publisher 2007. You can then customize your e-mail publication by replacing the placeholder text and graphics with your own content.

E-mail templates in Publisher 2007

Start with a predesigned publication

  1. Start Publisher.

  2. In the Publication Types list, click E-mail.

  3. Under E-mail, click Newer Designs or Classic Designs.

  4. Do one of the following:

    • Click the preview image for the design that you want.

    • Search for additional e-mail template designs on Microsoft Office Online.

      How?

      Important: You must first be connected to the Internet before you search Office Online for templates.

      1. Do one of the following:

        • In the E-mail catalog, click View templates from Microsoft Office Online.

        • In the Search for templates box, type a keyword. For example, type e-mail. In the list, click On Microsoft Office Online, and then click the green Search button.

          Note: The Search for templates box is above the E-mail heading.

      2. Click the template that you want.

  5. Choose the options that you want.

    Note: If you use a template that you downloaded from Office Online, you cannot customize the design until you create the publication.

    You can set the color scheme and font scheme, as well as insert your business information, before you create the publication. Do any of the following:

    • Under Customize, click the color scheme and font scheme that you want.

      Note: To prevent the text in your publication from being converted into an image when you send your e-mail message, select a Web-ready font scheme. For information about Web-ready fonts and Web-ready font schemes, click a link in the See Also section.

    • Under Customize, click the business information set that you want, or create a new one.

  6. Click Create.

  7. In your e-mail publication, replace the text and pictures in the publication with your own content.

    For more information about working with text and graphics, see Get text on the page in Publisher and Tips for working with images.

  8. Save the e-mail publication.

Start with a blank publication

If you want to design your e-mail publication from scratch, you can start with a blank publication.

  1. Start Publisher.

  2. In the Publication Types list, click E-mail.

  3. Under E-mail, click Blank Sizes.

  4. Click the blank template that you want.

  5. Under Customize, click the color scheme, font scheme, and business information set that you want.

    Note: To prevent the text in your publication from being converted into an image when you send your e-mail message, select a Web-ready font scheme. For information about Web-ready fonts and Web-ready font schemes, click a link in the See Also section.

  6. Click Create.

  7. On the Arrange menu, click Layout Guides, and then click the Margin Guides tab.

  8. In your publication, add text, pictures, and any other objects that you want.

  9. For more information about working with text and graphics, see Get text on the page in Publisher and Tips for working with images.

  10. Save the e-mail publication.

Top of Page

Send your e-mail publication

After you finish your publication, you are ready to send it.

Preview and send an e-mail message

When you send a page as an e-mail message, the message is sent in HTML format, and the recipient of the message does not need to have Office Publisher 2007 installed to view the message. The page that you send appears in the body of the e-mail message.

You can preview the message before you send it. The page is displayed in your current Web browser.

Important: To send a single page as an e-mail message or to preview it before sending, you must have Microsoft Office Outlook 2007, Microsoft Office Outlook 2003, Outlook Express (version 5.0 or later), or Windows Mail installed on your computer. For more information about adding and configuring e-mail accounts, see the links in the See Also section.

  1. To preview the message as it will appear when it is sent, point to Send E-mail on the File menu, and then click E-mail Preview.

    Your current message is displayed in your browser.

  2. To send the message, point to Send E-mail on the File menu, and then click Send as Message.

  3. In the message header, in the To and Cc boxes, type or select e-mail addresses for the recipients.

  4. In the Subject box, add a title for the e-mail message.

  5. On the toolbar above the message header, choose any other options that you want.

  6. Click Send.

Note: 

  • After you preview the page by using E-mail Preview, send the page as an e-mail message to yourself to see whether you want to make any final changes before you send it to your intended recipients. When you send the page to your own e-mail account, you can see what the file size is (in case the file size is an issue for you or your recipients).

  • The appearance of your e-mail message may differ slightly from one recipient's e-mail program to another, depending on the e-mail program that the recipient uses. If you need to know exactly how your message will look when it is opened in a particular e-mail program, arrange for a test with one or more people who use that program. If they are nearby, send the page to them and then view it yourself in their e-mail program. Or ask for their feedback before you send your message for wider distribution.

Send a publication as an e-mail attachment

When you want recipients to read and print the content of your publication in its original format, send your publication as an attachment. If you have Office Outlook 2007, Microsoft Office Outlook 2003, Outlook Express (version 5.0 or later), or Windows Mail installed on your computer, you can send an e-mail message that includes your publication as an attachment in any of these formats:

  • A Publisher publication

  • A PDF file

  • An XPS file

Note: You can save as a PDF or XPS file from a 2007 Microsoft Office system program only after you install an add-in. For more information, see Enable support for other file formats, such as PDF and XPS.

Tip: If you don't use Office Outlook 2007, Microsoft Office Outlook 2003, Outlook Express (version 5.0 or later), or Windows Mail as your default e-mail program, you can publish the e-mail publication as a PDF file or an XPS file, and then you can attach the PDF or XPS file to an e-mail message in your e-mail program.

When you send your publication as an e-mail attachment, you do not need to preview its appearance in a browser, because e-mail recipients will open and view the publication in the appropriate program, such as Office Publisher 2007 or Microsoft Publisher 2003 for a publication, Adobe Reader for a PDF file, or Microsoft Windows XP or Windows Vista for an XPS file.

Send an attachment

  1. On the File menu, point to Send E-mail, and then do one of the following:

    • To send the publication as a publication attachment, click Send Publication as Attachment.

      Note: When you send a Publisher publication as an e-mail attachment, the recipient must have Office Publisher 2007 or Office Publisher 2003 installed in order to view the publication.

    • To send the publication as a PDF attachment, click Send Publication as PDF Attachment.

    • To send the publication as an XPS attachment, click Send Publication as XPS Attachment.

  2. In the message header, in the To and Cc boxes, type or select e-mail addresses for the recipients.

  3. In the Subject box, add a title for the e-mail message.

  4. On the toolbar above the message header, choose any other options that you want.

  5. Click Send.

Top of Page

Automatically send someone a copy of messages that you send

Automatically send someone a copy of messages that you send

In Microsoft Outlook, you can specify that for all messages that you send, an automatic carbon copy (Cc) is sent to other people or distribution lists.

One scenario in which this rule is useful is when all members of a team are responsible for responding to incoming email messages, such as a support center. When one team member replies to a message, the rest of the team automatically receives a copy of the reply, keeping everyone informed of outgoing communications.

You will first need to create a rule to automatically send a carbon copy (Cc) of all email messages that you send.

This particular rule is called a client-side rule. A client-side rule runs only on the computer on which it is created, and only runs if Outlook is running. If you were to send an email message by using your email account on a different computer, the rule would not run from that computer until it was created on that computer. You must create this same rule on each computer from which you intend to use it.

Create the rule

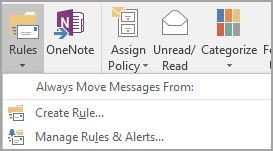
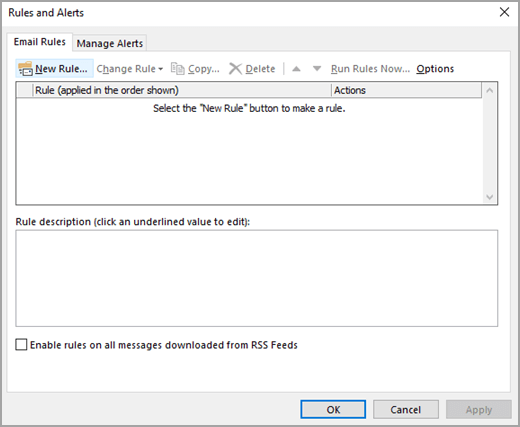
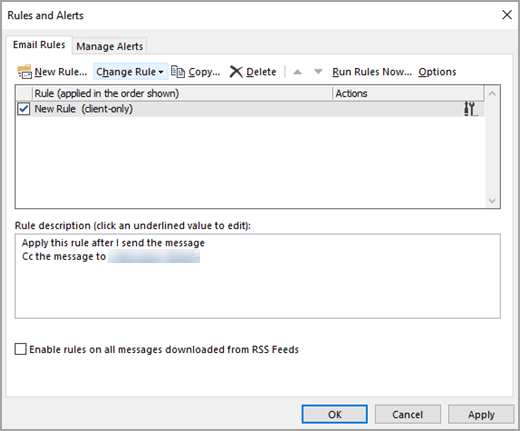
  1. In Mail, on the Home tab, in the Move group, click Rules > Manage Rules & Alerts.

    Rules and Alerts dialog box

    The Rules and Alerts dialog box appears.

  2. On the E-mail Rules tab, click New Rule.

    Select New Rule

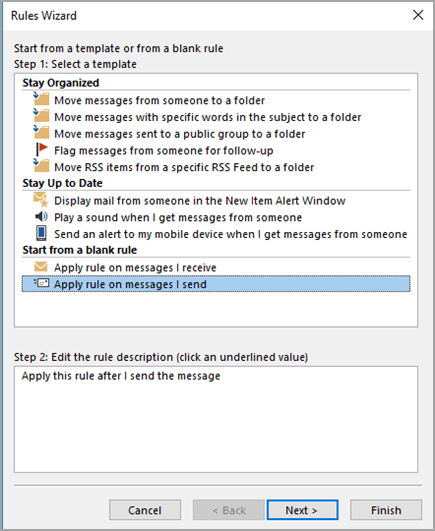
  3. In the Rules Wizard, under Start from a blank rule, click Apply rule on messages I send.

    Select Apply rule on messages I send

  4. Click Next, and then click Next again.

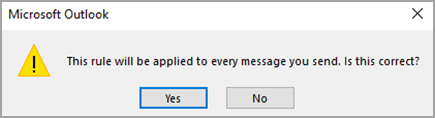
  5. A confirmation message will appear, notifying you that this rule will apply to every message that you send. Click Yes.

    Confirmation message

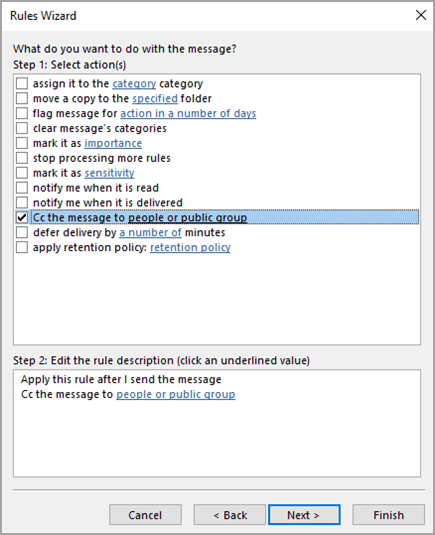
  6. Under Step 1: Select action(s), select the Cc the message to people or public group check box.

    Select action(s)

  7. Under Step 2: Edit the rule description (click an underlined value), click people or public group.

  8. In the Rule Address dialog box, click a name or group, and then click To. Repeat this step until all names or groups that you want to add are included in the To box.

  9. Click OK.

  10. In the Rules Wizard, click Next and then click Next again.

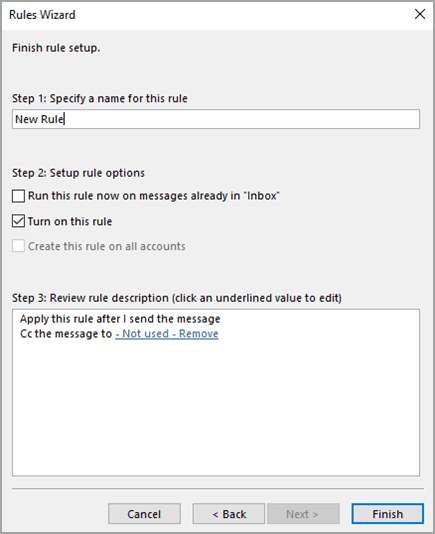
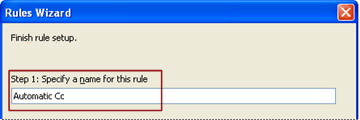
  11. Under Step 1: Specify a name for this rule, enter a name that you will recognize for this rule.

    Name the new rule

  12. In Step 2: Set up rule options, select the Turn on this rule check box.

  13. Click Finish.

  14. You will see a message stating that the rule will run only when you check your email in Outlook. Click OK.

Now every time that you send a message, whether it is a new message, a reply, or a message that you are forwarding, the people or groups that you specified in the rule will automatically be added as Cc recipients. You will not see the names of the people or groups on the Cc line as you compose the message, but any recipient of the message will see these names.

Top of page

Turn off the rule

To avoid automatically sending a carbon copy, you must first turn off the rule.

  1. In Mail, on the Home tab, click Rules > Manage Rules & Alerts.

  2. On the E-mail Rules tab, under Rule, clear the check box for the rule that you created earlier.

  3. Click OK.

You can now send a message without the automatic Cc rule sending a copy to other people or distribution lists. The rule will remain off until you return to the Rules and Alerts dialog box and enable the rule again.

Tip: For a fast way to turn off this rule on a per-message basis, see the next section, "Use a category to turn off the automatic Cc on a per-message basis."

Use a category to turn off the automatic Cc on a per-message basis

If you want the flexibility to turn your new automatic Cc rule off on a single-message basis without going to the Rules and Alerts dialog box, you can use the category feature in Outlook, together with the rule.

Edit the rule you created earlier so that if you add a specified category to the message, the Cc rule does not send a copy to anyone automatically.

  1. In Mail, on the Home tab, click Rules > Manage Rules & Alerts.

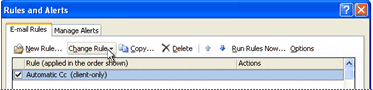
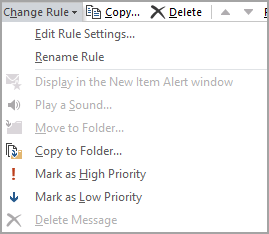
  2. On the E-mail Rules tab, click the rule that you created earlier, and then click Change Rule.

    Change the rule

  3. Click Edit Rule Settings.

    Edit rule settings

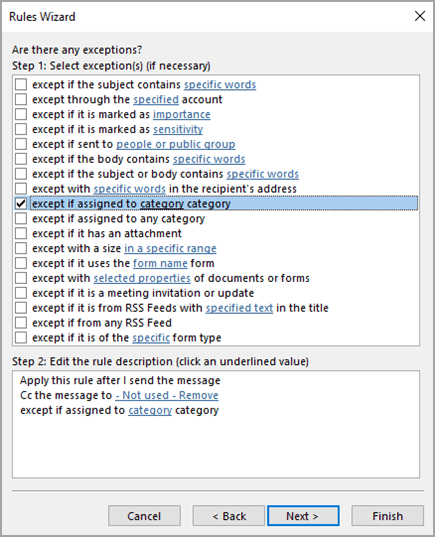
  4. Click Next on the first two steps of the Rules Wizard until you see Are there any exceptions?

  5. Under Step 1: Select exception(s) (if necessary), select the except if assigned to category category check box.

    Select exceptions

  6. Under Step 2: Edit the rule description (click an underlined value), click category.

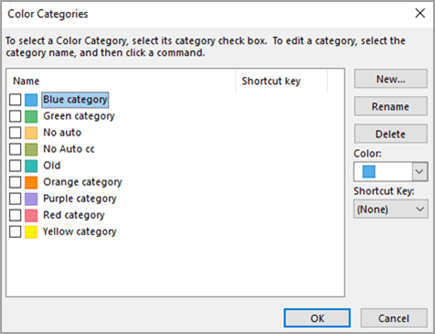
  7. In the Color Categories dialog box, click New.

    Color Categories dialog box

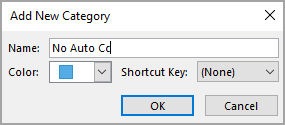
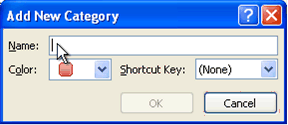
  8. In the Add New Category dialog box, in the Name box, type No Auto Cc.

    Add New Category

    You can also assign a keyboard shortcut that can be used to quickly apply this category to a message. To do this, click an option in the Shortcut Key list.

  9. Click OK to close the Add New Category and Color Categories dialog boxes.

  10. Click Finish.

  11. You will see a message stating that the rule is a client-only rule. Click OK.

When you want to send a message and turn off the automatic Cc rule for that one message, apply the category to the message.

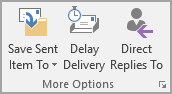
  1. When composing a new message, or replying to or forwarding a message, on the Options tab, click More Options.

    More Options

  2. In the Properties dialog box, click Categories, and then click No Auto Cc.

Tip: Use the category keyboard shortcut if you specified one when you created the special category.

When you send the message, the Auto Cc rule will not automatically send a copy to anyone.

Top of page

You will first need to create a rule to automatically send a carbon copy (Cc) of all email messages that you send.

This particular rule is called a client-side rule. A client-side rule runs only on the computer on which it is created, and only runs if Outlook is running. If you were to send an email message by using your email account on a different computer, the rule would not run from that computer until it was created on that computer. You must create this same rule on each computer from which you intend to use it.

Create the rule

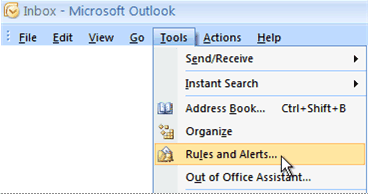
  1. In Mail, on the Tools menu, click Rules and Alerts.

    Tools menu

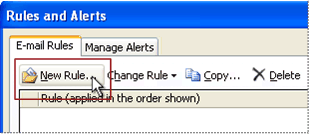
  2. On the E-mail Rules tab, click New Rule.

    Rules and Alerts dialog box

  3. In the Rules Wizard dialog box, under Start from a blank rule, click Check messages after sending, and then click Next.

  4. Click Next.

    A confirmation will appear, notifying you that this rule will apply to every message that you send. Click Yes.

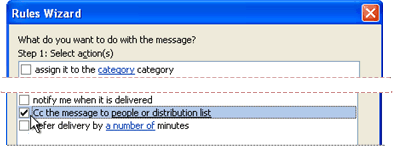
  5. Under Step 1: Select action(s), select the Cc the message to people or distribution list check box.

    Rules Wizard dialog box

  6. Under Step 2: Edit the rule description (click an underlined value), click people or distribution list.

  7. In the Rule Address dialog box, click a name or distribution list, and then click To. Repeat this step until all names or distribution lists you want to add are included in the To box.

  8. Click OK.

  9. In the Rules Wizard dialog box, click Next.

  10. Click Next.

  11. Under Step 1: Specify a name for this rule, enter a name that you will recognize for this rule.

    Rules Wizard dialog box

  12. Click Finish.

Now every time that you send a message, whether it is a new message, a reply, or a message that you are forwarding, the people or distribution lists that you specified in the rule will automatically be added as Cc recipients. You will not see the names of the people or distribution lists on the Cc line as you compose the message, but any recipient of the message will see these names.

Top of page

Turn off the rule

To avoid automatically sending a carbon copy, you must first turn off the rule.

  1. In Mail, on the Tools menu, click Rules and Alerts.

  2. On the E-mail Rules tab, under Rule, clear the check box for the rule that you created earlier.

  3. Click OK.

    You can now send a message without the automatic Cc rule sending a copy to other people or distribution lists. The rule will remain off until you return to the Rules and Alerts dialog box and enable the rule again.

Tip: For a fast way to turn off this rule on a per-message basis, see the next section, "Use a category to turn off the automatic Cc on a per-message basis."

Use a category to turn off the automatic Cc on a per-message basis

If you want the flexibility to turn your new automatic Cc rule off on a single-message basis without going to the Rules and Alerts dialog box, you can use the category feature in Office Outlook 2007 together with the rule.

Edit the rule you created earlier so that if you add a specified category to the message, the Cc rule does not send a copy to anyone automatically.

  1. In Mail, on the Tools menu, click Rules and Alerts.

  2. On the E-mail Rules tab, click the rule you created earlier, click Change Rule, and then click Edit Rule Settings.

    Rules and Alerts dialog box

  3. Click Next on the first two steps of the Rules Wizard until you see Are there any exceptions?

  4. Under Step 1: Select exception(s) (if necessary), select the except if assigned to category category check box.

  5. Under Step 2: Edit the rule description (click an underlined value), click category.

  6. In the Color Categories dialog box, click New.

    Add New Category dialog box

  7. In the Add New Category dialog box, in the Name box, type No Auto Cc.

    You can also assign a keyboard shortcut that can be used to quickly apply this category to a message. To do this, click an option in the Shortcut Key list.

  8. Click OK to close the Add New Category and Color Categories dialog boxes.

  9. Click Finish.

When you want to send a message and turn off the automatic Cc rule for that one message, apply the category to the message.

  1. When composing a new message, or replying to or forwarding a message, on the Message tab, in the Options group, click the Message Options Dialog Box Launcher Button image .

  2. In the Message Options dialog box, click Categories, and then click No Auto Cc.

Tip: Use the category keyboard shortcut if you specified one when you created the special category.

When you send the message, the Auto Cc rule will not automatically send a copy to anyone.

Top of page

Remove a filter from a control

Remove a filter from a control

In this article

Remove a filter from a list box, drop-down list box, or a combo box

Remove a filter from a repeating section or table

Remove a filter from a list box, drop-down list box, or a combo box

  1. Right-click the control that you want to modify, and then click Control Properties on the shortcut menu.

  2. Click the Data tab.

  3. Click Select XPath Data Source button next to the Entries box.

  4. In the Select a Field or Group dialog box, click the field or group that contains the fields that provide the values for the control, and then click Filter Data.

  5. In the Existing filters list, click the filter that you want to remove, and then click Remove.

Tip: If you want to remove a condition from an existing filter, rather than the filter itself, click the filter, click Modify, and then click Delete next to the condition that you want to remove in the Specify Filter Conditions dialog box.

Top of Page

Remove a filter from a repeating section or table

  1. Right-click the Repeating Table or Repeating Section label that appears below the table or section on the form template, and then click Control Properties on the shortcut menu.

  2. Click the Display tab.

  3. Click Filter Data.

  4. In the Existing filters list, click the filter that you want to remove, and then click Remove.

Tip: If you want to remove a condition from an existing filter, rather than the filter itself, click the filter, click Modify, and then click Delete next to the condition that you want to remove in the Specify Filter Conditions dialog box.

Top of Page

Change the the look and feel of your presentation with themes

Change the the look and feel of your presentation with themes

You can easily change the look and feel of your presentation by applying a different theme. Themes have associated color schemes, fonts, and effects to help give your presentation a unified, polished appearance.

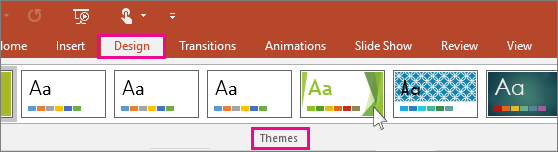
  1. On the Design tab, pick a theme.

    shows PowerPoint design themes

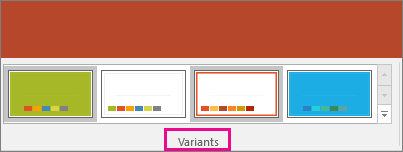
  2. In the Variants group, select a color variation that you like.

    Shows PowerPoint theme variants

    Tip:  To preview how the current slide looks with a particular theme applied, rest your pointer on the thumbnail of that theme.

    To view more themes, on the Design tab, click More Button image .

Read more: