Note: Office 365 Video is being replaced by Microsoft Stream. To learn more about the new enterprise video service that adds intelligence to video collaboration and learn about the transition plans for current Office 365 Video customers, see Migrate to Stream from Office 365 Video.
To upload a video to Office 365 Video, you upload it to a particular channel. You can use a channel for videos for a particular subject, for example, or for videos for a group such as a department or a team. Channel admins in your organization can create channels, and each channel can be managed separately by one or more people who have owner permission for the channel. This article describes how quick and easy it is to create and manage a channel and upload videos to it in Office 365 Video.
In this article:
-
Creating a channel. Create a channel so that people can upload videos to it.
-
Managing a channel. Upload videos, control who can edit or view a channel, and perform other channel management tasks.
Office 365 Video comes with one preconfigured channel, which is named Community. By default, everyone in your organization can edit and view the Community channel, but you can change these permissions if you like. For example, you can change the editor permission for the Community channel so that only certain people can upload videos to it. For information about channel editor permission and channel viewer permission, see Changing channel permissions later in this article. Or you can delete the Community channel if you don't need it. For more information, see Deleting a channel later in this article.
Creating a channel
You have to have channel admin permission to create a channel. By default, everyone in your organization has channel admin permission. Only a video admin can change who has channel admin permission. For information about video admin permission and channel admin permission, see Changing admin permissions for your Microsoft 365 Video portal in Manage your Microsoft 365 Video portal.
The person who creates a channel automatically has owner permission for that channel and can give other people permission to edit it. For information about channel owner permission, see Changing channel permissions later in this article.
To create a channel
-
Sign in to Microsoft 365 as a user who has channel admin permission.
-
Select the Microsoft 365 app launcher
 , and then select the Video tile.
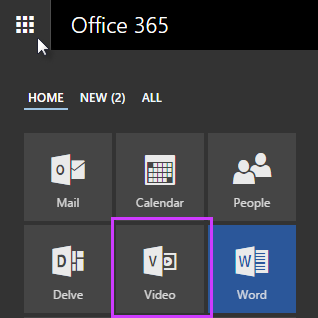
-
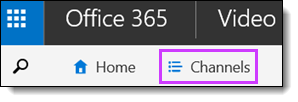
On the Office 365 Video top navigation bar, on the left side, choose Channels, and then on the right side choose + New Channel.

-
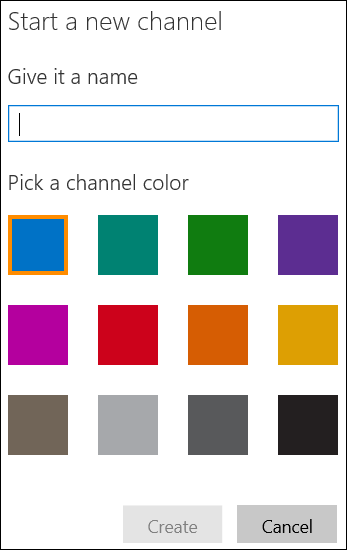
In the Start a new channel dialog box, do the following:
-
Type a name for the new channel.
-
Under Pick a channel color, select a color for the new channel.
-
-
Choose Create.
Managing a channel
This section describes the procedures for managing a channel, which you can do only if you have owner permission or editor permission for the channel:
For information about channel owner permission, see Changing channel permissions later in this article.
Selecting a channel to manage
To manage a channel, you first select it.
To select a channel to manage
-
Sign in to Microsoft 365 as a user who has either owner permission or editor permission for the channel that you want to manage. For information about channel permissions, see Changing channel permissions later in this article.
-
Select the Microsoft 365 app launcher
, and then select the Video tile. -
On the Office 365 Video top navigation bar, choose Channels.
-
Select a channel for which you have owner or editor permission. For more information about channel permissions, see Changing channel permissions later in this article.
Uploading videos
As long as you have channel owner or editor permission for a channel, you can upload a video to it from anywhere within Office 365 Video. You can also upload multiple videos to a channel at the same time. For information about channel permissions, see Changing channel permissions later in this article. For information about video formats that are compatible with Office 365 Video, see Video formats that work in Microsoft 365 Video.
The original video file is stored in SharePoint Online at the time you upload a video and it counts against your storage quota. For more information, see Manage site collection storage limits.
To make it easier for users to find your video when using search, it can be useful to be consistent about how you title and describe videos when you upload them. (You can also change this information at any time later. For more information, see Editing information about a video later in this article.) This information can make it easier for everyone to search for the videos later, especially when you have a lot of videos in Office 365 Video. It also provides additional context for the video in Delve and the Office Graph.
Note: As is the case for any file upload, there are many factors that can affect the time it takes to upload a video, such as network bandwidth and video size.
To upload a video
-
In Office 365 Video, on the top navigation bar, choose Upload.

-
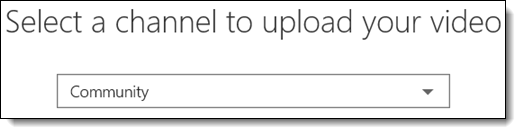
Select the channel to which you want to upload the video. If you're already in a channel, the name of that channel will be selected as the default. To upload your video to a different channel, just select the channel name from the drop-down list.
-
Do one of the following:
-
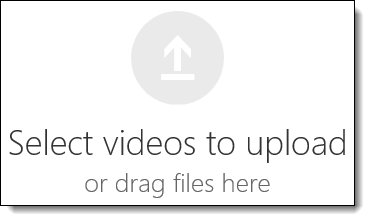
Drag a file to the box labeled Select videos to upload or drag files here.
-
Click in the box labeled Select videos to upload or drag files here, select a video in the Choose File to Upload dialog box, and then choose Open.
The video will start to upload.
Tip: To replace an existing video with a new version, simply make sure that the file name for the new version is exactly the same as the file name for the original version. Also, make sure you upload the new version of the video to the same channel as the original one. This will ensure that the URL for the video remains the same.
-
-
While the video is uploading, you can provide a title and description for the video, and then click Save.
-
After the upload is complete, click Go to video to view your video.
To upload multiple videos at the same time
-
From a Windows Explorer window, drag and drop the videos into the box labeled Select videos to upload or drag file here. The videos will start to upload.
-
When all the videos are uploaded and are being processed for playback, you can choose Edit details next to a video thumbnail to provide a title and description for the video. To provide this information:
-
Specify a title and description for the video.
-
Choose Save.
-
Checking when a video is ready to play
After you upload a video, it takes time to process it for streaming playback and index it for search before it is ready to play. The video will first be visible and playable under My Videos in the channel. It will be visible and playable by others elsewhere on the portal a while after that. Only people who have permission to view videos in that channel can view it.
To check when a video is ready to play
-
Select the channel to which you uploaded one or more videos. For information about how to do this, see Selecting a channel to manage earlier in this article.
-
Choose My videos.
-
Refresh the page occasionally. For example, to refresh the page in Internet Explorer, you can press F5. When the video is ready to play from My Videos, a video thumbnail will appear instead of a processing message. The video will appear elsewhere on the portal for other people to watch it a little later.
Changing a thumbnail for a video
After a video you've uploaded to Office 365 Video has been processed and is ready to play, you can add a custom thumbnail for the video or you can choose from one of the auto-generated thumbnails provided.
To add a thumbnail to a video
-
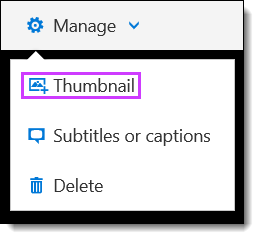
On the video player page in Office 365 Video, click Manage on the menu bar and then click Thumbnail.
-
In the Choose a thumbnail pane, click to select the thumbnail you want to use for your video from one of the pre-generated thumbnails. Alternately, click Upload an image, to choose and upload a custom thumbnail.
Note: Auto-generated thumbnails are only available for videos uploaded to Office 365 Video after October 1, 2015.

-
After making your selection, click X in the top right corner of the Choose a thumbnail pane.
Note: It may take several minutes for people to see the new thumbnail.
Editing information about a video
Providing information about a video, such as a description or a list of people in the video, will make it easier for users to find it through search and will provide additional context for the video in Delve and the Office Graph. To edit information about a video, you have to have owner or editor permission for the channel that the video is in. For information about channel permissions, see Changing channel permissions later in this article.
To edit the title or description for a video
-
Select the channel that the video is in. For information about how to do this, see Selecting a channel to manage earlier in this article.
-
Select the thumbnail of the video that you want to edit.
-
On the video player page, below the video player, choose
 .
. -
Change the information about the video as appropriate.
-
Choose Save.
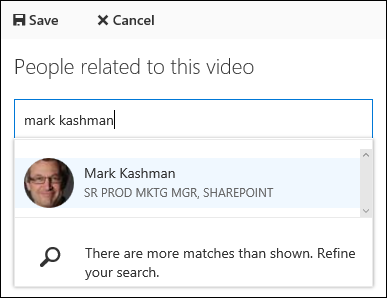
To associate people with a video
-
Below the video on the video player page, under People related to this video, click
 .
. -
In the People related to this video pane, start typing the name of the person you want to add and then select their name from the list of names that appears.
-
Click Save to associate that person with the video.
Deleting a video
Deleting a video frees up space toward your SharePoint Online storage quota. To delete a video, you have to have owner or editor permission for the channel that the video is in. For information about channel permissions, see Changing channel permissions later in this article.
Note: After you delete a video, you can't recover it.
To delete a video
-
Select the channel from which you want to delete a video. For information about how to do this, see Selecting a channel to manage earlier in this article.
-
Select the thumbnail of the video that you want to delete. The video player page appears.
-
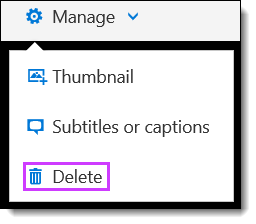
On the top navigation bar, choose Delete.
-
In the Delete Video dialog box, choose Delete to confirm that you want to delete the video.
Note: When you delete a video from a Office 365 Video channel, it is moved to the SharePoint recycle bin where it will be permanently deleted after 30 days.
After you delete a video, it can take a while for search indexing to complete, and then the video will no longer be visible in Office 365 Video.
To restore or permanently delete a deleted video
-
Select the channel from which the video was deleted.
-
On the Office 365 Video top navigation bar, choose Recycle Bin.

-
In the Recycle Bin pane, select the video you want to restore or permanently delete.
Note: In the Recycle Bin pane, global administrators will see a list of all videos that have been deleted from a channel. Channel owners and editors will only see a list of videos that they've deleted. For more information about the Recycle Bin, see Empty the recycle bin or restore your files and Manage the Recycle Bin of a SharePoint site collection.
-
Click Restore Selection to restore the video to it's original channel or click Delete Selection to permanently delete the video.

-
Click OK to verify the restore or delete or click Cancel to go back to the list of items in the Recycle Bin.
Managing channel settings
This section describes the procedures for managing channel settings, which you can perform only for channels that you have owner permission for:
Going to the video channel settings page for a channel
To manage channel settings, you first go to the video channel settings page for that channel.
To go to the video channel settings page for a channel
-
Select a channel that you want to manage. For information about how to do this, see Selecting a channel to manage earlier in this article.
-
On the right-hand side of the top navigation bar, select Channel Settings.

Changing general channel settings
You can change the name and color of any channel that you have owner permission for. For information about channel permissions, see Changing channel permissions later in this article.
To change general channel settings
-
Select a channel that you want to change settings for. For information about how to do this, see Selecting a channel to manage earlier in this article.
-
Go to the video channel settings page for the channel. For information about how to do this, see the previous procedure, Going to the video channel settings page for a channel.
-
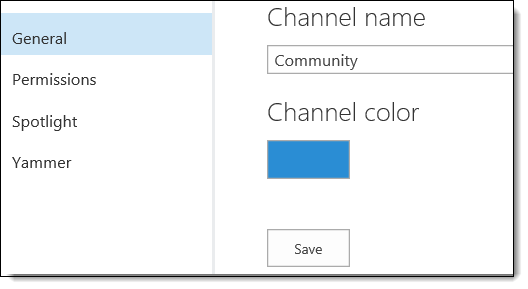
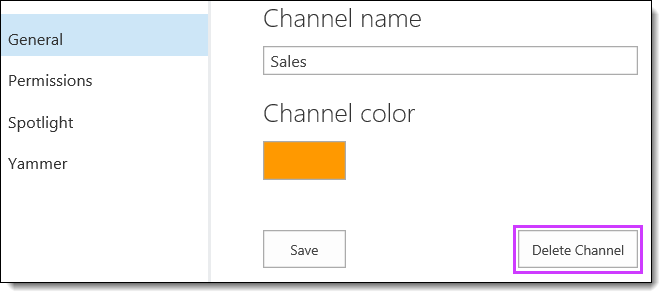
In the left navigation pane, choose General.
-
In the Channel Name text box, type a new channel name.
-
Under Channel color, select the box to choose a different color for the channel.
-
Choose Save.
Note: It can take a while for the changes to be visible in certain pages of the video portal. Some pages in the portal are search-driven and it takes time for the search system to pick up changes.
Changing channel permissions
There are three types of channel permissions: owners, editors, and viewers. You must have owner permission to change permission settings.
-
Owners - A user or security group that has full control over a channel. They can manage the channel from the channel settings page, upload videos, delete videos, and delete the channel. By default, only the person who creates a channel has owner permission for it, but that person can give owner permission to other people.
Tip: It can be a best practice to limit the number of people that have owner permission for a channel. For example, if a person who has owner permission deletes a channel, you cannot recover the channel or the videos that were in it.
-
Editors - A user or security group that has edit permission for a channel. They can upload videos and delete videos. Then cannot manage the channel settings or delete the channel.
-
Viewers - A user or security group that can view all of the videos that are in the channel. Without this permission, they can't see the channel or view the videos that are in it. By default, everyone in your organization has viewer permission for a channel when the channel is created.
You have to have owner permission for a channel to change or view the permissions for it.
To change channel permissions
-
Select the channel that you want to change permissions for. For information about how to do this, see Selecting a channel to manage earlier in this article.
-
Go to the video channel settings page for the channel. For information about how to do this, see Going to the video channel settings page for a channel earlier in this article.
-
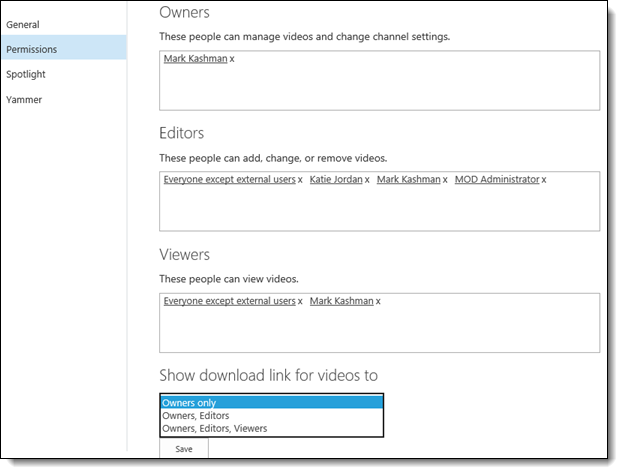
In the left navigation pane, choose Permissions.
-
To control who has full control over the channel, specify people or security groups in the Owners box.
-
To control who can edit the videos within a channel, specify people or security groups in the Editors box.
-
To control who can view the channel, specify people or security groups in the Viewers box.
-
By default, only channel owners will see the download link on the player page for videos. To change who can download videos from the channel, select an option from the Show download link for videos to list.
Note: The Show download link for videos setting only controls whether or not a user can see the download link. Since Office 365 Video is built on SharePoint, if a user has view permission to a video and they know how to access the URL for the video by other means, they will always be able to find the original video to download.
Spotlighting videos in a channel
After a number of videos are uploaded to a particular channel, it's time to promote some of them. You can promote videos by spotlighting them at the top of the channel page. You can spotlight up to five videos on a channel page.
To spotlight videos in a channel, you have to have owner permission for the channel. For information about channel permissions, see the previous procedure, Changing channel permissions.
If you want particular channels or videos to be spotlighted on the Office 365 Video portal home page, contact a person in your organization who is a video admin for Office 365 Video. For more information, see Spotlighting videos and channels on the Microsoft 365 Video portal home page in Manage your Microsoft 365 Video portal.
To spotlight videos in a channel
-
Select the channel that you want to spotlight videos in. For information about how to do this, see Selecting a channel to manage earlier in this article.
-
Go to the video channel settings page for the channel. For information about how to do this, see Going to the video channel settings page for a channel earlier in this article.
-
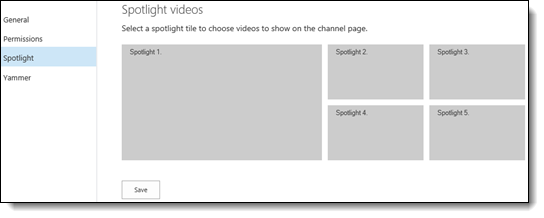
In the left navigation pane, choose spotlight.
-
Select a spotlight tile, such as Spotlight 1.
-
In the window that appears, search or browse for the thumbnail of the video that you want to spotlight, and then select the thumbnail.
Note: A video that has just been uploaded can be spotlighted only after it has been indexed by search and is generally ready to play on the portal. If you don't see the thumbnail of the video that you want to spotlight right away, check back a little later.
-
You can repeat steps 3 through 5 of this procedure for the other spotlight tiles.
To put a different video in a spotlight tile, select the spotlight tile and then select the thumbnail of a different video.
-
Choose Save.
Changing Yammer conversation settings
If Yammer is enabled on your Microsoft 365 tenant, you can turn Yammer conversations on or off for a channel.
To change Yammer conversation settings
-
Select a channel that you want to change settings for. For information about how to do this, see Selecting a channel to manage earlier in this article.
-
Go to the video channel settings page for the channel. For information about how to do this, see Going to the video channel settings page for a channel.
-
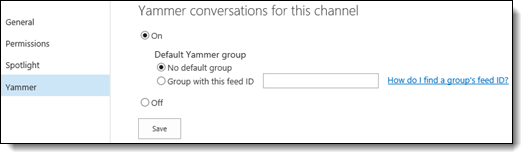
In the left navigation pane, choose Yammer.
-
Select On to enable Yammer conversations for the channel.
-
Set the default Yammer group for the channel by selecting one of the following:
-
No default group to enable users to direct their conversation to a Yammer group they define or to a specific person .
-
Group with this feed ID to enable conversations in a default Yammer group by adding the Yammer feed ID for the group. Users can then choose to post in the default Yammer group or they specify a different one.
-
-
Select Off to disable all Yammer conversations on the channel.
-
Choose Save.
Deleting a channel
Deleting a channel removes the channel and all videos in it from the Office 365 Video portal. This frees up space toward your SharePoint Online storage quota.
To delete a channel, you have to have owner permission for it. For information about channel owner permission, see Changing channel permissions earlier in this article.
Caution: After you delete a channel, you cannot recover it or the videos that were in it.
To delete a channel
-
Select the channel that you want to delete. For information about how to do this, see Selecting a channel to manage earlier in this article.
-
Go to the video channel settings page for the channel. For information about how to do this, see Going to the video channel settings page for a channel earlier in this article.
-
In the left navigation pane, choose general.
-
Choose Delete channel.
-
Choose OK to confirm that you want to delete the channel.
oracle rac online training
ReplyDeleteoffice 365 online training
business analyst online training
business analyst online training