Printing a PivotTable the way that you want often requires using a combination of print features for worksheets and PivotTables. To use these features, you must have only one report on the worksheet, or you must set a print area that includes only one report.
Tip: For the best results, follow these sections in sequence.
Set a print area
If you have more than one PivotTable report on the worksheet, set a print area that includes only the report that you want to print.
-
Click the PivotTable.
-
On the Analyze tab, in the Actions group, click Select, and then click Entire PivotTable.
-
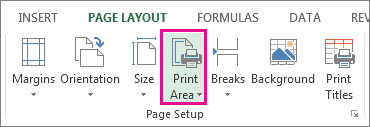
On the Page Layout tab, in the Page Setup group, click Print Area, and then click Set Print Area.
Fine-tune the page layout in Page Layout view
Page Layout view is useful for getting your data ready for printing. For example, you can use the rulers to measure the width and height of the data, change the page orientation, add or change page headers and footers, set margins for printing, and hide or display row and column headers.
-
On the View tab, in the Workbook Views group, click Page Layout.
Tip: You can also click Page Layout View
 on the status bar.
 -
Make adjustments to the page layout.
Repeat row and column labels on each page as print titles
You can repeat the row labels and column labels of a report on every printed page as print titles. When you change the layout of the report so that the labels are shown in different worksheet rows and columns, the new label rows and columns are repeated automatically the next time you print the report.
-
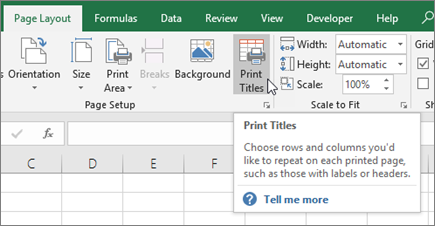
On the Page Layout tab, in the Page Setup group, click Print Titles.
-
In the Page Setup dialog box, make sure that the Rows to repeat at top and Columns to repeat at left check boxes are cleared.
-
Close the Page Setup dialog box.
-
On the Analyze tab, in the PivotTable group, click Options.
-
In the PivotTable Options dialog box, click the Printing tab, and then select the Set print titles check box.
-
If your report has more than one row label and you also want to repeat the outer row label items on each page, select the Repeat row labels on each printed page check box.
Set page breaks after each outer row label
When your report has multiple row labels and a page break falls within a group of row label items, you can set the report to automatically repeat the item labels for the outer labels at the top of the next page. In a report with two or more row labels, all but the rightmost label are outer row labels. In the following example, the report is set so that the items East and Qtr2 from the outer row labels Region and Qtr are printed on the next page after the page break.
1. Page break within an item group.
2. Item labels from the outer row labels are repeated on page 2.
-
Right-click the outer row label that has the items that you want to print on separate pages, and then click Field Settings on the shortcut menu.
-
In the Field Settings dialog box, click the Layout & Print tab.
-
Select the Insert page break after each item check box.
Adjust page breaks throughout the report
It is a good idea to review the entire PivotTable in Page Break Preview, in case you need to make additional adjustments of the page breaks.
-
On the View tab, in the Workbook Views group, click Page Break Preview.
You can insert new manual page breaks and move and delete automatic page breaks. For more information, see Add, delete, or move page breaks.
Decide whether to print the expand and collapse buttons
You may or may not want to print the expand and collapse buttons. To decide whether you want to print the expand and collapse buttons, do the following:
-
To show or hide the expand and collapse buttons on the worksheet, on the Analyze tab, in the Show/Hide group, click +/- Buttons.
-
To show or hide the expand and collapse buttons on the printed report, do the following:
-
On the Analyze tab, in the PivotTable group, click Options.
-
Click the Printing tab, and then select or clear the Print expand/collapse buttons when displayed on PivotTable check box.
Note: This check box requires the +/- Buttons command in the Show/Hide group on the Options tab to be turned on.
-
Check your final layout in Print Preview and then print the report
-
To check your final print layout, click File > Print, and see the preview.
Keyboard shortcut You can also press CTRL+F2.
Make final adjustments as necessary. For more information, see Preview worksheet pages before printing.
-
When the preview looks correct, click Print.
Set a print area
If you have more than one PivotTable report on the worksheet, set a print area that includes only the report that you want to print.
-
Click the PivotTable.
-
On the Options tab, in the Actions group, click Select, and then click Entire PivotTable.
-
On the Page Layout tab, in the Page Setup group, click Print Area, and then click Set Print Area.

Fine-tune the page layout in Page Layout view
Page Layout view is useful for getting your data ready for printing. For example, you can use the rulers to measure the width and height of the data, change the page orientation, add or change page headers and footers, set margins for printing, and hide or display row and column headers.
-
On the View tab, in the Workbook Views group, click Page Layout.

Tip: You can also click Page Layout View
on the status bar. -
Make adjustments to the page layout.
Repeat row and column labels on each page as print titles
You can repeat the row labels and column labels of a report on every printed page as print titles. When you change the layout of the report so that the labels are shown in different worksheet rows and columns, the new label rows and columns are repeated automatically the next time you print the report.
-
On the Page Layout tab, in the Page Setup group, click Print Titles.
-
In the Page Setup dialog box, make sure that the Rows to repeat at top and Columns to repeat at left check boxes are cleared.
-
Close the Page Setup dialog box.
-
On the Options tab, in the PivotTable group, click Options.

-
In the PivotTable Options dialog box, click the Printing tab, and then select the Set print titles check box.
-
If your report has more than one row label and you also want to repeat the outer row label items on each page, select the Repeat row labels on each printed page check box.
Set page breaks after each outer row label
When your report has multiple row labels and a page break falls within a group of row label items, you can set the report to automatically repeat the item labels for the outer labels at the top of the next page. In a report with two or more row labels, all but the rightmost label are outer row labels. In the following example, the report is set so that the items East and Qtr2 from the outer row labels Region and Qtr are printed on the next page after the page break.
1. Page break within an item group.
2. Item labels from the outer row labels are repeated on page 2.
-
Right-click the outer row label that has the items that you want to print on separate pages, and then click Field Settings on the shortcut menu.
-
In the Field Settings dialog box, click the Layout & Print tab.
-
Select the Insert page break after each item check box.
Adjust page breaks throughout the report
It is a good idea to review the entire PivotTable in Page Break Preview, in case you need to make additional adjustments of the page breaks.
-
On the View tab, in the Workbook Views group, click Page Break Preview.
Tip: You can also click Page Break Preview
 on the status bar.
You can insert new manual page breaks and move and delete automatic page breaks. For more information, see Add, delete, or move page breaks.
Decide whether to print the expand and collapse buttons
You may or may not want to print the expand and collapse buttons. To decide whether you want to print the expand and collapse buttons, do the following:
-
To show or hide the expand and collapse buttons on the worksheet, on the Options tab, in the Show/Hide group, click +/- Buttons.
-
To show or hide the expand and collapse buttons on the printed report, do the following:
-
On the Options tab, in the PivotTable group, click Options.
-
Click the Printing tab, and then select or clear the Print expand/collapse buttons when displayed on PivotTable check box.
Note: This check box requires the +/- Buttons command in the Show/Hide group on the Options tab to be turned on.
-
Check your final layout in Print Preview and then print the report
-
To check your final print layout, do the following:
-
Excel 2010: Click File > Print.
-
Excel 2007: Click the Microsoft Office Button
 , click the arrow next to Print, and then click Print Preview.
Keyboard shortcut You can also press CTRL+F2.
Make final adjustments as necessary. For more information, see Preview worksheet pages before printing.
-
-
When the preview looks correct, click Print.
Need more help?
You can always ask an expert in the Excel Tech Community, get support in the Answers community, or suggest a new feature or improvement on Excel User Voice.
No comments:
Post a Comment