Print a blank calendar
The easiest way to print a blank calendar without any of your meetings or appointments is to create a blank calendar, then use the print options to customize the date range and print styles (daily, weekly, monthly, or yearly style).
-
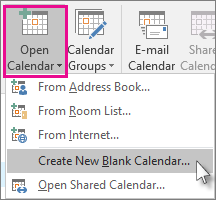
In Calendar, click Add Calendar, or Open Calendar and then click Create New Blank Calendar.

-
In the Create New Folder box, enter a name for your Calendar in the Name box. You can also select where to place your blank calendar. By default, Outlook will create it as a subfolder of your main Calendar folder. Click OK to create your calendar.
-
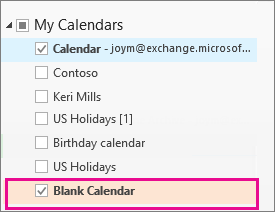
In the left Navigation Pane under My Calendars, check the box next to the blank calendar you just created. You don't have to uncheck your main calendar.

-
You should now see your blank calendar side-by-side with your main calendar. Click anywhere in the blank calendar to make it the active calendar.
-
Click File > Print.
-
In the Print pane, under Settings, select your preferred calendar style.
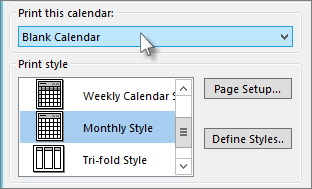
Note: If the print preview displays your main calendar with all of your appointments and events, click Print Options. Under Print this calendar, click the calendar you selected in step 3.
-
To specify a date range, click Print Options and under Print Range, enter the Start and End dates.
-
Click Print.
-
On the File menu, point to New, and then click Folder.
-
In the Create New Folder dialog box, in the Name text box, type a name for the folder.
-
In the Folder contains list, click Calendar Items.
-
In the Select where to place the folder list, click Calendar, and then click OK.
-
In Calendar, in the Navigation Pane under the My Calendars section, select the check box for the calendar you created.
-
On the File menu, click Print.
-
In the Print dialog box, under Print this calendar, click the calendar you created.
-
Select the print style options you want, and then click OK.
No comments:
Post a Comment