Create a custom email signature in Outlook


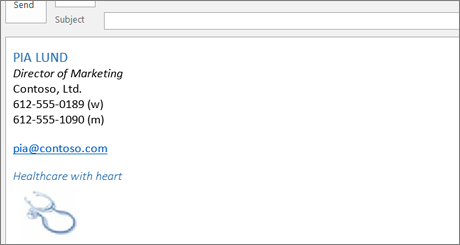
Create a signature with a company logo or other picture
If you work with a lot of contacts outside of your company, you may want to personalize your signature with your business contact information and company logo.
-
On the Home tab, click New Email.
-
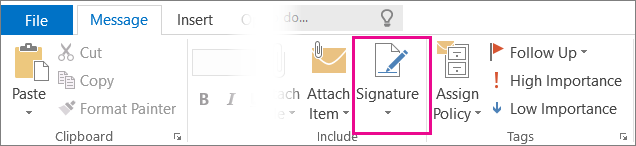
On the Message tab, click Signature > Signatures.
-
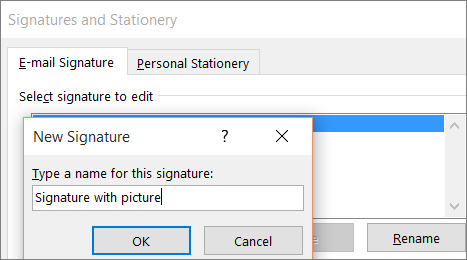
On the E-mail Signature tab, click New.
-
Type Signature with picture to save the signature with a unique name and click OK. If you create multiple signatures, this will help you identify this particular signature when you add it to an email later on.
-
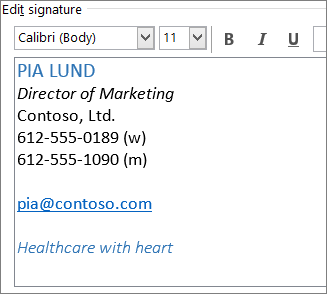
In the Edit signature box, type your name, job title, and contact information.
-
Select your name, and then change the font size to 12 point and the color to blue.
-
Click in the area below the signature content that you typed, and then click Insert a picture.

-
Find a logo or picture on your computer to add to your signature, click to select it, and then click OK. Common image file formats for pictures include .bmp, .gif, .jpg, and .png.
-
Click OK to finish creating the signature.
You can automatically add your new signature all outgoing messages, or you can choose which messages should include a signature.
Create a multi-column signature with a photo and social icon links
You can create more complex signatures that include your personal photo, your contact information, and icons with links to your social profile pages.

-
On the Home tab, click New Email.
-
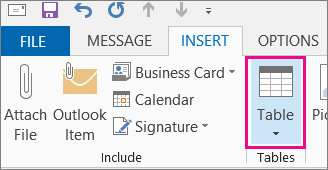
Click Insert > Table.
-
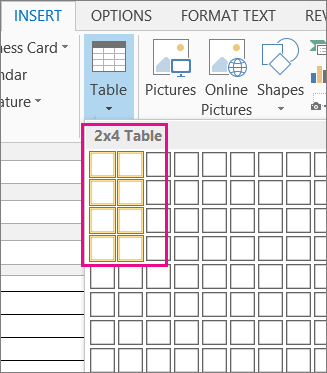
Drag your cursor in the table grid to select four rows and two columns that you'll use to hold your signature information.
-
Insert your cursor into the first cell of the table, and then click Insert > Pictures.

-
Find a photo of yourself on your computer to add to your signature, click to select it, and then click OK. Common image file formats for pictures include .bmp, .gif, .jpg, and .png.
-
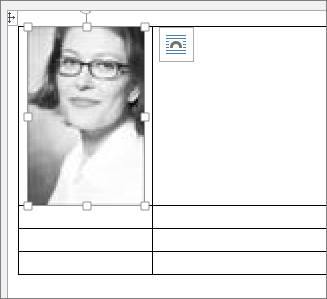
Drag to resize the column so there is no extra room in the cell.
-
In the first row (second column) of the table, type your name, job title, and company name.

-
In the second row (second column), type your work phone number, mobile phone number, and email address.

-
In the third row (second column), type the URL of your company's web site.

-
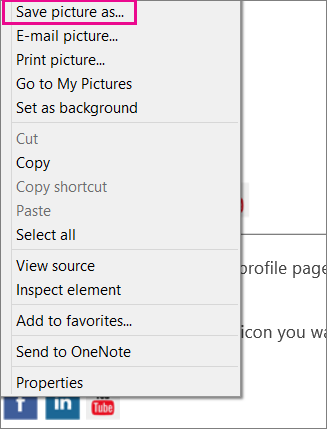
In this article, right-click the Twitter icon below:


-
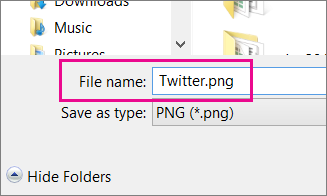
Click Save picture as to save an icon as an individual .png picture file on your computer.
-
Type Twitter.png as the File name and save it to your computer's desktop.
-
In the fourth row (second column), click Insert a picture, browse to the Twitter .png file that you saved, click to select it, and then click Insert. Repeat steps 10-13 for each additional social icon that you want to add.

-
To link each icon to the associated social profile page, click the icon, click Hyperlink, and then add the URL in the Address box. For example, if you added the Twitter icon, add the URL to your personal Twitter page.
-
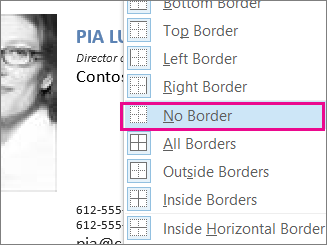
Click the layout selector to select the whole table.

-
On the Design box, click Borders, and then click No Border.
-
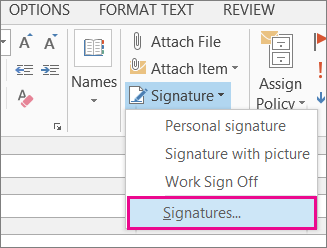
Copy the entire table, and in the Include group, click Signature, and then click Signatures.
-
Type Signature with social icons to save the signature with a unique name and click OK. If you create multiple signatures, this will help you identify this particular signature when you add it to an email later it on.
-
Paste the table into the Edit signature box.
-
Click OK to finish creating the signature.
You can automatically add your new signature all outgoing messages, or you can choose which messages should include a signature.
Create a handwritten signature
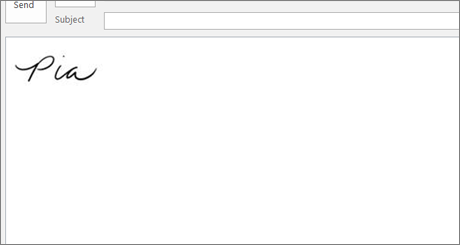
You may want to add a personal touch to your email by adding your handwritten name to your signature.
-
Capture your signature and turn it into a picture. There are many ways to do this:
-
Use a touch device Sign your name on a touch device, and then turn the signature into a picture. Check the instructions on your touch device, if you need help.
-
Scan your signature Sign your name on a piece of paper, and then scan it to turn it into a picture.
-
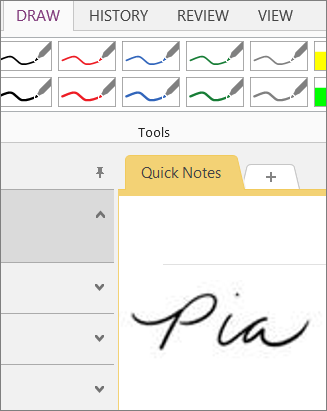
Draw and sketch notes on a page In OneNote, click Draw, and then use a drawing tool to sign your name. Use the Snipping Tool to capture the image, and then save it as a picture.
-
-
On the Home tab, click New Email.
-
Click the Message tab.
-
In the Include group, click Signature, and then click Signatures.
-
On the E-mail Signature tab, click New.
-
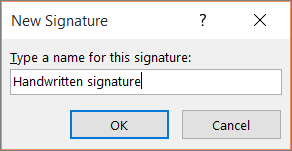
Type Handwritten signature to save the signature with a unique name and click OK. If you create multiple signatures, this will help you identify this particular signature when you add it to an email later it on.
-
Click in the Edit signature box, and then click Insert a picture.
-
Browse to your signature picture that you saved on your computer, click to select it, and then click OK.
-
Click OK to finish creating the signature.
You can automatically add your new signature all outgoing messages, or you can choose which messages should include a signature.
Looking for something else?
The signatures in this article are just a few examples of how you can create custom signatures. Use your creativity to create your own.
-
On the Home tab, click New E-mail.
-
Click the Message tab.
-
In the Include group, click Signature, and then click Signatures.
-
On the E-mail Signature tab, click New.
-
Type a name for the signature, and then click OK.
-
In the Edit signature box, type the text that you want to include in the signature.
-
To format the text, select the text, and then use the style and formatting buttons to select the options that you want.
-
To add elements other than text, click where you want the element to appear, and then do any of the following:
-
To add an electronic business card: Click Business Card, click a contact in the Filed As list, and then click OK.
-
To add a hyperlink: Click Hyperlink, type the link address or browse to a hyperlink, click to select it, and then click OK.
-
To add a picture: Click Pictures, browse to a picture, click to select it, and then click OK. Common image file formats for pictures include .bmp, .gif, .jpg, and .png.
-
-
To finish creating the signature, click OK.
You can automatically add your new signature all outgoing messages, or you can choose which messages should include a signature.
Microsoft Office Tutorials: Create A Custom Email Signature In Outlook >>>>> Download Now
ReplyDelete>>>>> Download Full
Microsoft Office Tutorials: Create A Custom Email Signature In Outlook >>>>> Download LINK
>>>>> Download Now
Microsoft Office Tutorials: Create A Custom Email Signature In Outlook >>>>> Download Full
>>>>> Download LINK aQ