Schedule a meeting with other people
You can send a meeting request to one or more people. Outlook tracks who accepts the request and reserves time on your calendar for the meeting. When you create a meeting request, you can add attachments, set a location, and use the Scheduling Assistant to choose the best time for your meeting.
Schedule a meeting
-
Create a meeting request in one of the following ways:
-
From the Inbox, select New Items > Meeting or use the keyboard shortcut Ctrl + Shift + Q.

-
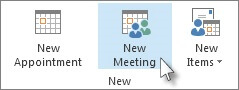
From the calendar, select New Meeting or use the keyboard shortcut Ctrl + Shift + Q.
-
From an email message in the Inbox, select the Reply with Meeting button.
-
-
Add attendees in one of two ways:
-
Add your attendees to the To line of the meeting request and skip to step 4.
-
If you're using an Office 365 or an Exchange account, use the Scheduling Assistant to see attendee schedules.
-
-
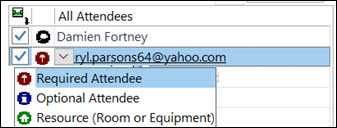
In the Scheduling Assistant, either click the box under your name and type an attendee's name or email address or click the Add Attendees button to bring up your address book.
Click the icon next to the attendee's name in the Scheduling Assistant to mark a specific attendee as a Required Attendee ,Optional Attendee, or a Resource. When you start typing a attendee's name, Outlook will provide suggestions for you based on the people you've met with or emailed recently. Choose a name from the list to add an attendee.
-
Add a meeting subject, start time and end time, and location.
In Outlook 2016 and Outlook for Office 365, you can start typing a location's name, for example, Fourth Coffee Shop or Conference Room 23, and Outlook will look for location matches. Select one of the suggestions to choose that location, or continue typing to enter another location.
Tip: If you use a Microsoft Exchange account or Office 365 email account, click Scheduling Assistant, then click Room Finder to check availability and reserve rooms. For more information, see Use the Scheduling Assistant and Room Finder for meetings in Outlook.
-
To attach a file to a meeting request, on the Insert menu, select Attach File, then choose the file you want to add.
-
If you don't want to make this a recurring meeting, click Send. Otherwise, see Make a meeting recurring.
 If you use Outlook for iOS, your mobile device can remind you when you need to leave to make it to your appointments on time.
Turn on Time To Leave
-
From Outlook for iOS, select Settings > Time To Leave.
-
Select a supported account, then use the slider to enable Time To Leave.
Note: Time To Leave is not yet available for Outlook for Android. Only Office 365, Outlook.com, and some Gmail accounts are supported.
Prevent attendees from forwarding a meeting
If you're using Office 365, when you create a meeting request, you can prevent meeting attendees from forwarding the meeting request to other people. This new option is available to Monthly channel customers after upgrading to Version 1808.
-
Before you send the meeting request, select Response Options > Allow Forwarding to toggle the ability for attendees to forward a meeting request.
See Prevent forwarding of a meeting to learn more.
Make a meeting recurring
-
Click Meeting > Recurrence.
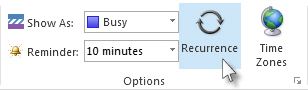
Note: Use the keyboard shortcut Ctrl+G to schedule the meeting to repeat regularly.
-
Choose the options for the recurrence pattern you want, and then click OK.
Note: When you add a recurrence pattern to a meeting request, the Meeting tab changes to Meeting Series.
-
To send the meeting request, click Send.
Add a person to an existing meeting
You can add another attendee to an existing meeting.
If you're the meeting owner:
-
Double-click to open the meeting, then use the To line or the Scheduling Assistant to add one or more people to the meeting.
-
Click Send and then select one of the following:
-
Send updates only to added or deleted attendees.
-
Send updates to all attendees.
-
If you're not the meeting owner
-
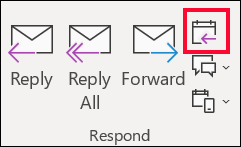
Open the meeting request. In the Respond group on the ribbon, select Respond, then Forward. Add one or more recipients to the meeting request.
-
Click Send. The meeting owner will receive notification that you've forwarded the meeting request to another person. For more information, see Forward a meeting.
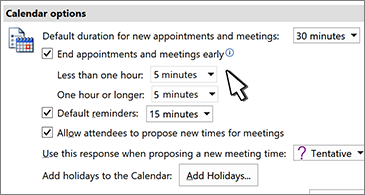
End meetings early
| |
 This feature is available to
 If you're using Outlook for Office 365, you can now have Outlook end your meetings a few minutes early. This can help you build in travel time between meetings. You can choose a different duration for meetings under one hour and meetings over one hour.
-
Select File > Options > Calendar > Calendar options
-
Check the End appointments and meetings early checkbox.
-
Use the drop-downs to select the number of minutes for meetings less than one hour and one hour or longer, then click OK.
No comments:
Post a Comment