Create a chart
Exploring charts in Excel and finding that the one you pick isn't working well for your data is a thing of the past! Try the Recommended Charts command on the Insert tab to quickly create a chart that's just right for your data.
-
Select the data for which you want to create a chart.
-
Click Insert > Recommended Charts.

-
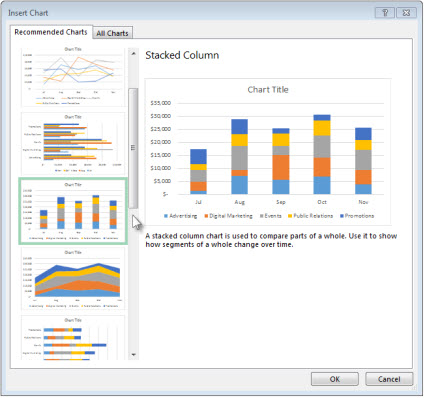
On the Recommended Charts tab, scroll through the list of charts that Excel recommends for your data, and click any chart to see how your data will look.

Tip: If you don't see a chart you like, click All Charts to see all available chart types.
-
When you find the chart you like, click it > OK.
-
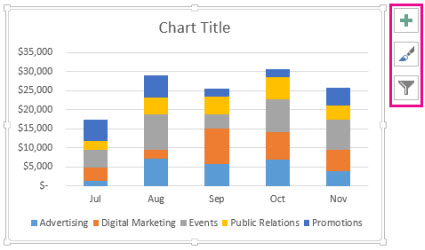
Use the Chart Elements, Chart Styles, and Chart Filters buttons next to the upper-right corner of the chart to add chart elements like axis titles or data labels, customize the look of your chart, or change the data that's shown in the chart.

-
To access additional design and formatting features, click anywhere in the chart to add the Chart Tools to the ribbon, and then click the options you want on the Design and Format tabs.

Tip: If you're using Office Professional Plus, you can also use Power View to create a chart. For more about Power View, see Charts and other visualizations in Power View.
No comments:
Post a Comment