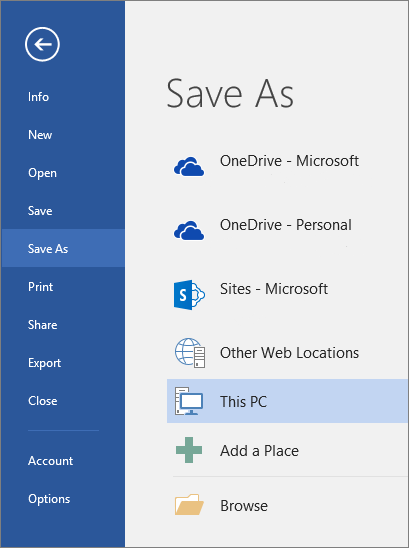
Use Save As on the File menu
Save As gives you a way to save a copy of the current file you're working on, with a different name or in a different location.
Note: If your file is stored on OneDrive or SharePoint the command may be called Save a Copy, but the functionality is the same.

To save the file to the Cloud, select one of the locations your accounts let you get to, sign in if necessary, and then save the file.
To save a file to your computer, select This PC, select the folder you want to save the file to, or select Browse to use the Open dialog box to find a location.
Tips
-
To add a new location, such as OneDrive or SharePoint, click Add a Place.
-
Change how many recent folders you see by clicking File > Options > Advanced. Under Display set the number you want to see in the Show this number of unpinned Recent Folders box. If there's a folder you always want to be shown in the Recent Folders list, hover your mouse over it in the list, right-click, and then select Pin to list.
-
If you want to open a file from, or save a file to, the root of your Windows drive (i.e. C:\), you first must run your Office app as an administrator.
-
If you're used to using the Save As dialog box from earlier versions of Office, you can go back to using that. Click File > Options > Save, and then check the Don't show the Backstage when opening or saving files box. The setting applies to all your Office programs. If you want to use the Save As dialog box without making a setting across Office programs, just press F12 instead of Ctrl+S when you save a file.
-
The setting in File > Options > Save > Default local file location is only the default for local files on your computer. No other locations have a default setting. You'll need to choose a place each time you do Save As.
No comments:
Post a Comment