Add an email account by using advanced settings
If you're not able to set up your email with the basic setup wizard in Mail for Windows 10, you can use the Advanced setup option to add your account.
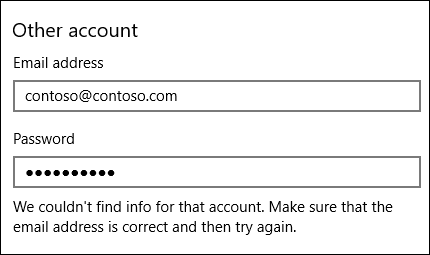
Note: Use the Advanced setup option if you receive a notification that your account can't be found or that your settings are out of date.

Add your email account using Advanced setup
-
Open the Mail or Calendar app, and choose Settings
 at the bottom left.
Note: On a phone or tablet, choose the three dots at the bottom of the page to access Settings.

-
Choose Manage Accounts > Add account.
-
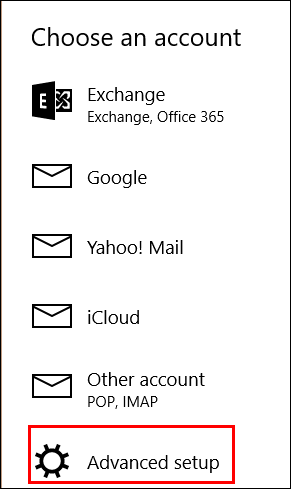
Choose Advanced setup.

Note: Advanced setup is the last option in the Add account box. If you don't see Advanced setup, you may need to scroll down.
-
Choose the kind of account you want to set up. For most email addresses, you'll choose Internet email. If you're not sure which type of account to pick, contact your email provider's technical support.

-
If you have an Exchange ActiveSync account, you'll need your server name and domain name. For example, add mail.server.com in the Server box, where mail.server.com is your Exchange server name.
-
For all other accounts, you'll need a variety of different settings:
-
Email address: This is your full email address, for example, tony@contoso.com.
-
User name: In most cases, your username is the same as your email address.
-
Password: Your password is case sensitive.
-
Account name: This is a friendly name you'll use to identify your account. For example, Tony's account.
-
Send your messages using this name: When people receive your email messages, they'll see this name.
-
Incoming email server: Your incoming email server address is how Mail for Windows 10 retrieves your messages. If you don't know your incoming email server, you can find that information for many popular email addresses in our POP and IMAP server name reference or contact your email provider's technical support. Most email accounts use IMAP. For example, if you have a Yahoo account, you'll enter imap.mail.yahoo.com in the box.
-
Outgoing (SMTP) email server: Your outgoing email server address is how Mail for Windows 10 sends your messages. If you don't know your outgoing email server, you can find that information for many popular email addresses in our POP and IMAP server name reference or contact your email provider's technical support. For example, if you have a Yahoo account, you'll enter smtp.mail.yahoo.com in the box.
-
The final four checkboxes are checked by default, and for almost all email accounts, you don't need to change these settings. If your email server settings in the POP and IMAP server name reference topic state that SSL isn't used, you can uncheck those boxes.
-
-
Once you've entered all of the required information, choose Sign in.
Troubleshoot problems
-
If account setup fails: Contact your email provider's technical support to verify your incoming and outgoing email server names and SSL settings.
-
If you can't sync your Yahoo account: You may need to give Mail for Windows 10 permission to access your account.
-
Go to https://mail.yahoo.com.
-
Choose your name in the upper right corner of the screen, then choose Account Info.
-
Choose Account security in the left pane, then turn Allow apps that use less secure sign in on.
-
-
If you see a message that your account is out-of-date: See Your account settings are out-of-date.
-
If you see a message that your account isn't synced yet : Choose the sync icon at the top of your message list. If you don't see messages arrive in your Inbox, see Resolve Sync issues in Mail and Calendar apps in Windows 10.
-
If you see a message that your certificate is untrusted : Contact your email provider to verify your incoming and outgoing email server names and SSL settings. If your settings are correct, you can choose Continue to trust the certificate.
-
If you see the message We didn't find anything to show here : See Where are my email messages or events?


No comments:
Post a Comment