Use a SmartArt graphic to create a timeline showing target dates for an assignment or project.
Create a timeline
-
On the Insert tab, click Smart Art.

-
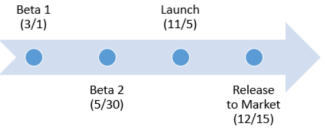
Pick a timeline layout from the gallery that appears, such as this Basic Timeline in the List section.

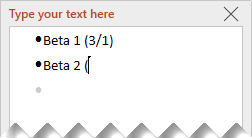
On the slide, a text editor opens next to the graphic so you can easily add words to the graphic.
-
In the text editor, enter the dates and descriptions, and then press Enter.
-
Optionally, you can make a sub-item in the bulleted list by clicking the bullet with the text you want to use for a sub-item, and on the Smart Art tab, clicking Demote.

Change the color or style of a timeline
You can change the color or style of the timeline graphic. You can also choose a different graphic layout entirely.
-
Select the timeline.
-
Select the SmartArt tab of the Ribbon, and then select either Change Colors or Styles to see a menu of available options for the timeline graphic. Click the style or color you want to select it.

-
You can also try changing the layout by opening the layout gallery to the left of Change Colors. Some of the options in the List and Process sections of the gallery are suitable for timelines.
Resize the timeline
You can change the size of the graphic so it fits better on your slide.
-
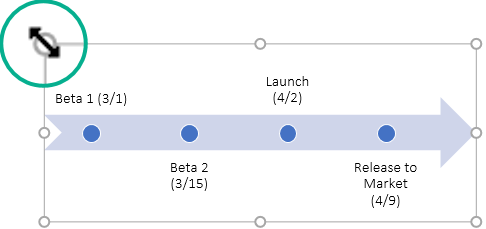
Select the timeline.
-
Point at one of the corner sizing handles until you see the two-headed arrow, and then click and drag to resize the timeline.
Microsoft Office Tutorials: Create A Timeline In Powerpoint For The Web >>>>> Download Now
ReplyDelete>>>>> Download Full
Microsoft Office Tutorials: Create A Timeline In Powerpoint For The Web >>>>> Download LINK
>>>>> Download Now
Microsoft Office Tutorials: Create A Timeline In Powerpoint For The Web >>>>> Download Full
>>>>> Download LINK C3