Bring focus and visual interest to your page with the Hero web part. You can display up to five items in the Hero web part and use compelling images, text, and links to draw attention to each. The Hero web part is included by default on Communication sites, but you can also add the Hero web part to other pages.
Notes:
-
Some functionality is introduced gradually to organizations that have opted in to the Targeted Release program. This means that you may not yet see this feature or it may look different than what is described in the help articles.
-
You must have Edit permissions to create pages. If you are an owner but you are unable to add a page, your administrator may have turned off the ability to do so.
Contents
The Hero web part on Communication sites: Topic and Showcase
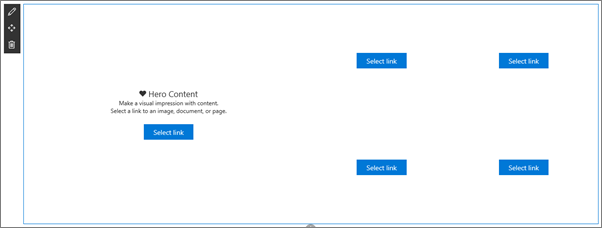
When you create a Communication site, the Hero web part is included on your page by default. It is pre-populated with default images, text and links that you change to showcase your own images, text, pages, links, or documents.
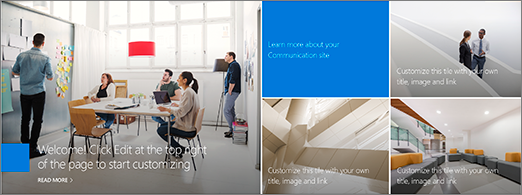
When you select Topic for the type of communication site you want, the default hero is a tiled layout with five tiles (which you can change from one to five):
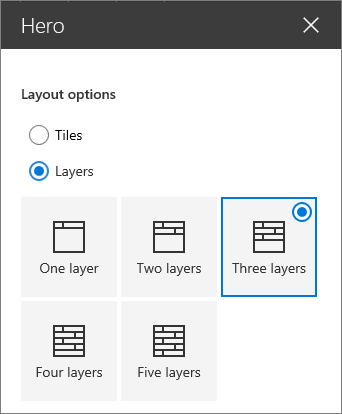
When you select Showcase for the type of communication site you want, the default hero is a vertical layout with three layers (which you can change from one to five layers):

You can change the layout of the Hero web part from a grid to vertical layers using the Edit web part button  , and you can change the links, images, and text for each tile or layer using the Edit details button
  for each tile or layer.
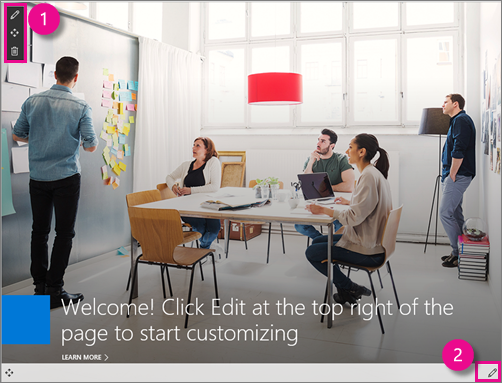
1. Edit web part button
2. Edit details button
Change the layout of the Hero web part
Watch this video to see how it's done, or follow the steps below the video.

-
If you are not already in edit mode on your page, click Edit on the top right of the page.
-
Click the web part Edit web part button
on the left and select the type of layout you want - you can select up to 5 tiles (like that on a Topic site), or up to 5 layers (like that on a Showcase site).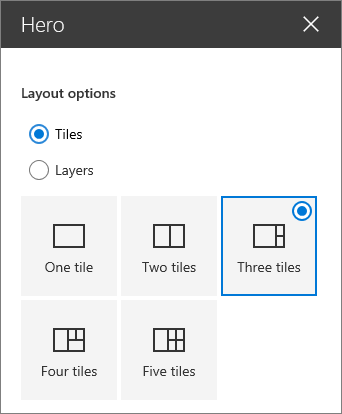
Change the image, text, and links for each tile or layer
Watch this video to see how it's done, or follow the steps below the video.
-
If you are not already in edit mode on your page, click Edit on the top right of the page.
-
Click Edit details
at the bottom right of the tile or layer you want to change. -
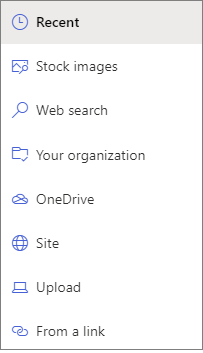
In the toolbox, click Change, and then choose a location from which to get your link:
-
Recent: If you have recently opened images, pages, or documents you'll find them listed here.
-
Stock images Stock images are provided by Microsoft. They are high-quality and sized just right for your use. If you're a SharePoint admin, we recommend that you enable a Content Delivery Network (CDN) to improve performance of getting images.
-
Web search: You can find images from Bing that utilize the Creative Common license. You are responsible for reviewing licensing for an image before you insert it on your page. SharePoint in Microsoft 365 only.
-
Your organization: If your organization has specified a set of approved assets, you'll be able to choose from that set here. If you're a SharePoint Admin and want to learn how to create an asset library for Your organization, see Create an organization assets library.
-
OneDrive: You can get a link for a document or image you have stored on OneDrive. SharePoint in Microsoft 365 only.
-
Site: You can get a link for a document, image, or page from a Site you specify.
-
Upload: You can upload a document or image from a personal device.
-
From a link: Enter a link for your page, document, or image from OneDrive or SharePoint in Microsoft 365.
Note: Links external to your site will not show an image preview in U.S. Government GCC High and DoD, and Office 365 operated by 21Vianet.
-
-
Select your image, page, or document and click Open.
-
In the toolbox, under Image, select Custom image or Color only (Color only is available just for the Tiles layout, and the color corresponds to your site theme color).
The Auto-selected option automatically selects an image from the page or document that you are linking to, if one is available.
-
Enter Alternative text for the image.
-
Under Options:
-
You can show a Call to action link by switching the toggle to Yes. Then add your Call to action text (for example, "Learn more"). The Call to action link is available for each layer in a layered layout, but only for the largest tile in a tiled layout.
-
For a layered layout, you can also show a Topic heading for each layer by switching the toggle for Topic heading to Yes. Then add your Topic heading text.
-
Change the focal point of an image
In SharePoint in Microsoft 365, you can change the focal point on a selected image within the Hero web part to get the most important part of your picture in the frame.
-
If you are not already in edit mode on your page, click Edit on the top right of the page.
-
Click Set focal point
 in the toolbar on the bottom of the Hero image you want to change.
 -
Drag the focal point where you want it in the image.

Reorder tiles or layers
You can reorder tiles or layers by moving them where you want.
-
If you are not already in edit mode on your page, click Edit on the top right of the page.
-
Click and hold the Move item button, and then drag the tile or layer where you want.
Put the Hero web part in one column
The Hero web part is designed to take up the full width of the page. If you would rather the Hero web part did not take up the full width, you can add move it into a column that is not full width.
Watch this video to see how it's done, or follow the steps below the video.
-
If you're not in edit mode already, click Edit at the top right of the page.
-
Hover your mouse just above the Hero web part, and click the circled + on the left of the web part
-
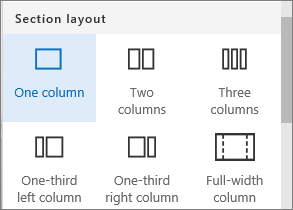
Under Section layout, select one column.
-
On the left side of the web part, use the Move web part button to drag the Hero web part into the column you just added.

Add an empty Hero web part to a page
You can add a Hero web part to a page in a Team site or a Communication site. To do this:
-
If you are not already in edit mode on your page, click Edit on the top right of the page.
-
On your page, hover your mouse above or below an existing web part and you'll see a line with a circled +, like this:

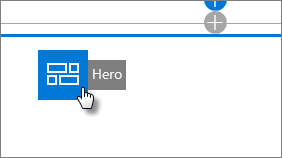
Click +, and then choose the Hero web part.
-
Click the web part Edit button
and select the type of layout you want - a grid from 1 to 5 tiles may be used, or 1 to 5 vertical layers. -
Click Select link for each tile you want to change.
-
For each tile, in the toolbox, click Select, and then choose a location from which to get your link:
In the toolbox, click Change, and then choose a location from which to get your link:
-
Recent: If you have recently opened images, pages, or documents you'll find them listed here.
-
Web search: You can find images from Bing that utilize the Creative Common license. You are responsible for reviewing licensing for an image before you insert it on your page. SharePoint in Microsoft 365 only.
-
Your organization: If your organization has specified a set of approved assets, you'll be able to choose from that set here. If you're a SharePoint Admin and want to learn how to create an asset library for Your organization, see Create an organization assets library.
-
OneDrive: You can get a link for a document or image you have stored on OneDrive. SharePoint in Microsoft 365 only.
-
Site: You can get a link for a document, image, or page from a Site you specify.
-
Upload: You can upload a document or image from a personal device.
-
From a link: Enter a link for your page, document, or image from OneDrive for SharePoint in Microsoft 365.
-
-
Select your image, page, or document and click Open.
-
In the toolbox, under Image, select Custom image or Color only. The Auto-selected option automatically selects an image from the page or document that you are linking to, if one is available. Color only is available just for the Tiles layout, and the color corresponds to your site theme color.
-
Enter Alternative text for the image.
-
Under Options (SharePoint in Microsoft 365 only):
-
You can show a Call to action link by switching the toggle to Yes. Then add your Call to action text (for example, "Learn more"). The Call to action link is available for each layer in a layered layout, but only for the largest tile in a tiled layout.
-
For a layered layout, you can also show a Topic heading for each layer by switching the toggle for Topic heading to Yes. Then add your Topic heading text.
-
Image scaling in the Hero web part
To choose optimally-sized images for the Hero web part, consider the following:
-
The web part is designed to fit the width of the screen in a full-bleed a layout.
-
In the Tiles layout, the height of the web part is scaled to follow an aspect ratio of 8:3, and images inside the web part scale to an aspect ratio of 4:3.
-
In the Layers layout, an individual layer scales to an aspect ratio of 8:3, and images inside each layer scale to an aspect ratio near 9:16.
Note: You can add a link to a video or upload a video to the Hero web part. However, videos cannot be played within the web part. Users can click the link for the video and be taken to the video player or link source to view the video.
Special thanks to HACK VANISH, a professional hacker I’ve been hiring for the past 2 years because, I find him to be an outstanding hacker who has aided me in various hacking related issues, ranging from fixing my poor FICO credit score of about 437 TransUnion, 462 Equifax to 802 plus excellent score, tracking my cheating husband’s phone and currently has helped me recover my lost crypto funds from an online scam investment I recently ventured into, I must confess he is the best, quite brilliant, ever since I discovered him through a positive review I saw on Wallet Hub and reached out to him via Email: Hackvanish @ Gmail. com, and Phone: +1(747) 293-8514, to which he responded in less than 10mins, I have never regretted working with him, he’s been quite helpful and highly efficient. I Would recommend his services to anyone without hesitation.
ReplyDeleteMicrosoft Office Tutorials: Use The Hero Web Part >>>>> Download Now
ReplyDelete>>>>> Download Full
Microsoft Office Tutorials: Use The Hero Web Part >>>>> Download LINK
>>>>> Download Now
Microsoft Office Tutorials: Use The Hero Web Part >>>>> Download Full
>>>>> Download LINK t7
PINNACLE CREDIT SPECIALIST remains the best credit expertise I have known. I had 23 negative things on my credit that were holding me back. One of them is from Capital one another from sears which I paid off and I am not sure of the others but they are both 6 years old. I filed bankruptcy 5years ago and settled with all of these. My attention was called that they are still on my reports I recently got referred by my best friend to hire (pinnaclecreditspecialist@gmail.com / +1 585 466 4373) which I did and he helped me fix my credit and my score improved by a huge leap. I recommend anyone that needs to fix his or her credit to get through with PINNACLE CREDIT SPECIALIST. He is just the best. Kudos to the entire team PINNACLE!
ReplyDelete