Use a custom domain name to rename your Office 365 Small Business public website
Note: The SharePoint Online Public Website information in this article applies only if your organization purchased Office 365 prior to March 9, 2015. Customers who currently use this feature will continue to have access to the feature for a minimum of two years after the changeover date of March 9, 2015. New customers who subscribed to Office 365 after the changeover date don't have access to this feature. Moving forward, Office 365 customers have access to industry-leading third-party offerings that enable them to have a public website that provides a complete online solution and presence. For more information about this change, see Information about changes to the SharePoint Online Public Website feature in Office 365.
 | Want some help? |
Your Office 365 public website has an initial address that is something like www.contoso-public.sharepoint.com, where contoso is the name you chose when you signed up. To rename it, you first have to add a domain to Office 365, and then you can change your Office 365 website address to the friendlier name.
Why rename your Office 365 website? So customers can access your site by using a familiar domain that you already own, or a new domain that you've chosen and purchased for your business.
The steps you'll follow to rename your website depend on two things:
-
Which Office 365 plan you're using. The steps in this article are for Office 365 Small Business which is no longer available for purchase. There's a separate set of steps to follow if you have a different Office 365 plan.
-
Whether you or Office 365 manage your domain's DNS records. During the steps you follow to add your domain, you choose whether to have Office 365 manage your domain's DNS records, or to keep managing the DNS records yourself at your DNS hosting provider. You'll follow different steps in this article, depending on which option you picked. (Not sure which option to pick? Learn more about choosing where your domain's Office 365 records are managed.)
Pick one of the following
Steps to rename your website: When Office 365 manages your domain's DNS records
-
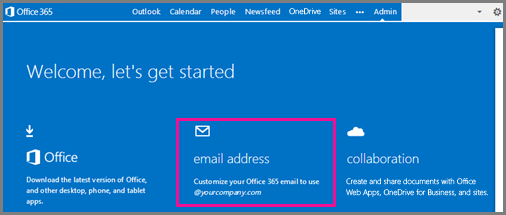
If you haven't done so already, set up your domain with Office 365. To get started, on the Getting Started pane, click Email address, then follow the steps in the wizard.
Note: If you've already updated your email address to use a custom domain and you want to use a different domain for your website URL, you can add another domain to Office 365.

-
Design and set up your public website, for example, by adding your company name, logo, and business information.
-
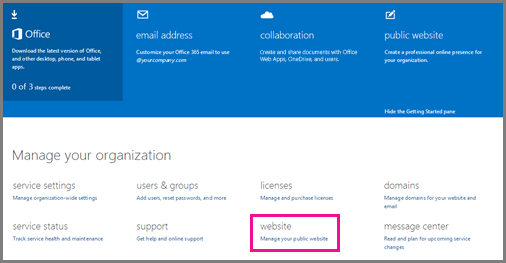
On the Admin page, under Website, click Manage your public website.

-
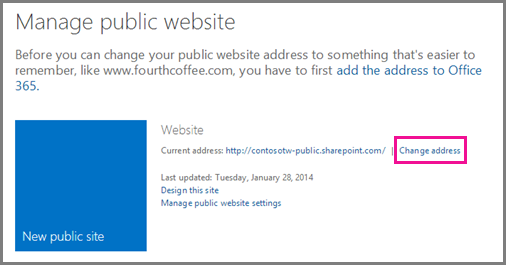
On the Manage public website page, next to your website, click Change address.

-
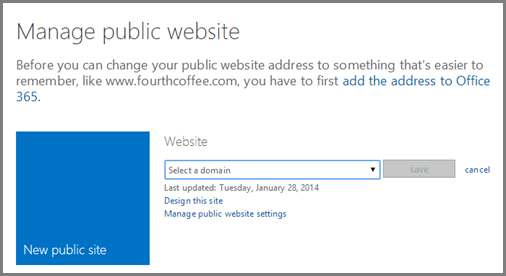
In the drop-down list, choose the URL with your domain name, like http://www.fourthcoffee.com.

Note: If you've been using Office 365 for a while, you might have two public websites with the service. If this is your situation, learn about working with your two Office 365 public websites.
You can now go to your website using your custom domain, for example: http://www.contoso.com/, instead of your temporary Office 365 domain, for example: http://www.contoso-public.sharepoint.com/.
Steps to rename your website: When you manage your domain's DNS records outside Office 365
-
Design and set up your public website, for example, by adding your company name, logo, and business information.
-
If you haven't done so already, set up your domain with Office 365. To get started, on the Getting Started pane, click Email address, then follow the steps in the wizard.
Note: If you've already updated your email address to use a custom domain and you want to use a different domain for your website URL, you can add another domain to Office 365.
-
In the last step of the domains wizard, Change your website address, you'll be guided to add a CNAME record for your domain at your DNS hosting provider. Use the following values for the CNAME record:
-
Host name: Use www
-
Points to address: Use name.sharepoint.com, where name is your custom domain name. For example, contoso.sharepoint.com.
-
TTL: Use 1 hour
-
-
Wait about 15 minutes, and then click Done, go check.
You can now go to your website using your custom domain, for example: http://www.contoso.com/, instead of your temporary Office 365 domain, for example: http://www.contoso-public.sharepoint.com/.
A few things to keep in mind
When you change your website to use your custom domain, keep in mind the following.
-
If you want to keep your current public website, hosted outside of Office 365, instead of using a public website that uses your domain on Office 365, you can. To learn how, see Update DNS records to keep your website with your current hosting provider.
-
If you rename your Office 365 website, you can change the site name later to use another custom domain, or change back to the original URL, for example, contoso-public.sharepoint.com. Here's how:
-
If Office 365 manages your DNS records, use the Change address option to pick a different domain.
-
If you manage your DNS records at your DNS hosting provider, change the CNAME record (as described in the earlier steps) to point to use a different domain name, such as going back to the original domain, like contoso-public.sharepoint.com.
-
Your Office 365 public website has an initial address that is something like www.contoso-public.sharepoint.com, where contoso is the name you chose when you signed up. To rename it, you first have to add a domain to Office 365, and then you can change your Office 365 website address to the friendlier name.
ReplyDeletebenefits of a website for small business