Thursday, November 30, 2017

Adjust the local cache for your projects

Adjust the local cache for your projects

Microsoft Office Project Professional 2007 uses a local cache to let you work with projects as if they were stored locally, making the Save and Open operations much faster than in previous versions. You can adjust the cache size and location, and select specific projects to remove from the cache.

What do you want to do?

Learn more about the local cache

View cache status

Adjust the cache settings

Remove projects from the cache

Learn more about the local cache

The local cache helps you work more efficiently by synchronizing a local version of your project with the version stored on Project Server.

When you check out a project, the local version is updated with changes made to the server version. As you make changes to the checked-out project, those changes are saved to the local version of the project.

When you check the project back in to Project Server, only those changes that were made while the project was checked out are synchronized to the server version of the project.

While working on a checked-out project, you may want to occasionally save the project to Project Server without checking it back in. When you save the project, it synchronizes the changes, similar to the check-in process. After saving a project, you can continue to work on the project while it is synchronizing your changes with the server. The local caching works in the background. A message is displayed at the bottom of the Project window, indicating the percent that the synchronization is complete, and approximately how much time it should take before the project is synchronized.

Note: 

  • If the cache for your project is stored in a shared network location, be sure that you have a fast connection to that location to avoid synchronization issues.

  • When the project information in your local cache is not currently synchronized with the server, an indicator Button Image is displayed at the bottom of the Project window, regardless of which project is open. Your local cache may become out of synch with the server when multiple synchronization jobs are queued for processing, if your connection to the server is interrupted, or when a synchronization job fails.

  • By default, the local cache is created in the profile for the user currently logged on to Windows, and only that user can access it. To maintain security of the cached Project files on a shared computer, each user should log on to Windows separately. If a single Windows account is used for multiple users on a shared computer (for example, if your organization has individual Project Server accounts for each user), security of the cached Project files is only maintained when connected to Project Server. When working offline, any user logged on using the shared Windows account can view and modify the cached Project files.

Top of Page

View cache status

You can view your recent cache activities, such as checking a project in or saving changes to Project Server, on the Active Cache Status dialog box. If you receive an error when synchronizing a project with Project Server, you can view these error messages on the Active Cache Status dialog box, as well.

  1. On the Tools menu, point to Local Project Cache, and then click View Status.

  2. On the Status tab, review your recent cache activities, including the date and time when each activity occurred, and the status of the activity.

  3. On the Errors tab, review any errors you may have received while synchronizing your projects with Project Server.

    Note: Contact your server administrator for more information on the errors listed on the Errors tab.

Top of Page

Adjust the cache settings

  1. On the Tools menu, point to Local Project Cache, and then click Cache Settings.

  2. In the Cache size limit box, type the maximum amount of memory, in megabytes, that you want the cache to occupy on your hard drive.

  3. In the Cache location box, type the path to the location that you want to use for the cache.

    Tip: You can also click Browse to navigate to the cache location.

Top of Page

Remove projects from the cache

Removing projects from the cache can be helpful in reducing the number of projects you see in the Open dialog box, or in reducing the amount of memory used when you are approaching the cache size limit.

  1. On the Tools menu, point to Local Project Cache, and then click Cleanup Cache.

  2. In the Remove projects from cache section, in the Project Filter list, click Projects not checked out to you or Projects checked out to you to display the corresponding list of projects in the grid.

  3. Click the project in the grid that you want to remove from the cache, and then click Remove From Cache.

    To select multiple projects that are not listed consecutively, hold CTRL and click each task. To select multiple tasks that are listed consecutively, click the first task listed, and then hold SHIFT and click the last task listed to select the entire series of tasks.

    Tip: The Cache Details box displays information about the cache size, including the total cache size when you opened the Clean Up Cache dialog box, and the cache size limit. The Size column, in the Remove projects from cache section, individually displays the size of each project. When you select multiple tasks, the total size of the selected projects is displayed next to Total size of selected projects. Use these size totals to determine whether you are clearing enough space in the cache to meet your needs.

Top of Page

Why can't I create items or folders at the root level in the list view?

Why can't I create items or folders at the root level in the list view?

SharePoint Workspace does not distinguish visually between list items and folders. As a result, list folders appear to be list items in the list view, and you may not always distinguish between items and folders when selecting them.

SharePoint folders on a SharePoint site and in a SharePoint workspace

1. A folder in a SharePoint site.

2. A folder in a SharePoint workspace.

If you create a new list item or folder while the current selection is a list folder, or any item in a list folder, the new item or folder will be placed hierarchically below the list folder.

If you want to create a list item or folder that appears at the root level in the list view, you must first make sure that no items in the list are selected. To ensure that no items are selected, you can do either of the following:

  • Hold down CTRL and click all highlighted items to deselect them.

  • Right-click in a white space area of the list view.

Claim or release a task

Claim or release a task

When a specific person must complete an SAP business task, the task author assigns the task directly to that person.

However, some tasks can be completed by any one of several different people. In this case, the task author might assign the task to a group of people. The unassigned task appears in each Task Decision Makers' task list. Group members can also complete the task without claiming it.

When you claim a task, Duet Enterprise for Microsoft SharePoint and SAP assigns the task to you, and removes it from the task lists of other Task Decision makers in your group. Once you claim a task, no one else can claim or decide the task until you release it.

What do you want to do?

Claim a task from Outlook

Claim a task from a Duet site

Release a task

Claim a task from Outlook

When someone assigns a task to a group of which you are a member, Duet sends an e-mail task notification to each Task Decision Maker in Outlook. When you receive a task notification in Outlook, you can then open and claim the task.

To claim a task from Outlook:

  1. In your Outlook Inbox, double-click the name of the message that contains the notification for the task you want to claim.

  2. In the message body, click detailed information. This opens the Task Details page on the Duet site.

  3. On the Task Details page, click Claim Task Claim Task .

Top of Page

Claim a task from a Duet site

When someone assigns a task to your group, you can claim it from a Duet site.

To claim a task from a Duet site:

Note:  A site designer can include an SAP workflow in any Duet site. Because of this, you might find tasks in a variety of locations. Often, an administrator creates a Tasks Center for tasks, but you might also find tasks other areas, such as the Customer Center and the Products Center. For assistance locating tasks in your environment, talk to your workflow manager or your site administrator.

  1. From the browser, open the Duet site and click Tasks Center.

  2. On the Task Center page, click All Site Content.

  3. On the All Site Content page, under Sites and Workspaces, click the name of the workflow that contains that task you want to claim.

  4. On the workflow page, click My Workflow Tasks, and then click the task you want to claim. This opens the Task Details page.

  5. On the Task Details page, click Claim Task Claim Task .

Top of Page

Release a task

When you no longer want to claim a task, you can release the task back to the original group. When you release a task, Duet re-assigns the task to the group and sends a notification message to each group member.

  1. From the browser, open the Duet site and click Tasks Center.

  2. On the Tasks Center page, click All Site Content.

  3. On the All Site Content page, under Sites and Workspaces, click the name of the workflow that contains that task you want to release.

  4. On the workflow page, click My Workflow Tasks, and then click the task you want to release. This opens the Task Details page.

  5. Click task you want to release, and then click Release Task Release task .

Top of Page

Connection Not Completed in Business Contact Manager

Connection Not Completed in Business Contact Manager

You receive this message when you attempt to connect to a database located on another computer, and the connection is not completed. The most likely reasons for the connection not completing are:

  • Your user name has not been granted access on the computer on which the database is located.

    To give you access, the database owner must create a user account for you on that computer. The database owner must also grant you access to the database by selecting your name on the Select Users page of the Manage Sharing wizard. Contact the database owner to ask or confirm that you have been granted access.

  • The password that you are using to log on to the remote computer (the computer on which the database is located) does not match the password you use to log on to your local computer (the computer you are currently using).

    To gain access, you must change your remote password (the password that you use to log on to the computer on which the database is located) to match your local password (the password that you use to log on to the computer you are currently using). Click the Change Password button.

  • Each computer must be running the same version of Business Contact Manager for Outlook for each user to connect to a shared Business Contact Manager database.

Tip:  The database owner must select the with users working on other computers in my network check box in the Manage Sharing wizard to grant access to someone who will connect to the shared database from a different computer. To add a new user whose name is not listed, on the Select Users page, click Add New User. If you are part of a workgroup, the database owner must specify a temporary password for each user. The password cannot be blank.

Top of Page

Wednesday, November 29, 2017

Use keyboard shortcuts with an external keyboard in Word for iOS

Use keyboard shortcuts with an external keyboard in Word for iOS

Word for iPhone supports many of your favorite Word-specific keyboard shortcuts.

Editing and formatting a document

To

Press

Undo the last action

Apple Cmd Symbol + Z

Repeat the last action

Apple Cmd Symbol + Y

Cut selected content

Apple Cmd Symbol + X

Copy selected content

Apple Cmd Symbol + C

Paste copied or cut content

Apple Cmd Symbol + V

Select all

Apple Cmd Symbol + A

Bold selected content

Apple Cmd Symbol + B

Italicize selected content

Apple Cmd Symbol + I

Underline selected content

Apple Cmd Symbol + U

Insert a line break

SHIFT + RETURN

Navigating a document

To

Press

Select text

SHIFT + LEFT/RIGHT ARROW or SHIFT + UP/DOWN ARROW

Find text

Apple Cmd Symbol + F

Move cursor up by one paragraph

OPTION + UP ARROW

Move cursor down by one paragraph

OPTION + DOWN ARROW

Move cursor right by one word

OPTION + RIGHT ARROW

Move cursor left by one word

OPTION + LEFT ARROW

Move cursor to the beginning of the document

Apple Cmd Symbol + UP ARROW

Move cursor to the end of the document

Apple Cmd Symbol + DOWN ARROW

Move cursor to the beginning of the current line

Apple Cmd Symbol + LEFT ARROW

Move cursor to the end of the current line

Apple Cmd Symbol + RIGHT ARROW

Select paragraph above

SHIFT + OPTION + UP ARROW

Select paragraph below

SHIFT + OPTION + DOWN ARROW

Select word to the left

SHIFT + OPTION + LEFT ARROW

Select word to the right

SHIFT + OPTION + RIGHT ARROW

Select from current position to beginning of the document

SHIFT + Apple Cmd Symbol + UP ARROW

Select from current position to the end of the document

SHIFT + Apple Cmd Symbol + DOWN ARROW

Select from current position to beginning of the line

SHIFT + Apple Cmd Symbol + LEFT ARROW

Select from current position to end of the line

SHIFT + Apple Cmd Symbol + RIGHT ARROW

Share files in OneDrive for Android

Share files in OneDrive for Android

You can share OneDrive files, photos, and folders from the OneDrive app on your Android device just as you can on a PC or Mac. You can also see files that other people have shared with you. To stop sharing, go to the OneDrive website and sign in with your Microsoft account.

Select how you want to share

  1. In the OneDrive app, select the file or folder you want (press and hold to select it), and then select Share Share files .

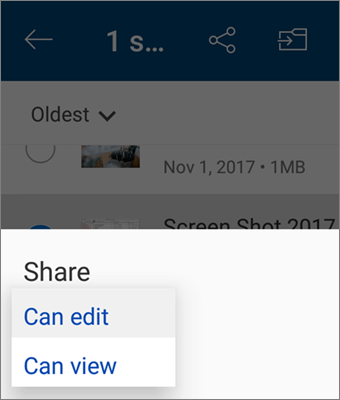
  2. (optional) Select whether recipients Can edit the file, or Can view the file as read-only.

    Screenshot of changing the permission while sharing in the OneDrive app for Android

  3. Select Copy link, and then paste the link in the app or website where you're sharing the link.

    Copy link button in OneDrive for Android

    Note: Remember that anyone who has the link can open, download and save the document, and forward the link.

  1. In the OneDrive app, select the file or folder you want to share (press and hold to select it).

  2. Tap Share Share files > Invite people.

    Invite People button in OneDroid for Android

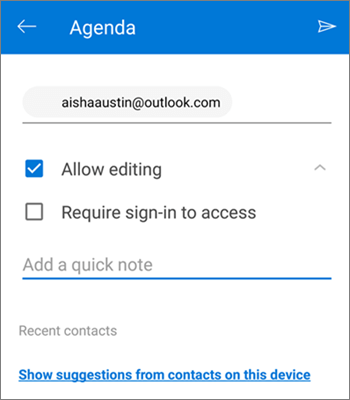
  3. At Add people to share with, enter the names or e-mail addresses you want.

    Screenshot of inviting people to share a file from OneDrive for Android

  4. To let people edit, leave the Allow editing box checked. Uncheck that box to let people only view the file or folder.

    Tip: To add a note to your sharing invitation, tap the arrow at the end of Allow editing, then tap Add a quick note and type what you want to say.

  5. Tap Send Send share invitation . The recipients get an email message with a link to the document.

  1. In the OneDrive app, select the file or folder you want to share (press and hold to select it).

  2. Tap Share Share files > Send files.

    Send files button in OneDrive for Android

  3. In the Share list, tap the app you want to use to send the file.

  4. To use that app every time you send a file, tap Always. If you tap Just once, this choice appears again next time you send a file.

    After you make this selection, the app you selected opens. Use it to share the file.

    Tip: Sharing as an attachment works only with individual files. If you want to share a folder, use Copy link or Invite people.

Files shared with you

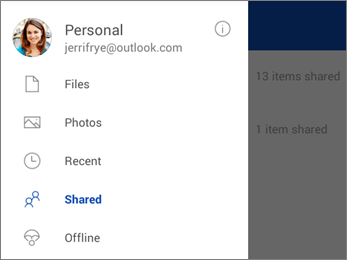
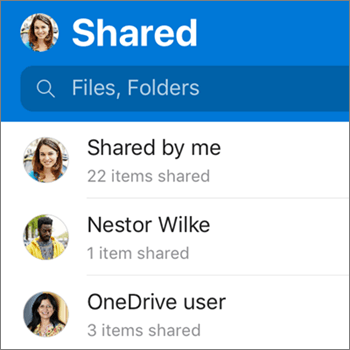
When someone shares a OneDrive file or folder with you, you typically get an email message or a notification on your Android device. To find the files shared with you in the OneDrive app, tap Menu Delve for Android Menu > Shared view.

Shared view in OneDrive

Shared view includes files shared with you, and files you've shared with others. Tap a sharer's name to find the files shared by that person.

Shared files view

Note: The Shared view looks different when you're signed in with a work or school account.

Need more help?

Online

Get online help
See more OneDrive Help for Android or OneDrive for Business Help.

Email Support icon

Email support
If you still need help, email the OneDrive support team.

Office 365 community forums

Ask the community
Get help from experts in our forums:
OneDrive community forum

Display or hide circles around invalid data

Display or hide circles around invalid data

Data validation is designed to display messages and prevent invalid entries only when users type data directly in a cell. Validation messages won't appear and invalid data can be entered when a user enters data in a cell by copying or filling, a formula in the cell calculates a result that isn't valid, or a macro enters invalid data in the cell.

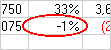
red circle around invalid data You may want to audit your worksheets to look for incorrect data that may cause inaccurate calculations or results. You can identify cells with data validation that contain invalid data by displaying a red circle around them so that you can easily find and correct any problems.
What do you want to do?

Circle invalid cells

Hide validation circles

Circle invalid cells

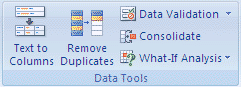
  1. On the Data tab, in the Data Tools group, click the arrow next to Data Validation, and then click Circle Invalid Data.

    Excel Ribbon Image

Microsoft Office Excel displays a red circle around any cells that contain invalid data.

All cells that don't meet their data validation criteria are circled, including values that were typed, copied, or filled in the cells, calculated by formulas, or entered by macros.

Top of Page

Hide validation circles

Do one of the following:

  • To remove the circle from a single cell, enter valid data in the cell.

  • On the Data tab, in the Data Tools group, click the arrow next to Data Validation, and then click Clear Validation Circles.

    Excel Ribbon Image

Top of Page