Wednesday, March 2, 2022

Guide to the access user interface

This article describes the Access user interface elements, and provides links to more information about these elements and how to customize your experience.

In this article

Overview

The three main components of the Access user interface are:

  • The ribbon    is the strip of tabs across the top of the program window that contains groups of commands.

  • The Backstage view    is the collection of commands that you see on the File tab on the ribbon.

  • The Navigation Pane    is the pane on the left side of the Access program window that lets you work with database objects. 

These three elements provide the environment in which you create and use databases.

The ribbon

The ribbon is the primary replacement for menus and toolbars. It primarily consists of tabs that have groups of buttons.

The ribbon has main tabs that group related commonly-used commands, contextual tabs that appear only when you can use them, and the Quick Access Toolbar, a small toolbar that you can customize with your favorite commands.

On the ribbon tabs, some of the buttons provide you a gallery of choices, while others launch a command.

The Backstage view

The Backstage view contains commands and information that apply to an entire database, such as Compact and Repair, as well as commands that were on the File menu in earlier versions, such as Print.

The Navigation Pane

The Navigation Pane helps you organize your database objects, and is the main means of opening or changing the design of a database object.

The Navigation Pane is organized by categories and groups. You can choose from a variety of organizational options, and can also create your own custom organization scheme in the Navigation Pane. By default, a new database uses the Object Type category, which has groups that correspond to the various kinds of database object. The Object Type category organizes the database objects in a similar fashion to the default Database Window display from earlier versions.

You can minimize the Navigation Pane, and you can also hide it, but you cannot obscure the Navigation Pane by opening database objects in front of it.

The Backstage view

The Backstage view occupies the File tab on the ribbon and contains many commands. The Backstage view also contains other commands that apply to an entire database file. When you open Access but do not open a database (e.g., you open Access from the Windows Start menu), you see the Backstage view.

In Backstage view, you can create a new database, open an existing database, and perform many file and database maintenance tasks.

Create a new blank database

  1. Start Access from the Start menu or from a shortcut.

    The Backstage view appears.

  2. Do one of the following:

    • Create a new web database

      1. Under Available templates, click Blank web database.

      2. On the right, under Blank web database, type a name for your database file in the File Name box or use the one that is provided for you.

      3. Click Create.

        The new database is created, and a new table is opened in Datasheet view.

    • Create a new desktop database

      1. Under Available templates, click Blank database.

      2. On the right, under Blank database, type a name for your database file in the File Name box or use the one that is provided for you.

      3. Click Create.

        The new database is created, and a new table is opened in Datasheet view.

Access provides a number of templates with the product, and you can download more from Office.com. An Access template is a predesigned database complete with professionally designed tables, forms, and reports. Templates give you a big head start when you create a new database.

Create a new database from a sample template

  1. Start Access from the Start menu or from a shortcut.

    The Backstage view appears.

  2. Click Sample templates, and then browse the available templates.

  3. When you find the template that you want to use, click that template.

  4. On the right, in the File Name box, type a file name or use the one that is provided for you.

  5. Click Create.

    Access creates the new database from the template and opens it.

You can download additional Access templates from office.com directly from the Backstage view.

Create a new database from an Office.com template

  1. Start Access from the Start menu or from a shortcut.

    The Backstage view appears.

  2. Under Office.com Templates pane, click a category and then, when the templates in that category appear, click a template.

    Note: You can also search for a template by using the search box provided.

  3. In the File Name box, type a file name or use the one that is provided for you.

  4. Click Download.

    Access automatically downloads the template, creates a new database based on that template, stores it in your documents folder (for example, the My Documents folder), and opens the database.

When you open (or create and open) a database, Access adds the file name and location of the database to an internal list of the most recently used documents. This list is displayed on the Recent tab of Backstage view so that you can easily open your most recently used databases.

Open a recently used database

  1. Start Access.

  2. In Backstage view, click Recent, and then click the database that you want to open.

    Access opens the database.

Open a database from Backstage view

  1. Start Access.

  2. Click the File tab, and then click Open. When the Open dialog box appears, browse and select a file, and then click Open.

    The database opens.

Top of Page

The ribbon

The ribbon is the primary replacement for menus and toolbars and provides the main command interface in Access. One of the main advantages of the ribbon is that it consolidates, in one place, those tasks or entry points that used to require menus, toolbars, task panes, and other UI components to display. This way, you have one place in which to look for commands, instead of a multitude of places.

When you open a database, the ribbon appears at the top of the main Access window, where it displays the commands in the active command tab.
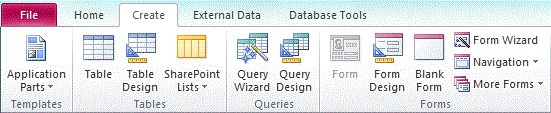
access ribbon

The ribbon contains a series of command tabs that contain commands. In Access, the main command tabs are File, Home, Create, External Data, and Database Tools. Each tab contains groups of related commands, and these groups surface some of the additional new UI elements, such as the gallery, which is a new type of control that presents choices visually.

The commands that are available on the ribbon also reflect the currently active object. For example, if you have a table opened in Datasheet view and you click Form on the Create tab, in the Forms group, Access creates the form, based on the active table. That is, the name of the active table is entered in the new form's RecordSource property. Moreover, some ribbon tabs only appear in certain contexts. For example, the Design tab only appears when you have an object open in Design view.

You can use keyboard shortcuts with the ribbon. All of the keyboard shortcuts from an earlier version of Access continue to work. The Keyboard Access System replaces the menu accelerators from earlier versions of Access. This system uses small indicators with a single letter or combination of letters that appear on the ribbon when you press the ALT key. These indicators show what keyboard shortcut actives the control underneath.

When you have selected a command tab, you can browse the commands available within that tab.

Select a command tab

  1. Start Access.

  2. Click the tab that you want.

-or-

  1. Start Access.

  2. Press and release the ALT key.

    The keyboard tips appear.

  3. Press the key or keys shown in the keyboard tip on or closest to the command tab that you want.

You can execute a command a number of different ways. The quickest and most direct route is to use the keyboard shortcut associated with the command.

For more information on keyboard shortcuts, see Keyboard shortcuts for Access.

Execute a command

  1. Start Access.

  2. Click the appropriate tab for the command. The following table shows a representative sampling of the tabs and the commands available on each tab. The tabs and the commands available change depending on what your are doing.

Command Tab

Common things you can do

Home

Select a different view.

Copy and paste from the clipboard.

Set the current font characteristics.

Set the current Font Alignment.

Apply rich text formatting to a memo field.

Work with records (Refresh, New, Save, Delete, Totals, Spelling, More).

Sort and filter records.

Find records.

Create

Create a new blank table.

Create a new table using a table template.

Create a list on a SharePoint site and a table in the current database that links to the newly created list.

Create a new blank table in Design view.

Create a new form based on the active table or query.

Create a new pivot table or chart.

Create a new report based on the active table or query.

Create a new query, macro, module, or class module.

External Data

Import or Link to external data.

Export data.

Collect and update data via e-mail.

Create saved imports and saved exports.

Run the Linked Table Manager.

Database Tools

Move some or all parts of a database to a new or existing SharePoint site.

Launch the Visual Basic editor or run a macro.

Create and view table relationships.

Show/hide object dependencies.

Run the Database Documenter or analyze performance.

Move data to Microsoft SQL Server or to an Access (Tables only) database.

Manage Access add-ins.

Create or edit a Visual Basic for Applications (VBA) module.

  1. Click the control that represents the command. Alternatively, if you know the keyboard shortcut for the command from an earlier version of Access, enter the keyboard shortcut by using the keyboard.

    -or-

    Press and release the ALT key.

    The access keys appear.

    Press the key or keys shown in the keyboard tip associated with the command that you want.

Contextual command tabs

In addition to the standard command tabs, Access also has contextual command tabs. Depending on your context (that is, which object you are working with and what you are doing), one or more contextual command tabs might appear next to the standard command tabs.
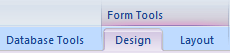
Contextual tabs

Activate a contextual command tab

  • Click the contextual command tab.

-or-

  1. Press and release the ALT key.

    The access keys appear.

  2. Press the key or keys shown in the access key that appears on or closest to the contextual command tab.

The contextual command tabs contain commands and features that you need to work in a specific context. For example, when you open a table in Design view, the contextual tabs contain commands that apply only when you are working with a table in that view. As another example, when you open a table in Design view, a contextual command tab named Design appears next to the Advanced Tools tab. When you click the Design tab, the ribbon shows the commands available to you only when the object is in Design view.

Galleries    

The ribbon also uses a kind of control called a gallery. The gallery control is designed to focus your attention on getting the results that you want. Rather than merely show commands, the gallery control shows the result of using those commands. The idea is to provide a visual way for you to browse and see what Access 2010 can do, with a focus on the results, rather than focusing solely on the commands themselves.
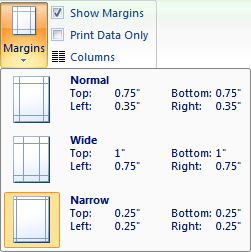
Margin gallery

Galleries come in different shapes and sizes. There is a grid layout, a menu-like representation that drops down, and even an on-ribbon layout that places the content of the gallery itself on the ribbon.

Hiding the ribbon

Sometimes, you might need a little more space to devote to your work area. For that reason, the ribbon can be collapsed so that only the bar with the command tabs remains. To hide the ribbon, double-click the active command tab. To show it again, double-click the active command tab again.

Hide and restore the ribbon

  1. Double-click the active command tab (the active tab is the highlighted tab).

  2. Double-click the active command tab again to restore the Ribbon.

Quick Access Toolbar (QAT)

The Quick Access Toolbar is a toolbar adjacent to the ribbon that allows one-click access to commands. The default set of commands include Save, Undo, and Redo, and you can customize the Quick Access Toolbar to include other commands that you use often. You can also modify the placement of the toolbar and change it from the default small size to large size. The small toolbar appears next to the command tabs on the ribbon. When you switch to the large size, the toolbar appears below the ribbon and extends its full width.
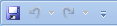
Quick access toolbar

Customize the Quick Access Toolbar

  1. Click the rightmost drop-down arrow in the toolbar.

  2. Under Customize Quick Access Toolbar, click the command that you want to add, and you are done.

    Or, if the command is not listed, click More Commands, and proceed to the next step of this procedure.

  3. In the Access Options dialog box, select the command or commands that you want to add, and then click Add.

  4. To remove a command, highlight it in the list on the right, and then click Remove. Alternatively, double-click the command in the list.

  5. Click OK when you are done.

Top of Page

Navigation Pane

When you open a database or create a new one, the names of your database objects appear in the Navigation Pane. The database objects include your tables, forms, reports, pages, macros, and modules.

Objects in the Navigation Pane

To open a database object or apply a command to a database object, right-click the object and select a menu item from the context menu. The commands on the context menu vary according to the object type.

Open a database object, such as a table, form, or report

  • In the Navigation Pane, double-click the object.

    -or-

    In the Navigation Pane, select the object, and then press ENTER.

    -or-

  • In the Navigation Pane, right-click an object, and then click Open.

Note that you can set an option to open objects with a single click in the Navigation Options dialog box.

The Navigation Pane divides your database objects into categories, and these categories contain groups. Some categories are predefined for you, and you can also create your own custom groups.

By default, the Navigation Pane appears when you open a database, including databases created in earlier versions of Access. You can prevent the Navigation Pane from appearing by default by setting a program option. The following set of steps explain how to take each action.

To show or hide the Navigation Pane    

  • Click the button in the upper-right corner of the Navigation Pane (Shutter bar open/close button for Navigation Pane in Access), or press F11.

Prevent the Navigation Pane from appearing by default

  1. Click the File tab, and then click Options.

    The Access Options dialog box appears.

  2. In the left pane, click Current Database.

  3. Under Navigation, clear the Display Navigation Pane check box, and then click OK.

For more information about the Navigation Pane, see the article View and manage objects by using the Navigation Pane.

Top of Page

Tabbed documents

For everyday interactive use, you may prefer the tabbed document interface. You can enable or disable tabbed documents by setting your Access Options (see Show or hide document tabs, later in this article). However, if you change the tabbed document settings, you must close and reopen your database for the new settings to take effect.
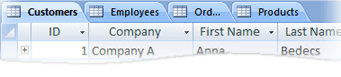
Tabbed object in Access 2007

Show or hide document tabs

  1. Click the File tab, and then click Options.

    The Access Options dialog box appears.

  2. In the left pane, click Current Database.

  3. In the Application Options section, under Document Window Options, select Tabbed Documents.

  4. Select or clear the Display Document Tabs check box. Clearing the check box turns off document tabs.

  5. Click OK.

    Notes: 

    • The Display Document Tabs setting is a per-database setting. You must set this independently for each database.

    • After you change the Display Document Tabs setting, you must close and reopen your database to see the change take effect.

    • New databases created by using Access display document tabs by default.

    • Databases created by using an earlier version of Access use overlapping windows by default.

Top of Page

Status bar

You can display a status bar at the bottom of the window. This standard UI element continues to be the place to look for status messages, property hints, progress indicators, and so on. The status bar also takes on two standard functions that you will also see in the status bar of other Office programs: View/Window switching and Zoom.

You can quickly switch the active window between one of the available views by using the controls available on the status bar. If you are viewing an object that supports variable zoom, you can adjust the zoom level to zoom in or out by using the slider on the status bar.

The status bar can be enabled or disabled in the Access Options dialog box.

Show or hide the status bar

  1. Click the File tab, and then click Options.

    The Access Options dialog box appears.

  2. In the left pane, click Current Database.

  3. Under Application Options, select or clear the Display Status Bar check box. Clearing the check box turns off the display of the status bar.

  4. Click OK.

Top of Page

Mini toolbar

Yyou can format text more easily by using the mini toolbar. When you select text for formatting, the mini toolbar automatically appears above the selected text. If you move the mouse pointer closer to the mini toolbar, the mini toolbar fades in and you can use it to apply bold, italic, font size, color, and so on. As you move the pointer away from the mini toolbar, the mini toolbar fades away. If you don't want to use the mini toolbar to apply text formatting to a selection, just move your pointer a few pixels away and the mini toolbar disappears.

Mini toolbar

Format text by using the mini toolbar

  1. Select the text to format.

    The mini toolbar transparently appears above the text.

  2. Apply formatting by using the mini toolbar.

Top of Page

Class notebook add in for onenote instructions

This add-in for a OneNote Class Notebook, opened in OneNote 2013 or 2016, enables teachers to save time and work even more efficiently with their Class Notebooks.

To download the add-in go to http://www.onenote.com/classnotebook.

For Help and Support, visit the Class Notebook add-in Support page or file a support ticket at https://aka.ms/EDUSupport.

Features include:

  • Distribute new pages, sections, or section groups to students in one or more classes easily and quickly

  • Distribute a single chunk of text, an image, or an ink selection to all students in a class notebook easily

  • Set individualized learning through distribution of new materials to specified students or student groups

  • Copy a Content Library to multiple Class Notebooks easily and quickly

  • Sequentially review student work (assignments, quizzes, etc.) easily in one or more classes

  • Launch Class Notebook app functionality easily

  • Connect OneNote Class Notebooks to your Learning Management System (LMS) or Student Information System (SIS)

  • Integrate assignments and grades from the Class Notebook to your LMS or related system

  • Provide useful Professional Development and Community Resources

  • IT Admin Installation Instructions

Class Notebook

When the Class Notebook add-in is installed, you'll find the Class Notebook tab in OneNote 2013 or 2016.

Class Notebook tab.

Install Class Notebook for OneNote 2013 or 2016

With Class Notebook Add in you can easily:

Distribute Pages and Content

Review Student's work

Connect OneNote to a Learning Management System

Create Assignments

Post scores for student's assignment

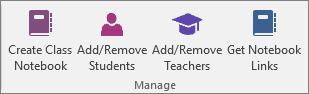
Manage

Each of these buttons launches a browser to access the Class Notebook app in Microsoft 365. You would then manage each of the functions in Class Notebook online.

Manage group of Class Notebook tab.

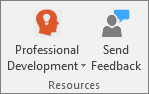
Resources

Resources group of Class Notebook tab.

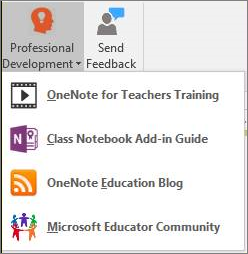
Professional Development

This button brings together useful resources and additional information and tips.

Class Notebook Resources.

Send Feedback

The Send Feedback button on the ribbon lets you send feedback directly to the development team. Click it, and your default mail client opens, ready to send us an email.

Deploying the Class Notebook Add-in

IT Administrators can deploy the Class Notebook Add-in broadly across a school or district. Instructions on how to do this can be found on the Download Center at https://www.microsoft.com/en-us/download/details.aspx?id=51934.

To deploy the Class Notebook Add-in with specific LMS or SIS information pre-configured for teachers, please visit the Group Policy page at https://aka.ms/classnotebookaddingrouppolicy.

Troubleshooting

We've worked hard to bring the best possible experience with this private alpha. Even so, you may hit snags. A few common issues and their workarounds are noted below.

Solutions to problems you might encounter

Release Notes

Version 0.3.14.0 (Original Release)

» View blog post about this version

Features:

  • Page distribution

  • Content distribution

  • Individual and Group distribution

  • New Section distribution

  • Content Library distribution

  • Review Student Work

  • Sort students by last name

  • Quick launcher for the Class Notebook app (Create Class Notebooks, Add/Remove students, Add/Remove teachers, Get Notebook list)

  • Professional Development links to OneNote Education training

Version 0.3.18.0 (March 2016)

» View blog post about this version

Features:

  • Support for Staff Notebooks

  • Support for printouts in page distribution

Version 0.4.0.0 (April 2016)

» View blog post about this version

Features:

  • LMS and SIS assignment and grading integration (https://www.onenote.com/edupartners)

  • The ability to undo (or "recall") a distributed page that inadvertently went to your students

  • The ability to distribute new Section Groups to your students for scenarios like new units in class

  • The ability to distribute new sections into your students' new Section Groups for a new project or lesson within that new unit

  • Ability for IT administrators to deploy an MSI installation of the add-in across a school or district, rather than having individual teachers need to install the add-in

  • Faster performance when distributing new sections

  • More icons (small section, notebook, and people icons)

  • Miscellaneous bug fixes, stability, and setup improvements

Version 0.4.5.0 (May 2016)

Features:

  • School Bytes assignment and grading integration

  • WinjiGo assignment and grading integration

  • Support for decimal grades across all LMSes

  • Support self-hosted LMSes

  • Support student mapping to handle cases where students have different names in Microsoft 365 and their LMS

  • Support for IT admin right-click installation

  • [Bug] Notebook ID was not permanent, causing existing notebook mappings to disappear randomly. This has been fixed, but it will cause a one-time reset of all existing notebook mappings.

  • [Bug] The Map Class Notebook dialog box was not displaying correctly at 125% window scaling. This has been fixed.

Version 0.5.0.0 (June 2016)

  • Aeries assignment/grading integration

  • Firefly Learning assignment/grading integration

  • PowerSchool assignment/grading integration

  • Rediker assignment/grading integration

  • Skyward assignment/grading integration

  • SunGard assignment/grading integration

  • WinjiGo assignment/grading integration

Version 0.5.1.0 (July 2016)

  • Google Classroom assignment/grading integration

Version 1.0.0.0 (August 2016)

Version 1.2.0.0 (September 2016)

  • SEQTA assignment/grading integration

  • Automatic mapping of class notebooks

  • Automatic mapping of students by last name, first name

  • Refresh tokens so teachers only have to sign in to LMS/SIS once

  • Display a warning when distributing pages that contain attachments

  • [Bug] Apostrophes in section names were not being preserved correctly during page distribution

Version 1.3.0.0 (September 2016)

  • Fixes an issue with grading in MS Classroom courses with a large number of assignments

Version 1.3.1.0 (October 2016)

  • Fixed an issue affecting Schoology logins

Version 1.3.2.0 (October 2016)

  • Fixed an issue preventing student mappings from getting saved

Version 1.4.0.0 (November 2016)

  • Added support for SEQTA LMS

  • Fixed some bugs that happened with certain content types for Page Distribution

Version 1.4.5.0 (December 2016)

  • Highlight unread pages in Review Student Work

  • Page distribution performance improvements

  • Automatic mapping of Microsoft Classroom class notebook
     

Version 1.5.0 (February 2017)

  • Stickers support, including customizable stickers

  • Grade scale Support for Canvas and Skooler - e.g. letter grades, custom points, percentage,

  • Fixes for different LMSes - Firefly and Rediker etc.

  • Bug fixes

Version 1.5.5 (March 2017)

  • Firefly: Assignment description field mapping to tasks in firefly LMS is now available

  • Updated menu item labels under Help and Feedback button

  • Review student work: improved usability for Mapping Student notebooks and grading

  • Bug fixes

Version 1.5.6 (March 2017)

  • Stability improvements

Version 1.5.7 (April 2017)

Fixes to improve Schoology assignment and grade integration

Stability improvements

Version 1.5.8 (May 2017)

Fixes to improve Skooler assignment and grade integration

Stability improvements

Verision 1.5.9 (May 2017)

Bug fixes and stability improvements

Skyward integration improvements  

Version 1.6.0 (May 2017)

New assignment and grade integration for Blackbaud onCampus

New assignment and grade integration for eSchoolData

Updated assignment and grade integration to match recent Google Classroom changes

Stability improvements

Version 1.6.1 (June 2017)

Skooler assignment and grade fix

Timeout improvement fix for Blackbaud assignment and grade integration


Version 1.7.0 (July 2017)

  • Two new sticker packs ("Silly Supplies" and "Cacti Friends")

  • Assignment and grade support for Edsby

  • Schoology assignment and grade integration improvements

  • Skooler assignment and grade integration improvements

  • Bug fixes

Version 1.8.0 (August 2017)

  • Assignment and grade integration with Infinite Campus

  • Assignment and grade integration with LiveGrades

  • Assignment and grade integration with EduPoint Synergy

Version 1.8.2.0 (August 2017)

  • Assignment and grade integration improvements for Canvas

  • Assignment and grade integration improvements for Edmodo

  • Assignment and grade integration improvements for Skooler

  • Assignment and grade integration improvements for SunGard

  • Assignment and grade integration improvements for Rediker

  • Assignment and grade integration improvements for WinjoGo
     

Version 1.8.3.0 (September)

  • Assignment and grade integration improvements for Skooler

  • Student mapping fix to allow for larger classes

  • Miscellaneous bug fixes

Version 1.8.4.0 (October)

  • Microsoft Education Resources integration into the "Insert" menu of OneNote desktop

  • Assignment and grade integration improvements for Skyward

  • Improvements for Skooler assignment and grade integration

  • Miscellaneous bug fixes

Version 2.0.0.0 (November)

  • Support for assignments and grades within Microsoft Teams for Education Class Notebooks

  • Schoology and Blackbaud fixes for Review Student Work

  • Skooler assignment and grades bug fix

  • Create Assignment's description box size increased to support more characters (1000)

  • Stickers layout fix

  • Miscellaneous bugs fixes and performance improvements

Version 2.1.0.0 (January)

  • Support for assignment and grades in PowerSchool - PowerTeacher Pro

  • 4 new sticker packs

  • Miscellaneous bug fixes and performance improvements
     

Version 2.2.0.0 (March)

  • Microsoft Teams decimal grading and custom points

  • Schoology custom points and assignment categories

  • Synergy multiple grade types

Version 2.3.0.0 (April)

  • Support for assignment and grades in Focus School Software

  • Support for assignment and grades in IST

  • Miscellaneous bug fixes and performance improvements

Version 2.4.0.0 (May)

  • Updated Support URL for Helpshift

Version 2.5.0.0 (June)

  • Page locking support to allow teachers to make a page or set of student pages read-only

  • Bug fixes and performance improvements

Version 2.6.0.0 (June)

  • Assignment and grade integration with Capita SIMS

  • Ability to have the Addin automatically detect new LMS and SISes that are added

  • Bug fixes and performance improvements

Version 2.7.0.0 (August)

  • Bug fixes for Moodle and Edmodo

  • Bug fixes for Manage buttons

  • Other general bug fixes

Version 2.8.0.0 (September)

  • Bug fixes and improvements to Education Resources

Version 2.9.0.0 (December 2018)

  • Bug fixes and improvements to Education Resources
     

Version 3.0.0.0 (March 2019)

  • Bug fixes and retirement of Education Resources


Version 3.1.0.0 (September 2019)

  • A fix for Canvas authentication for assignment and grade integration


Version 3.2.0.0 (April 2020)

  • We've improved performance, reliability, and the overall page distribution experience.  We've also made some big fixes.

Version 3.3.0.0 (November 2020)

  • We've removed the Connections buttons for LMS Connections, plus some bug fixes.

Most recent release​​​​

Version 3.4.0.0 (May 2021)

  • Bugs fixes and performance improvements

Outlook for ios and android help

The Outlook mobile app can sync email, contacts, calendar and files from Microsoft 365, Exchange Online, Exchange Server (2007 SP2, 2010, 2013, and 2016), Outlook.com (including Hotmail, Live, and MSN), Gmail and Yahoo! Mail. Outlook for iOS and Android also connects to OneDrive, OneDrive for Business, Dropbox, Google Drive & Box.

Note: To find out if your iOS or Android device can run the Outlook app, see system requirements.

Learn how to get more out of your Outlook app on iOS or Android devices to power your productivity at work, at home, or on the go.

Outlook for iOS and Android videos

Image of a woman holding a phone.

Sortby function

The SORTBY function sorts the contents of a range or array based on the values in a corresponding range or array.

Your browser does not support video. Install Microsoft Silverlight, Adobe Flash Player, or Internet Explorer 9.

Note: This function is currently available to Microsoft 365 subscribers in Current Channel. It will be available to Microsoft 365 subscribers in Semi-Annual Enterprise Channel starting in July 2020. For more information on how features are rolled out to Microsoft 365 subscribers, see When do I get the newest features for Microsoft 365.

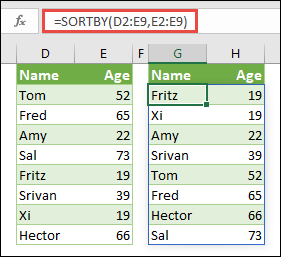
In this example, we're sorting a list of people's names by their age, in ascending order.

Use SORTBY to sort a range. In this case, we used =SORTBY(D2:E9,E2:E9) to sort a list of people's names by their age, in ascending order.

=SORTBY(array, by_array1, [sort_order1], [by_array2, sort_order2],…) 

Argument

Description

array

Required

The array or range to sort

by_array1

Required

The array or range to sort on

[sort_order1]

Optional

The order to use for sorting. 1 for ascending, -1 for descending. Default is ascending.

[by_array2]

Optional

The array or range to sort on

[sort_order2]

Optional

The order to use for sorting. 1 for ascending, -1 for descending. Default is ascending.

Notes: 

  • An array can be thought of as a row of values, a column of values, or a combination of rows and columns of values. In the example above, the array for our SORTBY formula is range D2:E9.

  • The SORTBY function will return an array, which will spill if it's the final result of a formula. This means that Excel will dynamically create the appropriate sized array range when you press ENTER. If your supporting data is in an Excel Table, then the array will automatically resize as you add or remove data from your array range if you're using Structured References. For more details, see this article on Spilled Array Behavior.

  • Excel has limited support for dynamic arrays between workbooks, and this scenario is only supported when both workbooks are open. If you close the source workbook, any linked dynamic array formulas will return a #REF! error when they are refreshed.

Examples

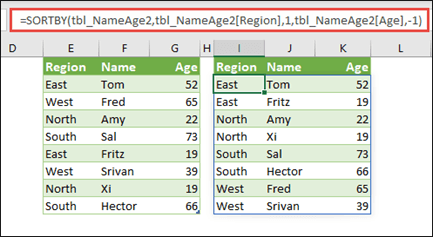
Sort a table by Region in ascending order, then by each person's age, in descending order.

Sort a table, by Region in ascending order, then by each person's age, in descending order.

Use SORTBY with RANDARRAY, and COUNTA to randomize a list of values. In this case, E2# references the dynamic array range beginning in cell E2, as that was populated by using =SEQUENCE(10). The # sign is called the spilled range operator.

Use SORTBY with RANDARRAY, and COUNTA. In this case, E2# references the entire range beginning in cell E2, as that was populated using =SEQUENCE(10). The # sign is called the spilled range operator.

Use SORTBY to sort a table of temperature and rainfall values by high temperature.

Use SORTBY to sort a table of temperature and rainfall values by high temperature.

Error conditions

  • The by_array arguments must either be one row high, or one column wide.

  • All of the arguments must be the same size.

  • If the sort order argument is not -1, or 1, the formula will result in a #VALUE! error. If you leave out the sort order argument, Excel will default to ascending order.

Need more help?

You can always ask an expert in the Excel Tech Community or get support in the Answers community.

See Also

FILTER function

RANDARRAY function

SEQUENCE function

SORT function

UNIQUE function

#SPILL! errors in Excel

Dynamic arrays and spilled array behavior

Implicit intersection operator: @

Create a chart with recommended charts

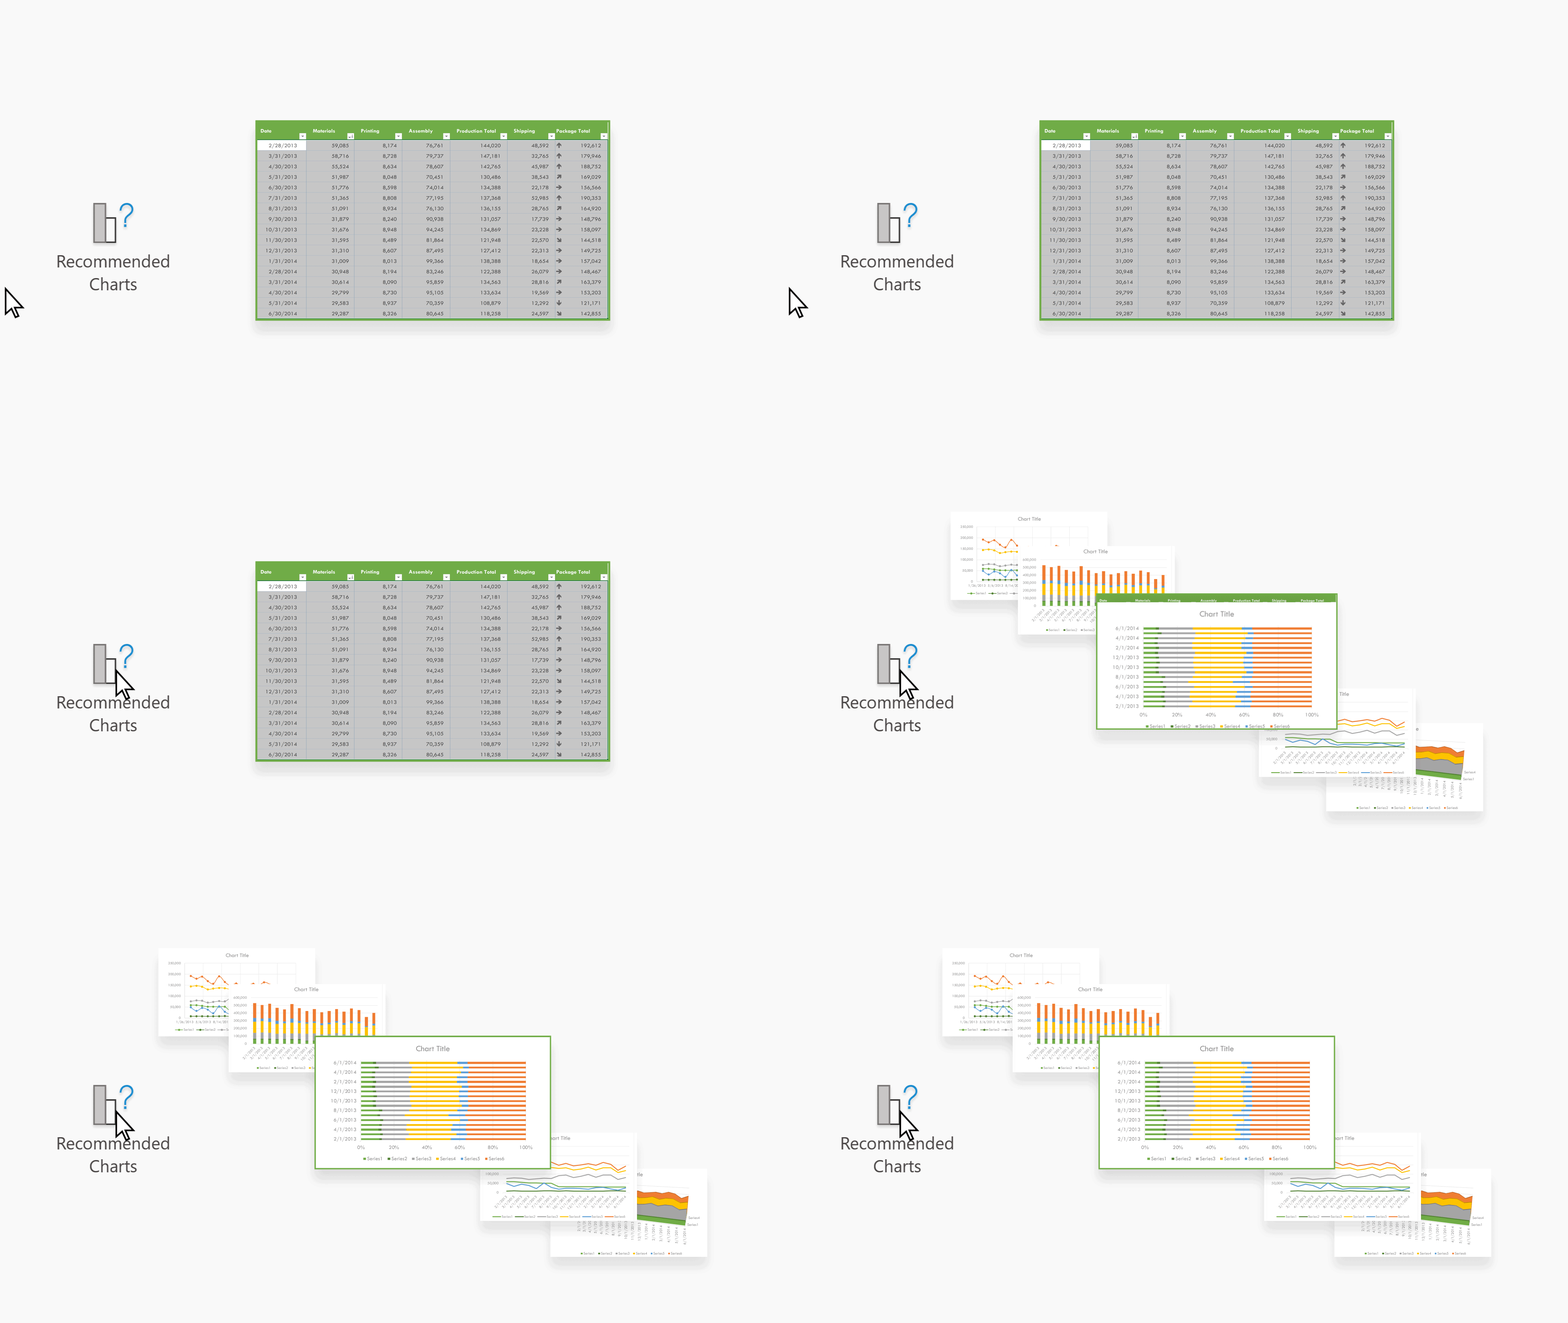
If you're exploring charts in Excel and having a hard time figuring out which one is right for you, then you can try the Recommended Charts command on the Insert tab. Excel will analyze your data and make suggestions for you.

  1. Select the data you want to use for your chart.

  2. Click Insert > Recommended Charts.

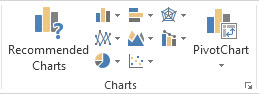
    Charts group on the Insert tab

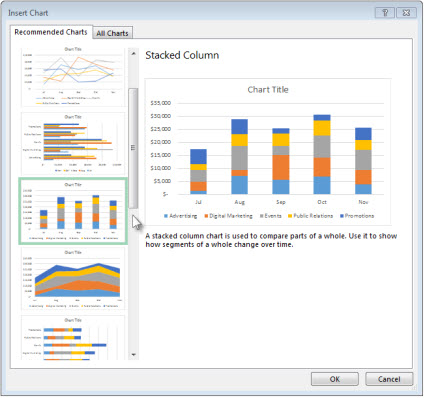
  3. On the Recommended Charts tab, scroll through the list of charts that Excel recommends for your data, and click any chart to see how your data will look.

    Recommended Charts tab in the Insert Chart dialog box

    Tip: If you don't see a chart you like, click All Charts to see all available chart types.

  4. When you find the chart you like, click it > OK.

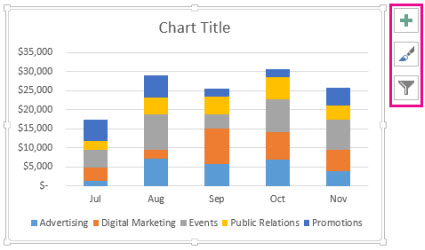
  5. Use the Chart Elements, Chart Styles, and Chart Filters buttons next to the upper-right corner of the chart to add chart elements like axis titles or data labels, customize the look of your chart, or change the data that's shown in the chart.

    Recommended stacked column chart

  6. To access additional design and formatting features, click anywhere in the chart to add the Chart Tools to the ribbon, and then click the options you want on the Design and Format tabs.

    Design and Format tabs for the Chart Tools

  1. Select the data you want to use for your chart.

  2. Click Insert > Recommended Charts.

    Charts group on the Insert tab

  3. On the Recommended Charts tab, scroll through the list of charts that Excel recommends for your data, and click any chart to see how your data will look.

    Recommended Charts tab in the Insert Chart dialog box

    Tip: If you don't see a chart you like, click All Charts to see all available chart types.

  4. When you find the chart you like, click it > OK.

  5. Use the Chart Elements, Chart Styles, and Chart Filters buttons next to the upper-right corner of the chart to add chart elements like axis titles or data labels, customize the look of your chart, or change the data that's shown in the chart.

    Recommended stacked column chart

  6. To access additional design and formatting features, click anywhere in the chart to add the Chart Tools to the ribbon, and then click the options you want on the Design and Format tabs.

    Design and Format tabs for the Chart Tools

Recommended charts in Excel for the web creates interesting visuals about your data in a task pane.

Recommended Chart

Note: Recommended charts are available to Microsoft 365 subscribers in English, French, Spanish, German, Simplified Chinese, and Japanese. If you are a Microsoft 365 subscriber, make sure you have the latest version of Office. To learn more about the different update channels for Office, see: Overview of update channels for Microsoft 365 Apps.

Get started

  1. Select the data you want to use for your chart.

  2. Click Insert > Recommended Charts.

  3. Choose a chart to insert from the Recommended Charts task pane, and select the + Insert Pivot Chart or + Insert Chart option.

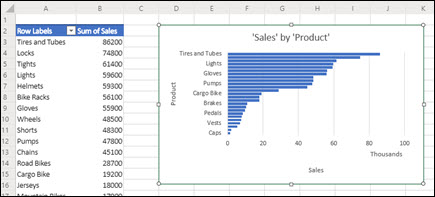
  4. If you choose the Pivot chart option, then Excel will insert a new worksheet for you with a PivotTable that is the data source for the Pivot Chart you selected. Each time you use the Insert Pivot Chart option, Excel will insert a new worksheet. If you choose the Insert Chart option, Excel will insert a chart directly on the worksheet with your source data.

    Recommended PivotTable and Pivot Chart added to a newly inserted worksheet.

Not sure how to get started?

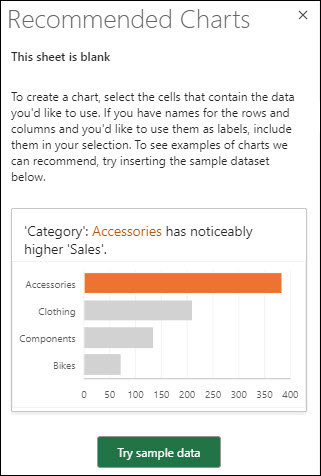
If you're not sure how to get started, we'll give you some sample data you can experiment with.

  1. Add a new worksheet -- You can right-click on any sheet tab, then select Insert.

  2. Go to Insert > Recommended Charts, and Excel will load the Recommended Charts pane.

  3. Select the Try sample data button.

    Excel Recommended Charts pane when no data is present in the worksheet. Select the Try sample data to automatically add a sample dataset to your worksheet.

    Excel will add some sample data to your worksheet, analyze it, then add recommended charts to the pane.

  4. Follow the steps in the Get Started section to insert any of the recommended Pivot Charts or charts.

Need more help?

You can always ask an expert in the Excel Tech Community or get support in the Answers community.

See Also

Available chart types in Office

Get Microsoft chart templates