Sunday, August 1, 2021

Answer a call in teams

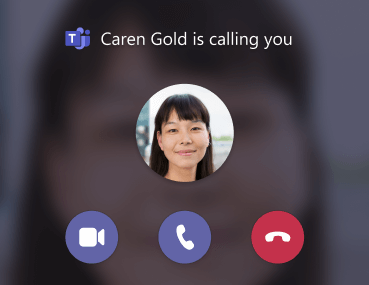
When someone calls you, you'll get a notification that lets you accept or decline the call.

Teams-incoming call notification

  • Select Accept with audio Calls button to answer with audio only.

  • Select Accept with video Video call button to accept the call and enable video as well.

  • Select Decline call red phone to decline the call and go on with your day.

When a call comes in to Teams, a notification pops up, letting you know. Tap Answer Calls button (the blue one!) to start talking.

When you get an incoming call, you'll see an onscreen notification. Tap the notification to answer.

Add or remove columns in the inbox

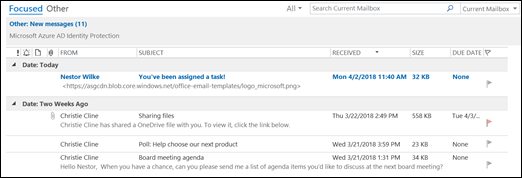
You can add or remove columns in some folders and views, such as the Inbox and other Mail folders, contact lists, or task lists.

Important: In order to use these instructions, you have to switch to a view other than the default view.

Change your view to show columns

In order to add and remove columns, you must use a list view. The default view for the Inbox is Compact, showing messages grouped by conversation.

To switch your view to a list view:

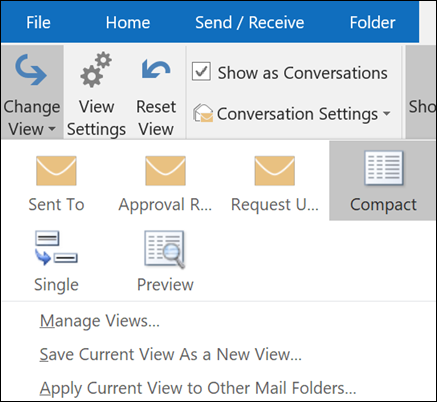
  1. Select the View menu, then Change View.

    Select Change View to pick a new view.
  2. Select Single or Preview.

Add or remove columns in a list view

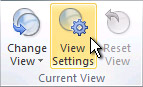
  1. On the View tab, in the Current View group, click View Settings.

    View Settings command on the ribbon

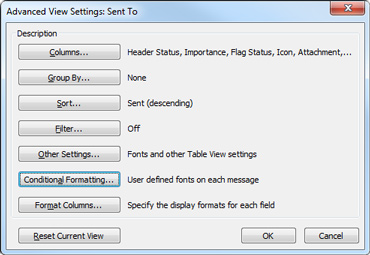
  2. In the Advanced View Settings dialog box, click Columns.

    Advanced View Settings dialog box

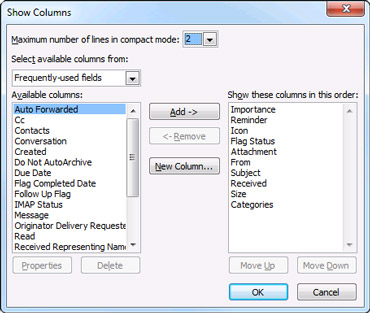
  3. In the Show Columns dialog box, in the Available columns list, click a column name, and then click Add.

    Show Columns dialog box

    If the column that you want is not in the Available columns list, click the Select available columns from box to see additional sets of columns.

    To create a custom column, click New Column, enter a Name for the column, and then click the Type and Format of information that you want the column to display.

    To remove a column, in the Show these columns in this order list, click a column name, and then click Remove.

  4. Click OK to save your changes and apply your new view.

    Important: If you don't see your new column appear in your view, you probably aren't using a list view. See Change your view to show columns to switch to a list view first, then repeat the steps in this procedure.

    You can add additional columns to your list view.

Columns in your Inbox and in other table  views of message lists are known as fields. To restore a column in these views, you need to add the column or field back to the views.

  1. On the View menu, point to Current View, and then click Customize Current View.

  2. Click Fields.

  3. In the Available fields list, click the field that you want to add.

    If the field that you want is not in the Available fields list, click a different set of fields in the Select available fields from box, and then click a field in the Available fields list.

  4. Click Add.

Saturday, July 31, 2021

Use groups in the outlook mobile app

Microsoft 365 Groups are now available in the Outlook mobile app. Use groups to start, read, and respond to group conversations. You can also join and leave a group right from the Outlook app.

Browse your groups

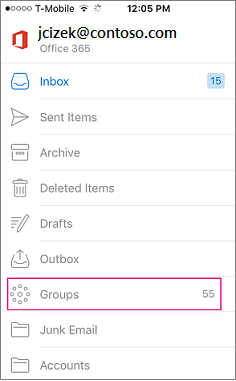
You'll find a Groups node in your folder list. Tap that node to see all the groups you're a member of. Here's an example from iOS.

Groups is a node on the folder list in Outlook mobile

Join or leave a group

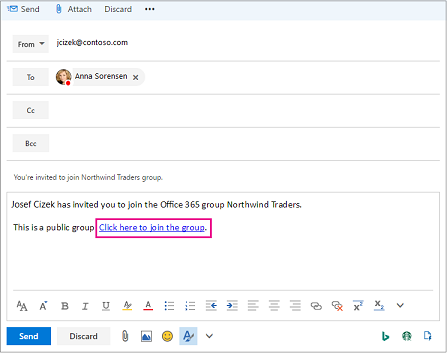
The easiest way to join a group in Outlook mobile is to receive an invitation from a group member or owner. That invitation might look like this:

Email with link inviting user to join group

Click the link to join the group.

Leave a group

  1. Select a group.

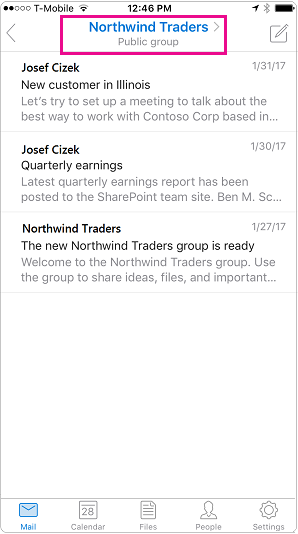
  2. Tap the group header.

    Outlook mobile conversation view with header highlighted

  3. On the Group Details card, tap Leave Group. Tap Leave Group again to confirm.

Have a group conversation

Start a conversation

  1. Select a group.

  2. Tap the New Message button. The message opens with the name of the group already listed on the To line.

  3. Add a subject.

  4. Type your message.

  5. Tap Send.

Join the conversation

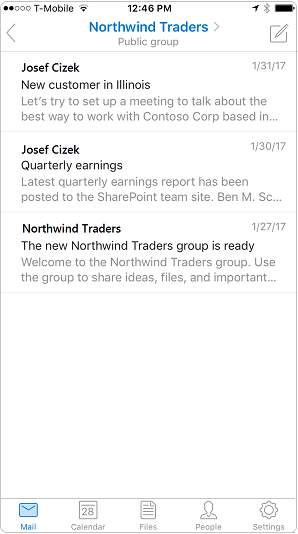
  1. Select a group. You'll see a list of all conversations in the group.

    Conversation view in the Outlook mobile app

  2. Tap a conversation to open it. The original message plus all replies are displayed in ascending order from oldest to newest.

  3. Select Reply All or Forward to join the conversation.

Frequently asked questions

Where do I get the Outlook mobile app?

You can find the Outlook mobile app in your device's app store.

How do I delete a conversation?

You can't delete a conversation from the group mailbox unless you're the owner of the group or the conversation. Deleting conversations from the group mailbox is possible in Outlook 2016 and Outlook on the web. If a copy of the conversation went to your personal inbox, you can delete the copy. The owner of the group determines whether copies are delivered to member inboxes.

Related Topics

Set up email in Outlook for iOS mobile app

Learn about Microsoft 365 Groups

Finish task field

Data Type    Date

Entry Type    Calculated or entered

Description    The Finish field shows the date when a task is scheduled to be completed. You can have Project calculate the finish date or you can enter it yourself.

How Calculated    Project calculates the finish date based on the start date, task duration, task dependencies, the project calendar, and other task constraints. If resources are assigned, Project also considers the resource calendar and assignment units.

If you enter a finish date for an automatically scheduled task, Project assigns a Finish No Earlier Than constraint to the task and uses your entered finish date as the constraint date. If your project schedules from the finish date, and if you enter a finish date, Project automatically applies a Finish No Later Than constraint to the task.

If you are using Project 2010, and you enter a finish date for a manually scheduled task, the date is simply entered as is, and Project does not assign a task constraint or make any other scheduling changes.

If you enter an actual finish date that is different from the scheduled finish date, Project changes the scheduled finish date to match the date in the Actual Finish field.

Best Uses    Add the Finish field to a task sheet when you want to review or filter for scheduled finish dates for tasks. The Finish field appears on the Gantt Chart view by default.

Example    You need to filter for all finish dates scheduled after March. You filter on the Finish field to see only those tasks scheduled with a finish date beyond March 31.

Remarks    In a manually scheduled task, you can enter a valid finish date, or you can enter text such as TBD or unknown. A manually scheduled task is considered a placeholder task until two of the three scheduling factors—start date, finish date, and duration—contain valid schedule information.

When you enter percent complete or actual work, Project might reschedule remaining work around the status date, and this can change the scheduled start date. If you prefer, you can leave these tracking fields in the project as originally scheduled, even if completed work is shown in the future or remaining work is shown in the past.

You can do this in the Project Options dialog box. Also, you can set the status date to a date other than today's date in the Project Information dialog box.
Guided walkthrough creating a team site

Microsoft 365 usage analytics

Gather the information you need to create office 365 dns records