Saturday, September 1, 2018

About publishing-enabled site templates

About publishing-enabled site templates

A SharePoint Online publishing site enables authors to create and modify web content and then publish that content on an intranet or public-facing Internet site. What makes a publishing site unique is the collection of features that support the content publishing process. These include check-in and check-out, scheduling and workflow, image and page libraries, web parts, content types, and so on.

A SharePoint publishing site is built from a publishing site template. The template is a file that dictates the overall look and feel of a site and can include the following:

  • Web parts

  • Page layouts

  • Themes

  • Image, page, and document libraries

  • Customizations to the Quick Launch or global navigation

  • Site content (list and document library contents)

Several different templates are available at both the site and site collection levels, and you choose the template you want to use when creating the site.

The following table describes each publishing site template.

Template

Purpose

Enterprise Wiki

A site for publishing knowledge that you capture and want to share across the enterprise. It provides an easy content-editing experience in a single location for co-authoring content, discussions, and project management.

Publishing Portal

A starter site hierarchy for an Internet-facing site or intranet portal. It can be customized easily with distinctive branding and includes a home page, sample press releases subsite, Search Center, and login page. Typically, this site has many more readers than contributors and is used to publish webpages with approval workflows. This template is available only at the site collection level.

Publishing Site

A blank site for expanding your website and quickly publishing webpages. Contributors can work on draft versions of pages and publish them to make them visible to readers. The site includes document and image libraries for storing web publishing assets and is available only at the site level.

Publishing Site with Workflow

A site for publishing webpages on a schedule by using approval workflows. It includes document and image libraries for storing web publishing assets. By default, only sites with this template can be created under this site. This template is available only at the site level when the Publishing Portal site template is used to create the top-level site.

Notes: 

  • By default, you can select only the Publishing Site, Publishing Site with Workflow, or Enterprise Wiki site template when creating a subsite of a publishing site. You can, however, enable additional site templates by clicking Page layouts and site templates under Look and Feel on the on the Site Settings page.

  • You can create a site collection using the Enterprise Wiki site template only if you are a term store administrator. It is not necessary to be a term store administrator to create a subsite that uses the Enterprise Wiki site template.

Top of Page

Copy a Word table into Excel

Copy a Word table into Excel

When you want to move data from a Word table to Excel, you can avoid having to retype that data by copying it from Word directly. When you copy data from a Word table into an Excel worksheet, the data in each Word table cell is pasted in an individual cell on the worksheet.

Important: After pasting the data, you may have to clean it up so that you can take advantage of the calculation features in Excel. For example, there may be unwanted extra spacing in cells, numbers may have been pasted as text rather than as numeric values that you can calculate, or dates are not displayed correctly. For help with formatting numbers as dates, currency, percentages, etc., see Format numbers. For help with formatting the style of your table, see Format an Excel table.

  1. In a Word document, select the rows and columns of the table that you want to copy to an Excel worksheet.

  2. To copy the selection, press CTRL+C.

  3. In the Excel worksheet, select the upper-left corner of the worksheet area where you want to paste the Word table.

    Note: Make sure that the paste area is empty before you paste the data. Data in Word table cells will replace any existing data in worksheet cells in the paste area. If necessary, review the table first in Word to verify its dimensions.

  4. Press CRL+V.

  5. To adjust the formatting, click Paste Options Button image next to the data that you pasted, and then do the following:

    • To use the formatting that is applied to the worksheet cells, click Match Destination Formatting.

    • To use the formatting of the Word table, click Keep Source Formatting.

Note: Excel pastes the contents of each Word table cell into a single cell. After you paste the data, you can distribute the data across additional cells in a column (for example, to divide first and last names so that they appear in separate cells) by using the Text to Columns command. For more information, see Distribute the contents of a cell into adjacent columns.

Move slides

Move slides

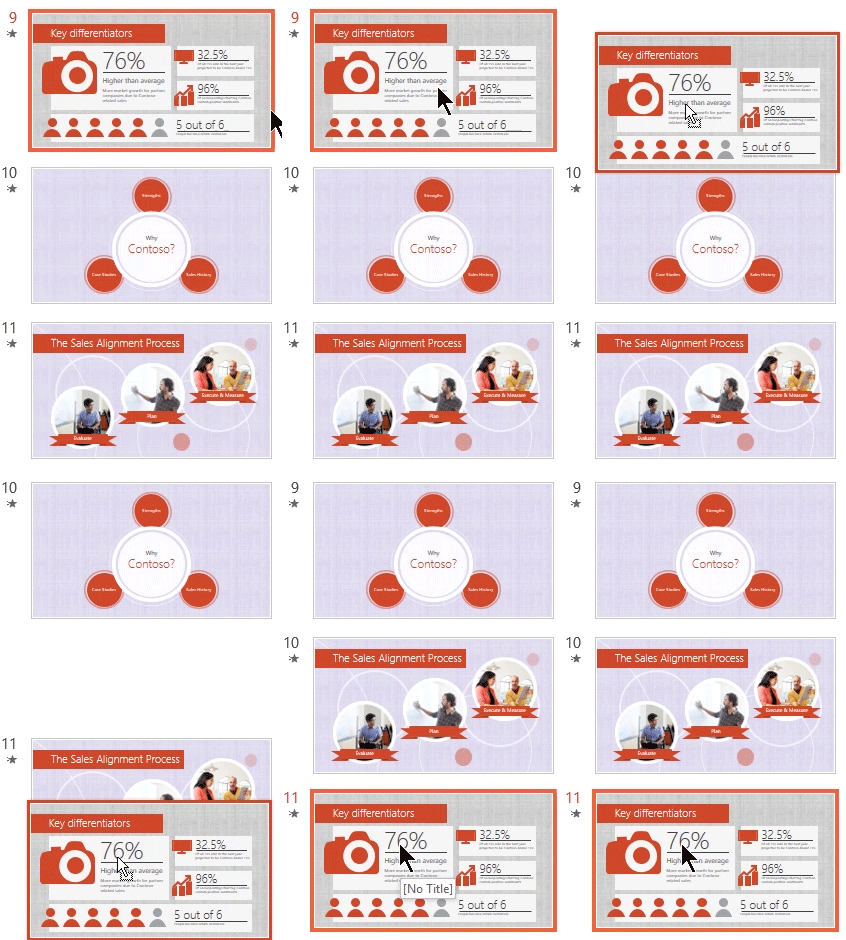
You can easily organize a presentation by dragging slides to different locations. In Normal view, you drag slides vertically in the thumbnail pane on the left side.

In Slide Sorter view, you can also drag slides to rearrange them.

In the thumbnail pane, click and drag a slide to change the order.

Move a slide in Normal view

  1. On the View menu, click Normal.

  2. In the navigation pane on the left, select the slide you want to move.

  3. Drag the slide to a new location.

Move a slide in Slide Sorter view

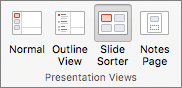
  1. On the View menu, click Slide Sorter.

    Screenshot shows the Presentation Views group with the options for Normal, Outline View, Slide Sorter, and Notes Page.

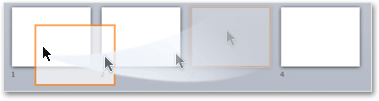
  2. Drag a slide to a new location.

    Drag slide

See also

Add, rearrange, duplicate, and delete slides in PowerPoint

Reuse (import) slides from another presentation

Move a slide in Normal view

  1. On the View menu, click Normal.

  2. In the top of the navigation pane, click the Slides  Slides tab  tab, and then click a slide.

    Note: Depending on the width of the navigation pane, you will either see the Slides named tab and Outline named tab  named tabs or the Slides  Slides tab and Outline  Outline tab icon tabs.

  3. Drag a slide to a new location.

Move a slide in slide sorter view

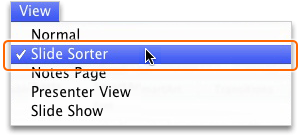
  1. On the View menu, click Slide Sorter.

    Click View, then click Slide Sorter

  2. Drag a slide to a new location.

    Drag slide

See also

Copy slides from one presentation to another

Change or sort the order of slides

Organize your slides into sections

Switch to different views in PowerPoint

Actual Cost fields

Actual Cost fields

The Actual Cost fields show costs incurred for work already performed by resources on their tasks, along with any other recorded costs associated with the task. The timephased versions of these fields show values distributed over time.

There are several categories of Actual Cost fields.

Data Type    Currency

Actual Cost (task field)

Entry Type    Calculated or entered

How Calculated    Until actual work is reported on a task, the Actual Cost field contains 0.00. You can choose to calculate all the actual costs as actual work is reported by each resource assigned to the task. This is the cost of actual work plus any fixed costs for the task to date. How and when actual costs are calculated depend on the assigned Standard Rate, Overtime Rate, Per Use Cost, and Cost accrual settings in the Resource Information dialog box.

Actual Cost = (Actual Work * Standard Rate) + (Actual Overtime Work * Overtime Rate) + Resource Per Use Costs + Task Fixed Cost

Best Uses    Add the Actual Cost field to a task view to review the resulting expense of a task. You can review this field while a task is in progress to see if you're staying within your budget. You can also review this information after the project is completed to help you plan costs for future projects.

Example    You're tracking costs on a task that has a 10-hour duration. The one resource assigned costs $20 per hour, and the resource has reported that the task is 50 percent complete. Microsoft Project calculates that the actual cost so far is $100. When the task is 100 percent complete, the actual cost will be calculated as $200.

Remarks    You can specify whether you want to enter actual costs or automatically calculate them. You do this in the Project Options dialog box. By default, the option to automatically calculate costs is selected. If you choose this option, any actual costs you've already entered will be cleared. If you choose to enter actual costs, Project will not calculate any actual cost values. However, it will continue to calculate remaining costs from the remaining work values. If you choose to have Project calculate actual costs, you cannot enter any actual costs until the task is 100 percent complete.

You can choose to enter actual costs or have Project calculate them for you. You can also enter actual costs for assignments and tasks on a timephased basis. In addition, you can set whether fixed costs are accrued at the start or end of the task or are prorated.

Actual Cost (resource field)

Entry Type    Calculated

How Calculated    If the resource has not yet reported any work on any assigned tasks, the Actual Cost field contains 0.00. As actual work is reported by the resource, Project calculates the actual cost. This is the cost of actual work plus any per-use costs for the resource. How and when actual costs are calculated depend on actual work and actual overtime work performed and the Standard Rate, Overtime Rate, Per Use Cost, and Cost accrual settings in the Resource Information dialog box.

Actual Cost = (Actual Work * Standard Rate) + (Actual Overtime Work * Overtime Rate) + Per Use Costs

Best Uses    Add the Actual Cost field to a resource view to review the resulting expense of a resource's work on all assigned tasks, based on the resource's actual work, hourly rate, and other incurred costs. You can also use this information at the end of a project to help you plan costs for staffing future projects.

Example    You're tracking costs for a resource who is assigned to 15 different tasks throughout the duration of the project. At any time, you can use the Actual Cost field to see how much this resource has cost so far. At the end of the project, you can use the Actual Cost field to see how much of the budget was spent for this resource to help with cost analysis and future planning.

Actual Cost (assignment field)

Entry Type    Calculated or entered

How Calculated    Until actual work is reported on an assignment, the Actual Cost field contains 0.00. You can choose to have Project calculate all the actual costs as actual work is reported by the resource assigned to the task. This is the cost of actual work plus any per-use costs for the assignment. How and when actual costs are calculated depend on actual work and actual overtime work performed and the assigned Standard Rate, Overtime Rate, Per Use Cost, and Cost accrual settings in the Resource Information dialog box.

Actual Cost = (Actual Work * Standard Rate) + (Actual Overtime Work * Overtime Rate) + Per Use Costs

Best Uses    Add the Actual Cost field to the sheet portion of the Task Usage or Resource Usage view to display or edit the resulting expense of an assignment based on actual work and the hourly rates of the assigned resources, along with any other costs. You can use this field while a task is in progress to see if you're staying within your budget. You can also use this information after the task is completed to help you plan costs for other tasks and future projects.

Example    You're tracking costs on a resource assignment for a task that has a 10-hour duration. The assigned resource is $20 per hour, and the resource has reported that the assignment is 50 percent complete. Project calculates that the actual cost for the assignment so far is $100. When the assignment is 100 percent complete, the actual cost will be calculated as $200.

Remarks    To specify whether you enter actual costs or have Project automatically calculate them go to the Project Options dialog box,. By default, the option to automatically calculate costs is selected. If you choose to enter actual costs, Project will not calculate any actual cost values. However, it will continue to calculate remaining costs from the remaining work values. If you choose to have Project calculate actual costs, you cannot enter any actual costs until the task is 100 percent complete.

Also, if you choose to enter actual costs, you can also enter actual costs for assignments and tasks on a timephased basis.

Actual Cost (task-timephased field)

Entry Type    Calculated or entered

How Calculated    Until actual work is reported on a task, the Actual Cost field contains 0.00. You can choose to have Project calculate all actual costs as actual work is reported by the assigned resources for the task. This is the cost of actual work plus any fixed costs for the task to date. How and when actual costs are calculated depend on the Standard Rate, Overtime Rate, Per Use Cost, and Cost accrual settings in the Resource Information dialog box.

Actual Cost = (Actual Work * Standard Rate) + (Actual Overtime Work * Overtime Rate) + Resource Per Use Costs + Task Fixed Cost

Best Uses    Add the Actual Cost field to the timephased portion of the Task Usage view to display the resulting expense of a task. You can review this field while a task is in progress to see if you're staying within your budget. You can also review this information after the task is completed to help you plan costs for other tasks and for future projects.

Example    Sean and Chris are assigned to the "Write proposal" task, which is scheduled for work from Monday through Thursday. They are both earning $20 per hour, and they have reported 20 hours of actual work on the task. You add the Actual Cost field to the timephased portion of the Task Usage view, and see that 5 hours of work are distributed across the 4 days. The timephased actual costs are, therefore, $100 each for Monday through Thursday.

Remarks    You can specify whether you want to enter actual costs or have Project automatically calculate them. You do this in the Project Options dialog box. By default, the option to automatically calculate costs is selected. If you choose to enter actual costs, Project will not calculate any actual cost values. However, it will continue to calculate remaining costs from the remaining work values. If you choose to have Project calculate actual costs, you cannot enter any actual costs until the task is 100 percent complete.

Actual Cost (resource-timephased field)

Entry Type    Calculated

How Calculated    If the resource has not yet reported any work on any assigned tasks, the Actual Cost field contains 0.00. As actual work is reported by the resource, Project calculates the actual cost. This is the cost of actual work plus any per-use costs for the resource. How and when actual costs are calculated depend on actual work and actual overtime work performed and the Standard Rate, Overtime Rate, Per Use Cost, and Cost accrual settings in the Resource Information dialog box.

Actual Cost = (Actual Work * Standard Rate) + (Actual Overtime Work * Overtime Rate) + Per Use Costs

Best Uses    Add the Actual Cost field to the timephased portion of the Resource Usage view to display the resulting expense of a resource's work on all assigned tasks, based on the resource's actual work, hourly rate, and other incurred costs. You can also use this information at the end of a project to help you plan costs for staffing future projects.

Example    Jamie, at $10 per hour, is assigned to 15 different tasks throughout the duration of the project. You add the Actual Cost field to the timephased portion of the Resource Usage view to see the actual costs incurred by Jamie's work so far. You might see timephased actual cost values such as $80 (8 hours at $10 per hour) for each day worked. If Jamie is assigned at fewer assignment units, you might see lower actual cost values. If Jamie has worked any overtime, you might see higher actual cost values.

Actual Cost (assignment-timephased field)

Entry Type     Calculated or entered

How Calculated     Until actual work is reported on an assignment, the Actual Cost field contains 0.00. You can choose to have Project calculate all the actual costs as actual work is reported by the resource assigned to the task. This is the cost of actual work plus any per-use costs for the assignment to date. When and how actual costs are calculated depend on actual work and actual overtime work performed and the assigned Standard Rate, Overtime Rate, Per Use Cost, and Cost accrual settings in the Resource Information dialog box.

Actual Cost = (Actual Work * Standard Rate) + (Actual Overtime Work * Overtime Rate) + Per Use Costs

Best Uses     Add the Actual Cost field to the timephased portion of the Task Usage or Resource Usage view to display the resulting expense of an assignment based on actual work and the hourly rates of the assigned resources, along with any other costs over time. You can review this field while a task is in progress to see if you're staying within your budget. You can also review this information after the task is completed to help you plan costs for other tasks and for future projects.

Example     Sean is assigned to the "Write proposal" task, which is scheduled for work from Monday through Thursday. Sean's standard rate is $20 per hour. Sean has reported 20 hours of work. Reviewing the Task Usage or Resource Usage view for this assignment, you see that 5 hours of work are distributed across the 4 days. The timephased actual costs are therefore $100 each for Monday through Thursday.

Remarks     To specify whether you enter actual costs or have Project automatically calculate them, go to the Project Options dialog box. If you select the option to automatically calculate costs, any actual costs you've already entered will be cleared. By default, this option is selected. If you choose to enter actual costs, Project does not calculate any actual cost values. However, it does continue to calculate remaining costs from the remaining work values. If you choose to have Project calculate actual costs, you cannot enter any actual costs until the task is 100 percent complete.

Open a SharePoint Online site on a BlackBerry® device

Open a SharePoint Online site on a BlackBerry® device

If you're using a BlackBerry® device and you have an Office 365 subscription that includes SharePoint Online, you can use your device to view sites, such as team sites in SharePoint Online. You can also view files that are in your OneDrive for Business library. This makes it easy to view information on sites, collaborate with colleagues, access shared documents, and stay connected with your work.

Ready to try it out?

Open a SharePoint site

Open your OneDrive for Business library

Open a SharePoint site

  1. Open the web browser on your device.

  2. In the address bar, type the website address (URL) for SharePoint Online.
    For example, our URL is http://contoso14.sharepoint.com.
    Your URL will include your domain name instead of Contoso14.

  3. Sign in using your work or school account.

  4. In the navigation links across the top of the screen, choose Sites.

  5. From the list of sites that appears, choose the site you want to open.

Open your OneDrive for Business library

  1. Open the web browser on your device.

  2. In the address bar, type the website address (URL) for your site in SharePoint Online.
    For example, our URL is http://contoso14-my.sharepoint.com.
    Your URL will include your domain name instead of Contoso14.

  3. Sign in using your work or school account.

  4. In the navigation links across the top of the screen, choose OneDrive.

For more information, see Use a mobile device to work with SharePoint Online sites.

Enter costs for resources

Enter costs for resources

Project calculates the costs for resources based on pay rates, per-use fees, fixed costs, or totals for cost resources (such as airfare or dining) that are assigned to tasks.

Note:  Before you can save changes to cost information for an enterprise resource, the resource must be opened for editing.

What do you want to do?

Enter cost rates for a work resource

Enter a per-use cost for a work resource

Enter a fixed cost for a task or for the project

Enter costs for a cost resource

Enter a rate for a material resource

Enter a per-use cost for a material resource

Enter cost rates for a work resource

  1. On the View tab, click Resource Sheet.

  2. In the Resource Name field, select a resource or type a new resource name.

  3. In the Std. Rate and Ovt. Rate fields, type the resource standard and overtime rates.

Got rates more complex than that? Sometimes, a single set of resource rates isn't enough to capture complex billing schemes ("blended rates").

For example, a resource may have variable rates that depend on:

  • Type of work

  • Work location

  • Volume discounting arising from the work

  • Change, over time

  • Resources used, such as trained vs. talented

You can model these more complex billing schemes by using rate-table features in Project:

  1. Double-click the resource to open the Resource Information dialog box, and then click the Costs tab.

  2. Under Cost rate tables, on the A (Default) tab, enter the date when the rate change takes effect in the Effective Date column.

  3. In the Standard Rate and Overtime Rate columns, type the resource rates.

  4. To enter a rate change that takes place on another date, in the additional rows of the cost rate tables, type or select the new date, and the new standard rates and overtime rates.

  5. To enter additional sets of pay rates for the same resource, click the B tab, and then repeat steps 2-4.

Notes: 

  • Use cost-rate tables to reflect rate changes that kick in after a certain date. This will avoid old data being calculated.

  • If you're using cost-rate tables on a regular basis, add the Cost Rate Table column to the Task Usage view to see and select the assignment's rate table.

  • Project calculates cost totals when rate-based resources, resources that have per-use costs, and cost resources are assigned to tasks. The resources' Accrue at setting will have an impact on this.

  • Changing the standard rate for a resource affects the cost of tasks that are 100% complete and that have the same resource assigned to them.

  • When you have entered multiple rates for a single resource by using the cost rate tables, you can change the resource rates for that resource for any assignment by using a different cost rate table. To change the cost rate table for a specific assignment, in the Task Usage view, select the resource that is assigned to the task, then right-click to select Information. On the Costs tab, in the Cost rate table list, click the cost rate table that you want to use.

Enter a per-use cost for a work resource

  1. On the View tab, click Resource Sheet.

  2. Click Tables > Entry.

  3. Fill out the Cost/Use column for the resource that has a set fee for each assignment. Resources can have a cost per use in addition to rate-based pay.

You can enter more than one per-use cost for each resource to reflect blended-rate schemes:

  1. Double-click the resource to open the Resource Information dialog box, and then click the Costs tab.

  2. Under Cost rate tables, on the A (Default) tab, enter the date when the rate change takes effect in the Effective Date column.

  3. Fill out the Per Use Cost column.

  4. To enter a per-use cost that takes place on another date, in the additional rows of the cost rate tables, type or select the new date and the new per-use cost.

  5. To enter additional sets of costs for the same resource, click the B tab, and then repeat steps 2-4.

Tip:  The Cost Accrual value is not specific to any cost-rate table, as it is a resource-level property.

Project can calculate cost totals when rate-based resources, resources that have per-use costs, and cost resources are assigned to tasks.

Notes: 

  • When you have entered multiple costs for a single resource by using the cost rate tables, you can change the resource costs for an assignment by using a different cost rate table. To change the cost rate table for a specific assignment, in the Task Usage view, select the resource that is assigned to the task, then right-click to select Information. On the Costs tab, in the Cost rate table list, click the cost rate table that you want to use.

  • If you're using cost-rate tables on a regular basis, add the Cost Rate Table column to the Task Usage view to see and select the assignment's rate table.

Enter a fixed cost for a task or for the project

Fixed costs are assigned to a task and are useful for planning and capturing task cost that arise in addition to those arising from the assigned resources. Fixed costs are applied to a task, and not to a resource.

  1. On the View tab, click Gantt Chart.

  2. Click Tables > Cost.

  3. In the Task Name field, select the task that has a fixed cost.

  4. In the Fixed Cost field, type a cost value.

Tip:  You can use the Fixed Cost Accrual value to control when fixed costs are realized, and you can use Use Cost Resource assignments for finer control of costs.

You can also enter fixed costs for the entire project, which you might choose to do if you are interested only in overall project costs (and not in task-level costs), or if you want to add project overhead costs (such as the cost of utilities).

  1. On the Format tab, select the Project Summary Task check box.

  2. Type a cost for the project in the Fixed Cost field for the project summary task.

Enter costs for a cost resource

A cost resource lets you apply a cost to a task by assigning a cost item (like a capital expenditure on equipment, or variable costs such as airfare or lodging) to that task. Unlike fixed costs, you can apply any number of cost resources to a task. Cost resources give you more control when you apply various types of costs to tasks.

Before you enter a cost for a cost resource, you must create the cost resource:

  1. On the View tab, click Resource Sheet.

  2. In the Resource Name field, type a name for the cost resource (such as Lodging), and then right-click to select Information.

  3. In the Resource Information dialog box, on the General tab, select Cost in the Type list, and then click OK.

After the cost resource is created, you can assign the cost resource to a task. After the cost resource is assigned to a task, you can enter costs for the resource assignment by using the Task Usage view.

  1. On the View tab, click Task Usage.

  2. Double-click the task that the cost resource is assigned to, to open the Task Information dialog box.

  3. Click the Resources tab, enter a cost value in the Cost field, and then click OK.

When a cost is applied by using a cost resource that is assigned to a task, the amount of the cost resource can vary depending on how the cost resource is used.

Notes: 

  • Unlike fixed costs, cost resources are created as a type of resource and then assigned to a task.

  • Unlike work resources, cost resources cannot have a calendar applied to them. However, if you assign a cost resource to a task and add a currency value on a specific date that falls outside of the task's current start or end date, Project 2010 adjusts the date to include the date of the cost resource assignment. For example, if you have a task that begins on August 1 and ends on August 15, and you assign a cost resource with a value of $500 on August 21, the end date of the task is adjusted to August 21, to reflect the cost resource assignment.

  • If you have estimated multiple values for a cost resource over a period of time, and the actual values differ from the estimates, Project replaces the estimates with the actuals. This cost resource behavior differs from other resource types because cost resources are not tied to actual work.

  • The currency value of cost resources doesn't depend on the amount of work done on the task that they are assigned to.

  • Costs entered into a project schedule are not as protected as those entered into a project accounting system. There are situations when costs may change, based on changes to the owning task. If the task duration is changed, it is possible that the cost distribution, over time, will change.

Enter a rate for a material resource

  1. On the View tab, click Resource Sheet.

  2. Click Tables > Entry.

  3. In the Resource Name field, select a material resource or type a new material resource name.

  4. If this is a new material resource, do the following:

    • Select Material in the Type field.

    • Type a measurement-unit name in the Material field, such as lit (for liters), cu. m (for cubic meters), or ea (for each).

  5. In the Std. Rate field, type a rate.

You can enter more than one rate per material resource:

  1. Double-click the resource to open the Resource Information dialog box, and then click the Costs tab.

  2. Under Cost rate tables, click the A (Default) tab, and then type a rate in the Standard Rate column.

  3. In the next row, type a value or percentage change from the previous rate in the Standard Rate column. For example, type +10% to indicate that the rate has increased 10% from the previous rate.

  4. In the Effective Date column, enter the date when the rate change takes effect.

  5. To enter additional sets of rates, click the B tab, and then repeat steps 2-4.

Notes: 

  • Enter material resource rates if you want Project to calculate material resource costs based on material resource rates. For example, to assign to a task a material resource named cement that has a unit price of $100 per ton, in the Type field select the resource type Material, and then type or select the resource name Cement, the label Ton, and the standard rate of $100.

  • Enter multiple rates for a material resource if you work with multiple grades of material or if you need to incorporate material rate changes on specific dates. For example, you can use the Cost rate table tabs to enter rates for various grades of carpet and to include cost increases or discounts that you expect at specific times during the project.

Enter a per-use cost for a material resource

  1. On the View tab, click Resource Sheet.

  2. Click Tables > Entry.

  3. In the Resource Name field, select a material resource or type a new material resource name.

  4. If this is a new material resource, select Material in the Type field.

  5. If this is a new material resource, type a measurement unit name in the Material Label field, such as lit (for liters), cu. m (for cubic meters), or ea (for each).

  6. In the Cost/Use field, type a cost value.

You can enter more than one per-use cost for each resource:

  1. If this is a new material resource, select Material in the Type field.

  2. Type a measurement-unit name in the Material box.

  3. Double-click the resource to open the Resource Information dialog box, and then click the Costs tab.

  4. Under Cost rate tables, click the A (Default) tab, and then type a cost value in the Per Use Cost column.

  5. In the next row, type a value or percentage change from the previous cost in the Per Use Cost column.

  6. In the Effective Date column, enter the date when the cost change takes effect.

  7. To enter additional sets of per-use costs, click the B tab, and then repeat steps 4-6.

Notes: 

  • Enter one per-use cost for a material resource if you want to enter only one per-use cost for that material resource and you don't want to incorporate future cost changes.

  • Enter multiple per-use costs for a material resource if you want to enter more than one per-use cost for that resource or to incorporate future material cost per-use changes.