You can print contacts, messages, calendars, meetings, and tasks in Outlook. Each type of Outlook item has several different print options.
Note: When you use File > Print to display the Print view, which contains both printer settings and print preview, the current window may shift to the background, behind the main Outlook window. You can minimize the main Outlook window to bring the Print view back to the foreground. For more information on this problem, see Print preview problems in Outlook.
Note: Because of the large number of different printers sold today, we are unable to provide troubleshooting information or help for specific printer issues. Contact your printer manufacturer or visit their website for more information on setting up and using your specific printer.
Print any Outlook item
-
Choose a mail, calendar, contact, or task item to print.
-
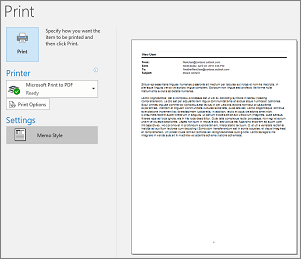
Choose File > Print, press Ctrl+P or choose Print
 on the quick access toolbar.
Notes:
-
The Backstage view opens showing a preview of the item you've chosen to print. This view gives you access to printer options and print settings.
-
-
-
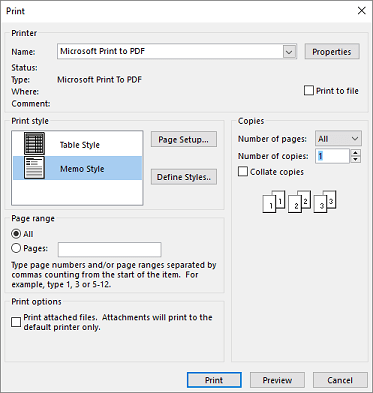
(Optional) In the Print dialog box, change options as needed.
-
Printer section
Select a printer, print to a file, or click Properties to set layout orientation and change paper/output options. -
Print style section
Different Outlook item types have different print style options. Table style and Memo style are two of the most common options. Click Page Setup to select different fonts, change specific paper and format properties, or add a header or a footer. If you want to save your own custom style, click Define Styles and edit a specific style. -
Page range section
Print all pages for the chosen item or specify the pages to be printed -
Print options section
You can choose whether to print any attachments. -
Copies section
Set the number of pages and the number of copies to print, and indicate if the copies are to be collated.
-
-
Select Print.
Print a single contact
-
Click People or the People icon at the bottom of your Outlook window.
 or
or 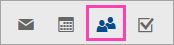
Note: If you don't see People or the People icon, you are probably using Windows 10 Mail.
-
In the folder pane, under My Contacts, click the contacts folder that contains the contact that you want to print.
-
Double-click the contact to open it.
-
Click File > Print.
-
A preview of the printed contact will show on the right. If this is the format you want and you want to print all pages, click Print. Otherwise, continue to Step 6.
-
Click Print Options to display the Print options dialog box.
-
Under Print style, click Define Styles > Edit to change fonts, fields, paper options, and header and footer options. When you're done making changes, click OK, then Print.
-
On the Print dialog box, under Page range, type the page numbers or range of page numbers you want to print, then click Print.
-
Print some or all contacts in your address book
To print some, but not all of your contact list, first filter your contacts so that only the contacts that you want appear. After your contacts are filtered, the printing steps are the same as if you are printing all contacts as outlined here. For information on filtering your contact list, see Use Outlook's built-in search filters.
-
Click People or the People icon at the bottom of your Outlook window.
or Note: If you don't see People or the People icon, you are probably using Windows 10 Mail.
-
In the folder pane, under My Contacts, click the contacts folder that contains the contact that you want to print.
-
Click File > Print.
-
A preview of the printed contacts will show on the right. If this is the format you want and you want to print all pages, click Print. Otherwise, continue to Step 5.
-
Click Print Options to display the Print options dialog box.
-
Under Print style, click Define Styles > Edit to change fonts, fields, paper options, and header and footer options. When you're done making changes, click OK, then Print.
-
On the Print dialog box, under Page range, type the page numbers or range of page numbers you want to print, then click Print.
-
Important: Because of the numerous printers available to consumers, we cannot help you troubleshoot any issues with your printer. For troubleshooting information, see the manufacturer's manual or Web site. You can also ask questions in Microsoft Office Communities.
No comments:
Post a Comment