Add or delete a fill, outline, or effect for text or WordArt
You can change the look of your text or WordArt by changing its fill, changing its outline, or adding effects, such as shadows, reflections, glows, or three-dimensional (3-D) rotations or bevels. In PowerPoint, you can also make these changes to text on a slide.
What is a fill, outline, or shape effect?
A fill is the interior of the letters in WordArt text or text on a PowerPoint slide. When you change the fill color of text, you can also add a texture, picture, or gradient to the fill. A gradient is a gradual progression of colors and shades, usually from one color to another color, or from one shade to another shade of the same color.

An outline is the exterior border around each character of your text or WordArt. When you change the outline of text, you can also adjust the color, weight, and style of the line.
An effect adds depth or emphasis to the text in WordArt or text on a slide. You can add combinations of individual effects to your text in Excel, Outlook, Word, and PowerPoint.
You can also format text in your WordArt or on your slide by using the options in the Font group on the Home tab or for Outlook, the options in the Basic Text group on the Message tab.
For more information, select an option from the following drop-down list.
-
Select the text in the WordArt that you want to add a fill to.
Important: To add WordArt to an Excel worksheet, you need to insert a text box first. To insert a text box, on the Insert tab, in the Text group, click Text Box, and then drag to draw a text box. Type your text into the text box and then follow the steps provided.
-
Under Drawing Tools, on the Format tab, in the WordArt Styles group, click the arrow next to Text Fill, and then do one of the following.
Notes:
-
If you do not see the Drawing Tools or Format tabs, make sure that you selected the text in the WordArt. You might have to double-click the text to open the Format tab.
-
To add or change a fill color, click the color that you want. To choose no color, click No Fill.
If you click No Fill, your text will not be visible unless you previously added an outline to the text.
To change to a color that is not in the theme colors, click More Fill Colors, and then either click the color that you want on the Standard tab, or mix your own color on the Custom tab. Custom colors and colors on the Standard tab are not updated if you later change the document theme. -
To add or change a fill picture, click Picture, locate the folder that contains the picture that you want to use, click the picture file, and then click Insert.
If you select non-continuous pieces of text and apply a picture fill, each individual selection is filled with the whole picture. The picture does not span the text selections. -
To add or change a fill gradient, point to Gradient, and then click the gradient variation that you want.
To customize the gradient, click More Gradients, and then choose the options that you want. -
To add or change a fill texture, point to Texture, and then click the texture that you want.
To customize the texture, click More Textures, and then choose the options that you want.
-
Note: Picture and texture fills for WordArt are not available in Word.
-
Select the text in the WordArt that you want to add an outline to.
To add the same outline to text in multiple places, select the first piece of text, and then press and hold CTRL while you select the other pieces of text. -
Under Drawing Tools, on the Format tab, in the WordArt Styles group, click the arrow next to Text Outline, and then do one of the following:
If you do not see the Drawing Tools or Format tabs, make sure that you selected the text in the WordArt. You might have to right-click the WordArt to open the Format tab.-
To add or change an outline color, click the color that you want. To choose no color, click No Outline.
To change to a color that is not in the theme colors, click More Outline Colors, and then either click the color that you want on the Standard tab, or mix your own color on the Custom tab. Custom colors and colors on the Standard tab are not updated if you later change the document theme. -
To add or change the thickness of the outline, point to Weight, and then click the thickness that you want.
To customize the thickness, click More Lines, and then choose the options that you want. -
To add or change the outline to dots or dashes, point to Dashes, and then click the style that you want.
To customize the style, click More Lines, and then choose the options that you want.
-
-
Select the text in the WordArt that you want to add an effect to.
To add the same effect to text in multiple places, select the first piece of text, and then press and hold CTRL while you select the other pieces of text. -
Under Drawing Tools, on the Format tab, in the WordArt Styles group, click Text Effects, and then do one of the following:
If you do not see the Drawing Tools or Format tabs, make sure that you selected the text in the WordArt. You might have to right-click the WordArt to open the Format tab.-
To add or change a shadow, point to Shadow, and then click the shadow that you want.
To customize the shadow, click Shadows Options, and then choose the options that you want. -
To add or change a reflection, point to Reflection, and then click the reflection variation that you want.
-
To add or change a glow, point to Glow, and then click the glow variation that you want.
To customize the glow colors, click More Glow Colors, and then click the color that you want. To change to a color that is not in the theme colors, click More Colors, and then either click the color that you want on the Standard tab, or mix your own color on the Custom tab. Custom colors and colors on the Standard tab are not updated if you later change the document theme. -
To give your text the appearance of depth by adding or changing an edge, point to Bevel, and then click the bevel that you want.
To customize the bevel, click 3-D Options, and then choose the options that you want. -
To add or change a 3-D rotation, point to 3-D Rotation, and then click the 3-D rotation that you want.
To customize the 3-D rotation, click 3-D Rotation Options, and then choose the options that you want. -
To add or change the warp or path of the text, point to Transform, and then click the warp or path that you want.
-
Note: To create a custom effect by adding multiple individual effects, repeat step 2.
-
Select the text in the WordArt that you want to delete a fill from.
To delete the same fill from multiple pieces of text, click the first piece of text, and then press and hold CTRL while you click the other pieces of text. -
Under Drawing Tools, on the Format tab, in the WordArt Styles group, click the arrow next to Text Fill, and then do one of the following:
If you do not see the Drawing Tools or Format tabs, make sure that you selected the text in the WordArt. You might have to right-click the WordArt to open the Format tab.-
To delete a fill color, picture, or texture, select another fill type.
If you click No Fill, your text will not be visible unless you previously added an outline to the text. -
To delete a fill gradient, point to Gradient, and then click No Gradient.
-
-
Select the text in the WordArt that you want to delete an outline from.
To delete the same outline from multiple pieces of text, click the first piece of text, and then press and hold CTRL while you click the other pieces of text. -
Under Drawing Tools, on the Format tab, in the WordArt Styles group, click the arrow next to Text Outline, and then click No Outline.
If you do not see the Drawing Tools or Format tabs, make sure that you selected the text in the WordArt. You might have to right-click the WordArt to open the Format tab.
-
Select the text in the WordArt that you want to delete the effect from.
To delete the same effect from multiple pieces of text, click the first piece of text, and then press and hold CTRL while you click the other pieces of text. -
Under Drawing Tools, on the Format tab, in the WordArt Styles group, click the arrow next to Text Effects, and then do one of the following:
If you do not see the Drawing Tools or Format tabs, make sure that you selected the text in the WordArt. You might have to right-click the WordArt to open the Format tab.-
To delete a shadow from the text, point to Shadow, and then click No Shadow.
-
To delete a reflection from the text, point to Reflection, and then click No Reflection.
-
To delete a glow from the text, point to Glow, and then click No Glow.
-
To delete an edge from the text, point to Bevel, and then click No Bevel.
-
To delete 3-D rotation from the text, point to 3-D Rotation, and then click No Rotation.
-
To delete a path or warp from the text, point to Transform, and then click No Transform.
Notes:
-
If you added multiple individual effects, repeat step 2 to delete all of the effects.
-
To delete all the effects at once, under Drawing Tools, on the Format tab, in the WordArt Styles group, click the More button
 , and then click Clear WordArt.
-
-
-
Select the WordArt that you want to remove, and then press DELETE.
Tip: Make sure that you select the entire WordArt object, and not just the text inside the WordArt object. When the whole WordArt object is selected, it is surrounded by a solid border line. When the text inside the WordArt object is selected, the border is a dashed line.
For more information, select an option from the following drop-down list.
If you are using Excel or PowerPoint
-
Select the text in the WordArt or on the PowerPoint slide that you want to add a fill to.
To add the same fill to text in multiple places, select the first piece of text, and then press and hold CTRL while you select the other pieces of text.
-
Under Drawing Tools, on the Format tab, in the WordArt Styles group, click the arrow next to Text Fill, and then do one of the following.

-
To add or change a fill color, click the color that you want. To choose no color, click No Fill.
If you click No Fill, your text will not be visible unless you previously added an outline to the text.
To change to a color that is not in the theme colors, click More Fill Colors, and then either click the color that you want on the Standard tab, or mix your own color on the Custom tab. Custom colors and colors on the Standard tab are not updated if you later change the document theme.
-
To add or change a fill picture, click Picture, locate the folder that contains the picture that you want to use, click the picture file, and then click Insert.
If you select noncontinuous pieces of text and apply a picture fill, each individual selection is filled with the whole picture. The picture does not span the text selections.
-
To add or change a fill gradient, point to Gradient, and then click the gradient variation that you want.
To customize the gradient, click More Gradients, and then choose the options that you want.
-
To add or change a fill texture, point to Texture, and then click the texture that you want.
To customize the texture, click More Textures, and then choose the options that you want.
-
If you are using Word or Outlook
-
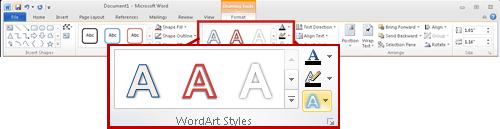
Click the WordArt that you want to add a fill to.
-
Under WordArt Tools, on the Format tab, in the WordArt Styles group, click Shape Fill, and then do one of the following.

-
To add or change a fill color, click the color that you want. To choose no color, click No Fill.
If you click No Fill, your text will not be visible unless you previously added an outline to the text.
To change to a color that is not in the theme colors, click More Fill Colors, and then either click the color that you want on the Standard tab, or mix your own color on the Custom tab. Custom colors and colors on the Standard tab are not updated if you later change the document theme.
-
To add or change a fill picture, click Picture, locate the folder that contains the picture that you want to use, click the picture file, and then click Insert.
If you select noncontinuous pieces of text and apply a picture fill, each individual selection is filled with the whole picture. The picture does not span the text selections.
-
To add or change a fill gradient, point to Gradient, and then click the gradient variation that you want.
To customize the gradient, click More Gradients, and then choose the options that you want.
-
To add or change a fill texture, point to Texture, and then click the texture that you want.
To customize the texture, click More Textures, and then choose the options that you want.
-
To add or change a pattern, click Pattern, and then click the options that you want.
-
If you are using Excel or PowerPoint
-
Select the text in the WordArt or on the PowerPoint slide that you want to add an outline to.
To add the same outline to text in multiple places, select the first piece of text, and then press and hold CTRL while you select the other pieces of text.
-
Under Drawing Tools, on the Format tab, in the WordArt Styles group, click the arrow next to Text Outline, and then do one of the following:
-
To add or change an outline color, click the color that you want. To choose no color, click No Outline.
To change to a color that is not in the theme colors, click More Outline Colors, and then either click the color that you want on the Standard tab, or mix your own color on the Custom tab. Custom colors and colors on the Standard tab are not updated if you later change the document theme.
-
To add or change the thickness of the outline, point to Weight, and then click the thickness that you want.
To customize the thickness, click More Lines, and then choose the options that you want.
-
To add or change the outline to dots or dashes, point to Dashes, and then click the style that you want.
To customize the style, click More Lines, and then choose the options that you want.
-
If you are using Word or Outlook
-
Click the WordArt that you want to add an outline to.
-
Under WordArt Tools, on the Format tab, in the WordArt Styles group, click Shape Outline, and then do one of the following:
-
To add or change an outline color, click the color that you want. To choose no color, click No Outline.
To change to a color that is not in the theme colors, click More Outline Colors, and then either click the color that you want on the Standard tab, or mix your own color on the Custom tab. Custom colors and colors on the Standard tab are not updated if you later change the document theme.
-
To add or change the thickness of the outline, point to Weight, and then click the thickness that you want.
To customize the thickness, click More Lines, and then choose the options that you want.
-
To add or change the outline to dots or dashes, point to Dashes, and then click the style that you want.
To customize the style, click More Lines, and then choose the options that you want.
-
To add or change the pattern, click Pattern, and then click the options that you want.
-
If you are using Excel or PowerPoint
-
Select the text in the WordArt or on the PowerPoint slide that you want to add an effect to.
To add the same effect to text in multiple places, select the first piece of text, and then press and hold CTRL while you select the other pieces of text.
-
Under Drawing Tools, on the Format tab, in the WordArt Styles group, click Text Effects, and then do one of the following:
-
To add or change a shadow, point to Shadow, and then click the shadow that you want.
To customize the shadow, click Shadows Options, and then choose the options that you want.
-
To add or change a reflection, point to Reflection, and then click the reflection variation that you want.
-
To add or change a glow, point to Glow, and then click the glow variation that you want.
To customize the glow colors, click More Glow Colors, and then click the color that you want. To change to a color that is not in the theme colors, click More Colors, and then either click the color that you want on the Standard tab, or mix your own color on the Custom tab. Custom colors and colors on the Standard tab are not updated if you later change the document theme.
-
To give your text the appearance of depth by adding or changing an edge, point to Bevel, and then click the bevel that you want.
To customize the bevel, click 3-D Options, and then choose the options that you want.
-
To add or change a 3-D rotation, point to 3-D Rotation, and then click the 3-D rotation that you want.
To customize the 3-D rotation, click 3-D Rotation Options, and then choose the options that you want.
-
To add or change the warp or path of the text, point to Transform, and then click the warp or path that you want.
-
Note: To create a custom effect by adding multiple individual effects, repeat step 2.
If you are using Word or Outlook
-
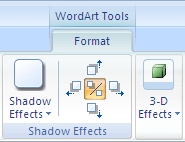
Click the WordArt that you want to add an effect to.
-
Under WordArt Tools, on the Format tab, do one of the following:
-
To add or change a shadow, in the Shadow Effects group, click Shadow Effects, and then click the shadow that you want.
To customize the shadow color, point to Shadow Color, and then click the color that you want.
To change to a color that is not in the theme colors, click More Shadow Colors, and then either click the color that you want on the Standard tab, or mix your own color on the Custom tab. Custom colors and colors on the Standard tab are not updated if you later change the document theme.
-
To add a 3-D effect, click 3-D Effects, click the second 3-D Effects, and then choose the options that you want.
-
If you are using Excel or PowerPoint
-
Select the text in the WordArt or on the PowerPoint slide that you want to delete a fill from.
To delete the same fill from multiple pieces of text, click the first piece of text, and then press and hold CTRL while you click the other pieces of text.
-
Under Drawing Tools, on the Format tab, in the WordArt Styles group, click the arrow next to Text Fill, and then do one of the following:
-
To delete a fill color, picture, or texture, select another fill type.
If you click No Fill, your text will not be visible unless you previously added an outline to the text.
-
To delete a fill gradient, point to Gradient, and then click No Gradient.
-
If you are using Word or Outlook
-
Click the WordArt that you want to delete a fill from.
-
Under WordArt Tools, on the Format tab, in the WordArt Styles group, click Shape Fill, and then click No Fill.
If you are using Excel or PowerPoint
-
Select the text in the WordArt or on the PowerPoint slide that you want to delete an outline from.
To delete the same outline from multiple pieces of text, click the first piece of text, and then press and hold CTRL while you click the other pieces of text.
-
Under Drawing Tools, on the Format tab, in the WordArt Styles group, click the arrow next to Text Outline, and then click No Outline.
If you are using Word or Outlook
-
Click the WordArt that you want to delete an outline from.
-
Under WordArt Tools, on the Format tab, in the WordArt Styles group, click Shape Outline, and then click No Outline.
If you are using Excel or PowerPoint
-
Select the text in the WordArt or on the PowerPoint slide that you want to delete the effect from.
To delete the same effect from multiple pieces of text, click the first piece of text, and then press and hold CTRL while you click the other pieces of text.
-
Under Drawing Tools, on the Format tab, in the WordArt Styles group, click the arrow next to Text Effects, and then do one of the following:
-
To delete a shadow from the text, point to Shadow, and then click No Shadow.
-
To delete a reflection from the text, point to Reflection, and then click No Reflection.
-
To delete a glow from the text, point to Glow, and then click No Glow.
-
To delete an edge from the text, point to Bevel, and then click No Bevel.
-
To delete 3-D rotation from the text, point to 3-D Rotation, and then click No Rotation.
-
To delete a path or warp from the text, point to Transform, and then click No Transform.
-
Note: If you added multiple individual effects, repeat step 2 to delete all of the effects.
If you are using Word or Outlook
-
Click the WordArt that you want to delete an effect from.
-
Under WordArt Tools, on the Format tab, do one of the following:
-
To delete a shadow, in the Shadow Effects group, click Shadow Effects, and then click No Shadow Effect.
-
To delete a 3-D effect, click 3-D Effects, click the second 3-D Effects, and then click No 3-D Effect.
-
No comments:
Post a Comment