Add a background picture (or watermark) to slides
Using a graphic as a watermark behind the text of your slides is a great way to display a logo or other meaningful image. PowerPoint lets you adjust the picture's transparency after you put it on the slide.

Another option: Text watermark
Do you want a text watermark instead? That's a different process. See Add a DRAFT watermark to a slide for instructions.

Select a section heading below to open it and see the detailed instructions:
Fill the slide background completely
Fill the entire background of your slide with a picture and then adjust the transparency of the picture so that it doesn't obscure the other content on the slide.
-
Choose the picture you want to use. The picture will fit better if its orientation (either landscape or portrait) matches that of the slide.
Why? PowerPoint resizes the image to fill the entire slide background. If an image has a different general shape than the slide it is placed on, outer portions of the picture may extend beyond the borders of the slide and not be visible on it.
-
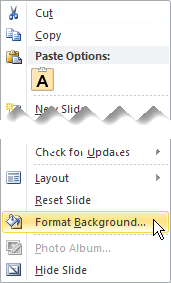
Go to the slide where you want to insert the picture. On the Design tab of the toolbar ribbon, select Format Background.

-
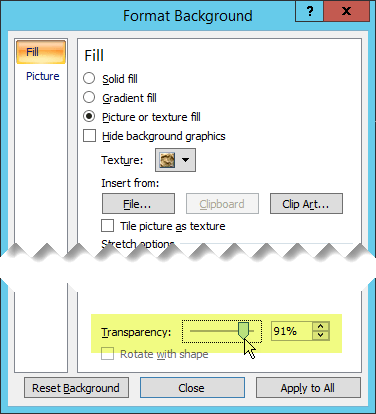
In the Format Background pane that appears on the right, select Picture or Texture Fill.
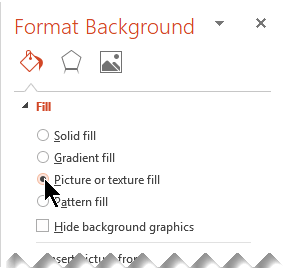
-
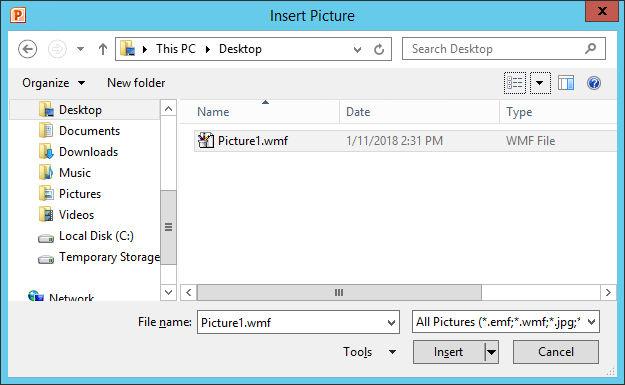
Under Insert picture from, select File.
-
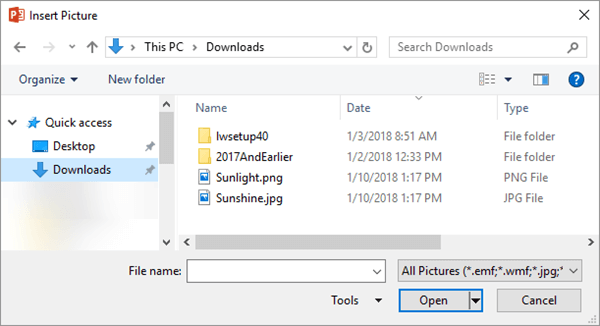
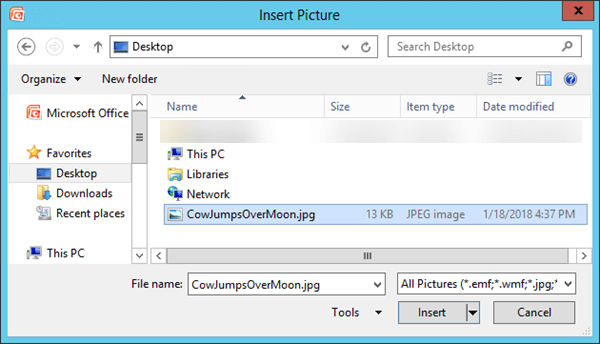
In the Insert Picture dialog box, locate the picture that you want, select it, and then select Insert.
You also can insert an image from the Windows Clipboard (the Clipboard option), or from the web or OneDrive (the Online option).
-
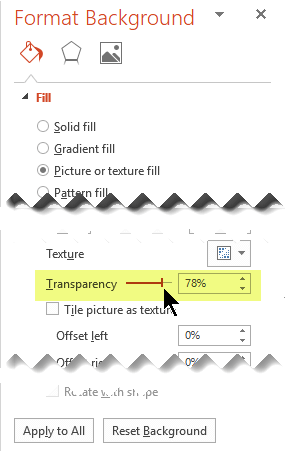
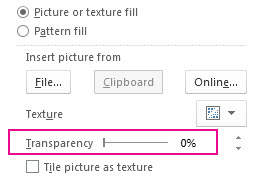
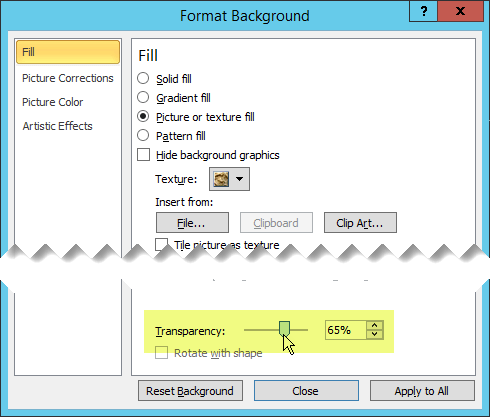
Once you've inserted the picture, go back to the Format Background pane and slide the Transparency bar to set the transparency percentage.
-
(Optional) To include this background picture on all the slides in your presentation, select Apply to all at the bottom of the Format Background pane.
-
Click File > Save to save your changes.
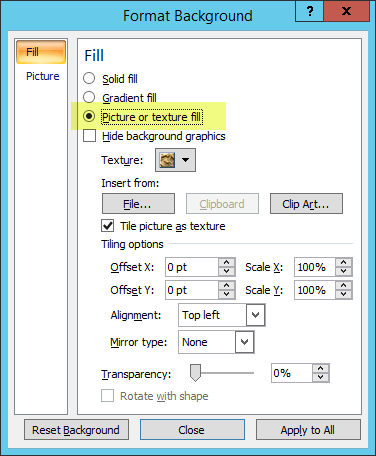
The selected image is sized to fill the entire slide background. It can't be resized as simply as a foreground picture can, but you can use the Offset settings to adjust its placement. Or you can use the Tile the picture as texture option to repeat the image horizontally and vertically throughout the background.
Add a picture or logo and set its transparency for a watermark effect
Draw a shape, fill it with a picture, and then adjust the picture's transparency:
-
On the Insert tab of the ribbon, select Shapes, and then choose a shape, such as a rectangle, from the gallery that appears.
-
Draw the shape on the slide.
It's important that the proportions of the shape are the same as the image you're about to add to it. If the proportions of the picture and shape differ, the picture will be skewed.
-
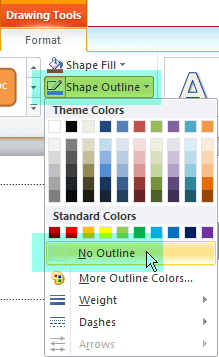
Remove the outline of the shape: right-click the shape and then click the Outline button that pops up. In the gallery that opens, select No Outline.
-
Right-click the shape again, and then click Format Shape.
The Format Shape pane opens.
-
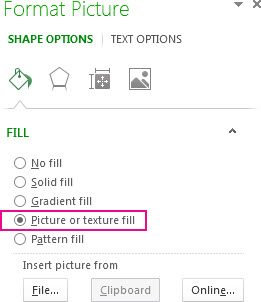
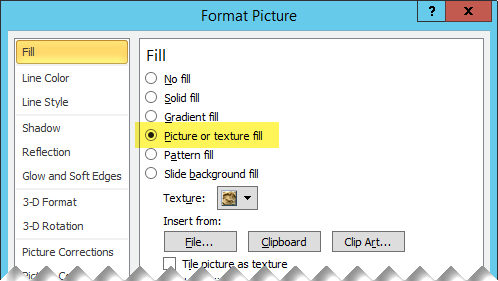
In the Format Shape pane, under Fill, click Picture or texture fill.
-
Click the File button. In the Insert Picture dialog box, locate the picture file that you want to insert. Select the picture and then select the Insert button.
-
With the picture now showing inside the shape, move the Transparency slider in the Format Shape pane the to adjust the picture as you see fit.
Remove a background picture
This procedure applies to a picture or texture that fills the slide background completely.
-
In Normal view, select a slide that has the background pattern or picture you want to remove.
-
On the Design tab of the toolbar ribbon, in the Customize group at the far right end, select Format Background.
-
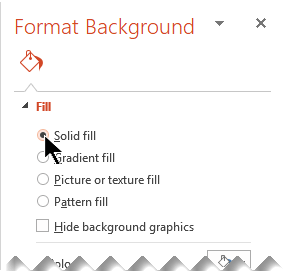
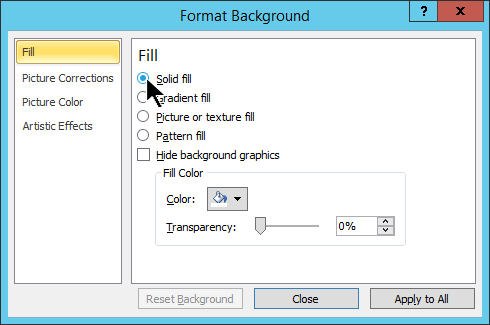
In the Format Background pane, under Fill, select Solid Fill.
-
Select the down arrow next to the Color button. A gallery of colors appears. Select the white color.
Your current background is removed, and the background of the slide is now white.
-
If you want to make the same change to the other slides in the presentation, choose Apply to All at the bottom of the Format Background pane.
Click a section heading below to open it and see the detailed instructions:
Fill the slide background completely
Fill the entire background of your slide with a picture and then adjust the transparency of the picture so that it doesn't obscure the other content on the slide.
-
Decide what picture you want to use. The picture will fit better if its orientation (either landscape or portrait) matches that of the slide.
Why? PowerPoint resizes the image to fill the entire slide background. If an image has a different general shape than the slide it is placed on, parts of the picture will extend beyond the borders of the slide and not be visible on it.
-
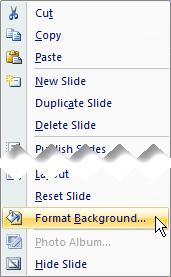
In the thumbnail pane on the left side of the PowerPoint window, select the slide where you want to insert the picture. Right-click the thumbnail and select Format Background.
-
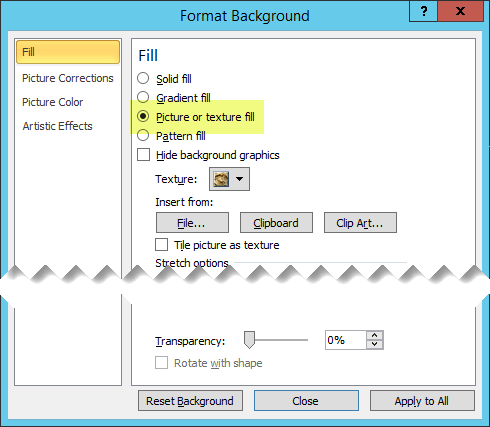
In the Format Background dialog box, select Picture or Texture Fill.
-
Under Insert picture from, select File.
-
In the Insert Picture dialog box, locate the picture that you want, select it, and then select Open.
(You also can insert clip art or an image from the Windows Clipboard.)
-
Once you've inserted the picture, slide the Transparency bar rightward to set the transparency percentage as you want it. The change is immediately reflected in the picture.
-
(Optional) To include this background picture on all the slides in your presentation, select Apply to all at the bottom of the Format Background dialog box.
-
Click Close to save your changes and close the dialog box.
The selected image is sized to fill the entire slide background. It can't be resized as simply as a foreground picture can, but you can use the Offset settings in the Format Background dialog box to adjust its placement. Or you can use the Tile the picture as texture option to repeat the image horizontally and vertically throughout the background.
Add a picture and set its transparency for a watermark effect
Draw a shape, fill it with a picture, and then adjust the picture's transparency:
-
On the Insert tab of the ribbon, select Shapes, and then choose a shape, such as a rectangle, from the gallery that appears.
-
Draw the shape on the slide.
Take care to match the proportions of the image you're about to add to the shape. If the proportions of the image and shape differ, the image will be skewed.
-
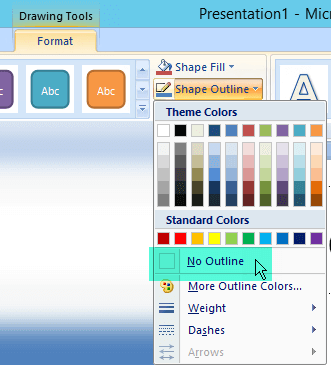
Remove the outline of the selected shape: With the shape still selected, on the Drawing Tools Format tab on the toolbar ribbon, select Shape Outline and then select No Outline.
-
Right-click the shape and select Format Shape.
The Format Shape dialog box opens.
-
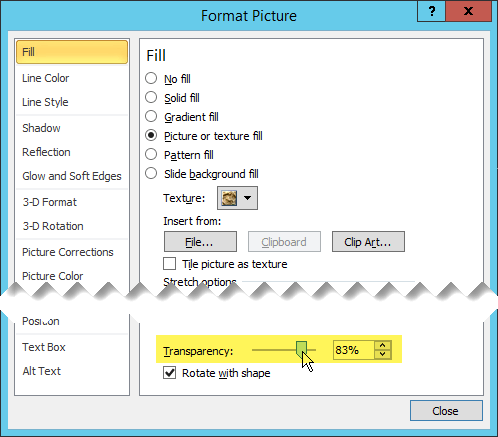
Under Fill, select Picture or texture fill, and then select the File button.

The Insert Picture dialog box opens.
-
In the Insert Picture dialog box, locate the picture that you want, select it, and then select Insert.
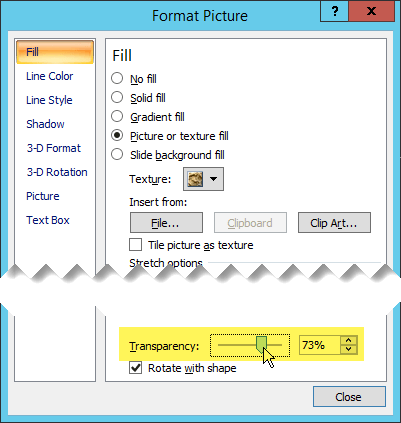
The picture is added to slide, inside the shape. You may need to move the Format Picture dialog box to see it. Keep the dialog box open to adjust the transparency.
-
With the picture now showing inside the shape, in the Format Picture dialog box, move the Transparency slider rightward to adjust the picture as you see fit.
-
Select Close to dismiss the dialog box.
Remove a background picture
This procedure applies to a picture or texture that fills the slide background completely.
-
In Normal view, select a slide that has the background pattern or picture you want to remove.
-
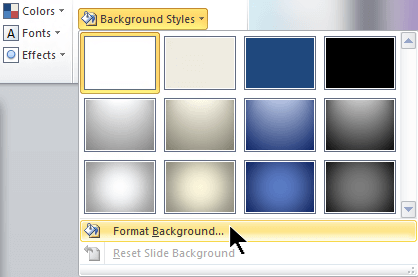
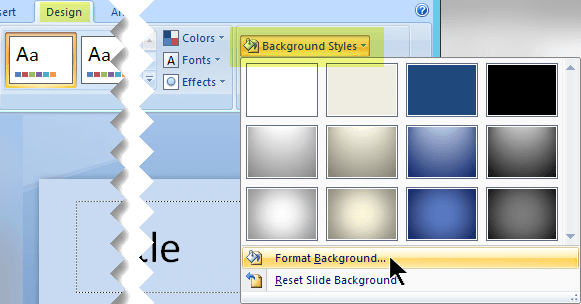
On the Design tab of the toolbar ribbon, in the Background group at the far right end, select Background Styles and then select Format Background.
The Format Background dialog box opens.
-
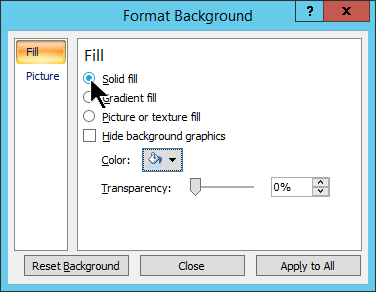
In the dialog box, on the Fill tab, select Solid Fill.
-
Select the down arrow next to the Color button and from the gallery of options select the white color.
Your current background is removed, and the background of the slide is now white.
-
If you want to make the same change to the other slides in the presentation, choose Apply to All.
-
Select Close.
Click a section heading below to open it and see the detailed instructions:
Fill the slide background completely
Fill the entire background of your slide with a picture and then adjust the transparency of the picture so that it doesn't obscure the other content on the slide.
-
Decide what picture you want to use. The picture will fit better if its orientation (either landscape or portrait) matches that of the slide.
Why? PowerPoint resizes the image to fill the entire slide background. If an image has a different general shape than the slide it is placed on, parts of the picture will extend beyond the borders of the slide and not be visible on it.
-
In the thumbnail pane on the left side of the PowerPoint window, select the slide where you want to insert the picture. Right-click the thumbnail and select Format Background.
-
In the Format Background dialog box, select Picture or Texture Fill.
-
Under Insert from, select File.
-
In the Insert Picture dialog box, locate the picture that you want, select it, and then select Insert.
(You also can insert clip art or an image from the Windows Clipboard.)
-
Once you've inserted the picture, slide the Transparency bar rightward to set the transparency percentage as you want it. The change is immediately reflected in the picture.
-
(Optional) To include this background picture on all the slides in your presentation, select Apply to all at the bottom of the Format Background dialog box.
-
Click Close to save your changes and close the dialog box.
The selected image is sized to fill the entire slide background. It can't be resized as simply as a foreground picture can, but you can use the Offset settings in the Format Background dialog box to adjust its placement. Or you can use the Tile the picture as texture option to repeat the image horizontally and vertically throughout the background.
Add a picture and set its transparency for a watermark effect
Insert a picture, inside a shape, at the precise size you want, and then adjust its transparency:
-
On the Insert tab of the ribbon, select Shapes, and then choose a shape, such as a rectangle, from the gallery that appears. Draw the shape over the picture you inserted in step 1.
-
Draw the shape on the slide.
Take care to match the proportions of the image you're about to add to the shape. If the proportions of the image and shape differ, the image will be skewed.
-
Remove the outline of the selected shape: On the Drawing Tools Format tab on the toolbar ribbon, select Shape Outline and then select No Outline.
-
Right-click the shape and select Format Shape.
The The Format Shape dialog box opens.
-
Under Fill, select Picture or texture fill, then select the File button.
The Insert Picture dialog box opens.
-
In the Insert Picture dialog box, locate the picture that you want, select it, and then select Insert.
The picture is added to slide, inside the shape. You may need to move the Format Picture dialog box to see it. Keep the dialog box open to adjust the transparency.
-
With the picture now showing inside the shape, in the Format Picture dialog box, move the Transparency slider rightward to adjust the picture as you see fit.
-
Select Close to dismiss the dialog box.
Remove a background picture
This procedure applies to a picture or texture that fills the slide background completely.
-
In Normal view, select a slide that has the background pattern or picture you want to remove.
-
On the Design tab of the toolbar ribbon, in the Background group at the far right end, select Background Styles and then select Format Background.
The Format Background dialog box opens.
-
In the dialog box, on the Fill tab, select Solid Fill.
-
Select the down arrow next to the Color button. A gallery of colors appears. Select the white color.
Your current background is removed, and the background of the slide is now white.
-
If you want to make the same change to the other slides in the presentation, choose Apply to All.
-
Select Close.
Microsoft Office Tutorials: Add A Background Picture (Or Watermark) To Slides >>>>> Download Now
ReplyDelete>>>>> Download Full
Microsoft Office Tutorials: Add A Background Picture (Or Watermark) To Slides >>>>> Download LINK
>>>>> Download Now
Microsoft Office Tutorials: Add A Background Picture (Or Watermark) To Slides >>>>> Download Full
>>>>> Download LINK EN
Thanks for sharing your best thoughts. I got really inspired to read your article. If people want to know about extending a background then don’t miss the chance to visit our website Extend A Background .
ReplyDelete