Office 365 Video for Office 365 operated by 21Vianet
What is Office 365 Video?
Office 365 Video is an intranet website portal where people in your organization can post and view videos. It's a streaming video service for your organization that's available with SharePoint Online in Office 365. It's a great place to share videos of executive communications or recordings of classes, meetings, presentations, or training sessions, for example.

Create a channel and upload videos
To upload a video, you upload it to a specific channel. You can upload multiple videos to a channel at the same time. Anyone in your organization who has edit permission for a particular channel can upload videos to it. Office 365 Video comes with one preconfigured channel, which is named Community. By default, everyone has edit and view permission for the Community channel.
To create a channel-
Select the Office 365app launcher
 , and then select the Video icon.
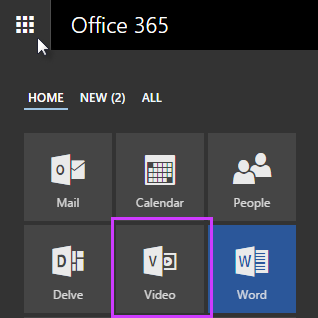
-
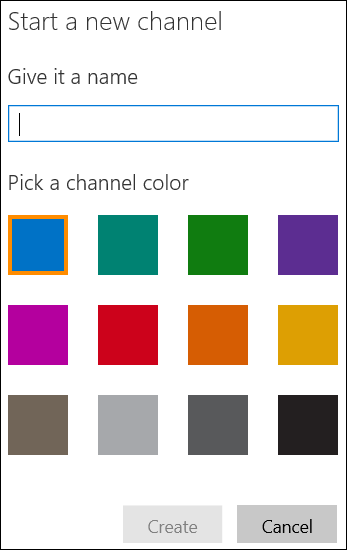
On the Office 365 Video top navigation bar, on the left side, choose Channels, and then on the right side choose + New Channel.

-
In the Start a new channel dialog box, do the following:
-
Type a name for the new channel.
-
Under Pick a channel color, select a color for the new channel.
-
-
Choose Create.
-
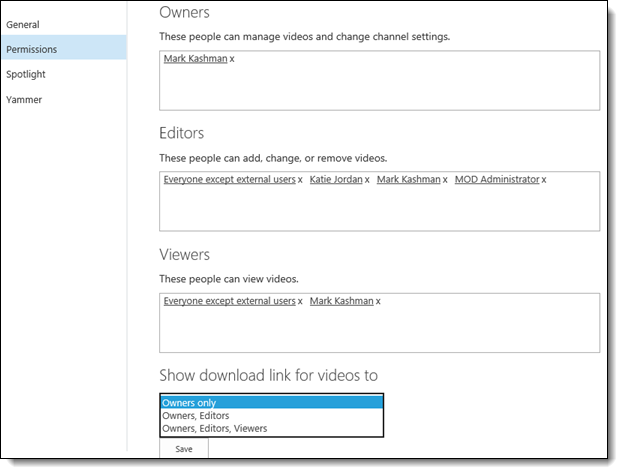
Select the channel that you want to change permissions for.
-
Go to the video channel settings page for the channel.
-
In the left navigation pane, choose Permissions.
-
To control who has full control over the channel, specify people or security groups in the Owners box.
-
To control who can edit the videos within a channel, specify people or security groups in the Editors box.
-
To control who can view the channel, specify people or security groups in the Viewers box.
-
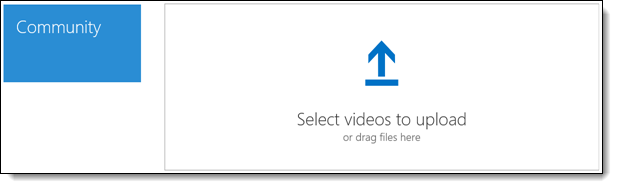
Select the channel that you want to upload a video to.
-
On the top navigation bar, on the right side, choose Upload.

-
Do one of the following:
-
Drag a file to the box labeled Select videos to upload or drag files here.
-
Click in the box labeled Select videos to upload or drag files here, select a video in the Choose File to Upload dialog box, and then choose Open.
-
-
While the video is uploading, you can provide a title and description for the video, and then click Save.
After the upload is complete, the video player page will appear.
Watching a video
You can watch videos from where they are featured on the Office 365 Video home page, and from specific channels. When you select a video thumbnail, the video plays right in your browser window. You'll need to meet the following requirements to view a video in your browser.
| Browser | OS | Playback Supported |
| IE 11 | Windows 8.1 | HTML5 |
| IE 11 | Windows 7 | Adobe Flash |
| IE 9 - 10 | Windows | Adobe Flash |
| Chrome 37+ | Windows/OSX | HTML5 |
| Firefox | Windows/OSX | Adobe Flash |
| Safari 8 | OSX Yosemite | Adobe Flash |
| Safari | Below OSX Yosemite | Adobe Flash |
Mobile
| Browser | OS | Playback Supported |
| IE 11 | Windows Phone 8.1 | HTML5 |
| Chrome | Android 4.4.4 | HTML5 |
| Safari | iOS 6 | Native HTML5 |
No comments:
Post a Comment