Schedule a meeting on a group calendar in Outlook
Updated: July 2017
Note: You may not be able to send updates, after modifying items in an Office 365 Group Calendar; such as title or time of a meeting. This is a known issue that has been fixed in all Office 365 channels except Deferred Channel. The fix for Deferred Channel will be released in June. For more information, see Unable to send updates when making changes to Groups calendar items.
You probably already know that when you join an Office 365 group in Outlook, you get a dedicated workspace for you and other group members to converse, collaborate, and share. But did you know that within that workspace is a shared calendar where you and every member of your group can schedule and see upcoming events? You can also share the events with other groups in your school or workplace.
All events that you create on the group calendar are delivered to both the group mailbox and the personal inboxes of all group members. Every member of the group can edit the events, which means that if the organizer of the event is sick or decides to take a vacation day and forgets to cancel the event, anyone else in the group can cancel it for them. No extra permissions required.
Office 365 Groups is available in both Outlook on the web (formerly Outlook Web App) and Outlook 2016. Instructions for using the group calendar are provided for both. Just select the tab below that applies to your version of Outlook. Not sure which version you're using?
| This is Outlook on the web | This is Outlook 2016 |
|---|---|
| | |
Open a group calendar in Outlook on the web
-
Sign in to Office 365.
-
In the app launcher, select Calendar.

-
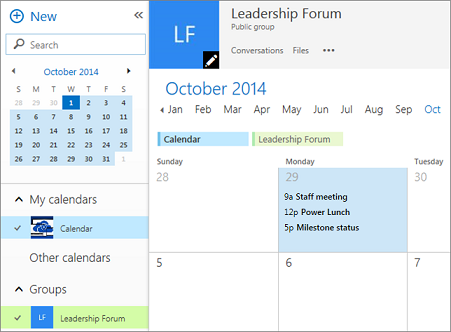
In the navigation pane, select Groups, and then select your group.
If you have multiple calendars open, the events for each will be displayed. Colored tabs across the top indicate which events align to each group.
-
Select Day, Work week, or Month to change the calendar view.
Add an event to a group calendar
Adding an event to a group calendar is very similar to adding an event to your personal calendar, and invitations are sent to all group members. When you create an event on a group calendar, it appears as organized by the group. You're automatically added as an attendee, and the event is added to your personal calendar.
Here's a video that walks you through the process.
-
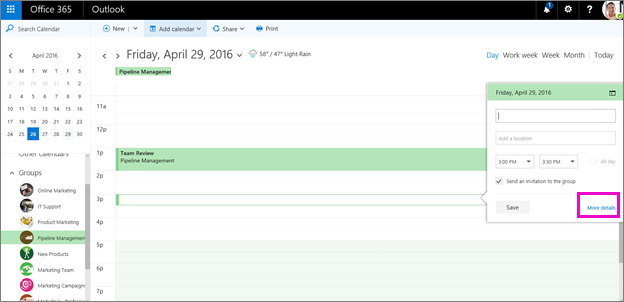
From the group calendar, select the time at which you'll schedule the event.
-
Enter a meeting title, location, and end time in the details window.
-
By default, the meeting invitation will be sent to every member's inbox in the group. If you don't want this, clear the checkbox, or select More details to specify the invitees.
-
Select Save.
Want to add vacation or out-of-office time to the group calendar?
Edit an event on a group calendar
-
From the group calendar, double-click the event to open it.
-
Make the changes you want and select Send.
See who's attending your group event
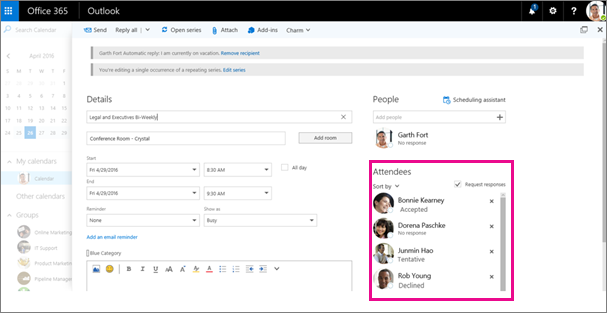
Email notifications such as "Accept," "Tentative," and "Decline," are distracting and can clutter your inbox. When you use a group calendar to schedule your event, you can easily get an at-a-glance view at who's coming, who's not, and who has yet to respond.
-
From the group calendar, double-click the event to open it.
-
Under Attendees, see the status (Accepted, No response, Tentative, Declined) under each invitee name.
Cancel a group event
When an event is created on the group calendar, anyone in the group can cancel it.
-
From the group calendar, double-click the event to open it.
-
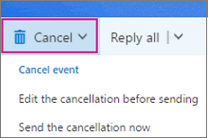
Click Cancel and select the appropriate cancellation option.
Schedule a meeting on a group calendar
-
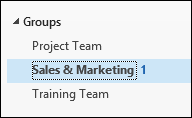
In Outlook 2016, choose a group from the left nav.
-
On the ribbon, select Calendar.

-
Select New Skype Meeting or New Meeting. If you make this a Skype meeting, call details will be added to the message body. For information about Skype meetings, see Skype for Business meeting help.

-
You'll notice the group's alias is entered automatically in the To line. Enter a subject, location, and start and end time for your meeting.
-
In the meeting area, type an agenda. If you're setting up a Skype Meeting, be careful not to change any of the online meeting information.
-
Select Scheduling Assistant on the ribbon to make sure you have the best time for the meeting.
-
Select Send.
The meeting appears on the group's calendar, as well as the personal calendar of each member.


No comments:
Post a Comment