Sometimes, the shape you want isn't included in the built-in or default shapes. You can merge shapes to create the picture you want. You can also use Edit Points to modify a shape.
For other ideas, see Make your own custom shapes.

Duration: 4:07. Design your own picture by merging and grouping shapes.
Merge shapes
-
Select the shapes you want to merge: press and hold the Shift key while you select each shape in turn.
(If you don't select any shapes, then the Merge Shapes button in step 2 will be grayed out.)
-
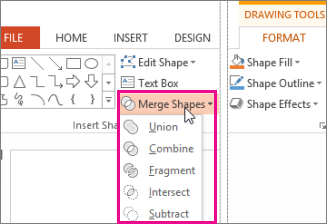
On the Drawing Tools Format tab, in the Insert Shapes group, select Merge Shapes, and then pick the option you want.
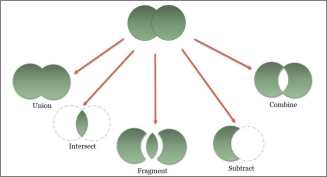
The second picture below illustrates the effect of each of the Merge Shapes options.
The order in which you select the shapes to merge may affect the options shown to you. If you're unsatisfied with the choices you get, start over by unselecting the shapes, and then repeat this procedure, selecting a different shape first than you did in the previous attempt.
Use Edit Points to change a shape
-
Select the shape you want to change.
-
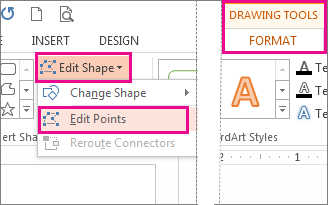
On the toolbar, select the Drawing Tools Format tab, and in the Insert Shape group, select Edit Shape > Edit Points.
-
Drag the black edit points to change the shape. Use the white square edit points to change the curvature of the line between two black edit points.

It's easier to use edit points if the shape doesn't have any fill or style. Add any color fill or effects after you have finished.
Tip: Here's a detailed video showing the different ways to use edit points. It was created with an earlier version of PowerPoint, but the process is the same.
Reuse your custom shape in another Office program
If you want to use the shape later, right-click it, and select Save As Picture. Give the picture a name, and save it on your computer.
To insert the picture in a different Office program, open that program and select Insert > Pictures. Locate the picture on your computer, select it, and then select Insert.
Merge shapes
-
Select the shapes to merge. Press and hold Shift to select multiple shapes.
The Shape Format tab appears. Note that it only appears when a shape is selected.
-
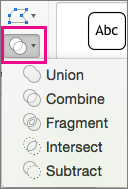
On the Shape Format tab, click Merge Shapes, and then pick the option you want.
The order in which you select the shapes to merge may affect the options shown to you. If you're unsatisfied with the choices you get, start over by unselecting the shapes, and then repeat this procedure, selecting a different shape first than you did in the previous attempt.
Use Edit Points to change a shape
-
Select the shape to change.
The Shape Format tab appears. Note that it only appears when a shape is selected.
-
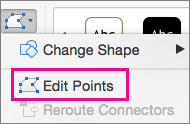
On the Shape Format tab, click Edit Shape > Edit Points.
-
Drag the black edit points to change the shape. Use the white square edit points to change the curvature of the line between two black edit points.
Tip: It's easier to use edit points if the shape doesn't have any fill or style, so add any color or fill effects after you're finished editing points.
Reuse your custom shape in another Office program
-
If you want to use the shape later, right-click it, and click Save as Picture.
-
To insert the picture in a different program, click Insert > Pictures, locate the picture, and click Insert.
No comments:
Post a Comment