Deleting a Teams free org takes a few steps.
You need to be an admin in order to delete a Teams free organization. You're automatically an admin if you created the Teams free org, or if another admin changed your role to admin.
Here's the procedure:
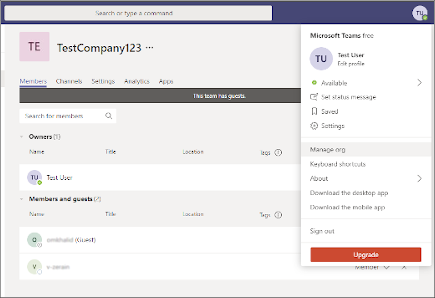
1. Remove members from your team
To get started, you need to remove all the people from the team (except yourself). To do this, sign in to the Teams free org you want to delete, click your profile pic at the top of Teams, then select Manage org. Click the X next to each person to remove them.
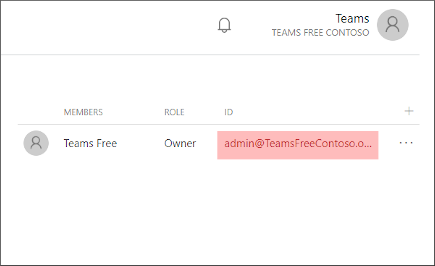
2. Get your admin email address
Next, you need to obtain your admin email address so you can continue the process. Go here to get your admin email address. Choose Groups, select Groups I own, and then find the admin email address on the right.
Note: Your admin email address will look similar to admin@yourfreeorgname.onmicrosoft.com.
3. Complete the password reset procedure
Once you have the admin email address for your Teams free org, go to the Microsoft 365 Admin Center. When prompted to sign in, choose Forgot my password.
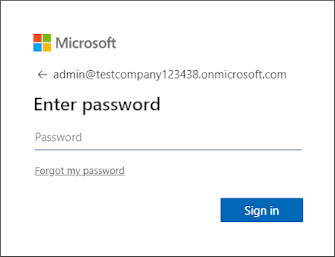
Then complete the password reset procedure using the admin email address that you obtained in Step 2.
-
Complete the verification steps.
-
You will receive an email with a code that you can use to set a new password.

-
Enter the code to complete the verification process.

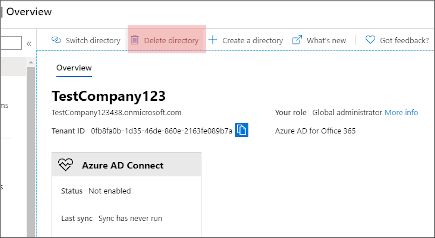
4. Prepare the directory for deletion
Using your admin email address and your new admin password, log in to the Azure Portal, choose the Show portal menu  in the upper-left of the screen, and then select Azure Active Directory in the left column.
In the Azure Active Directory, select Delete directory. This won't actually delete it (yet), but you will finish that process by following the next steps.
5. Complete the required actions
Before you can delete it, your directory will have to pass several checks. Use the links in theRequired Action column next to each item to pass the checks.
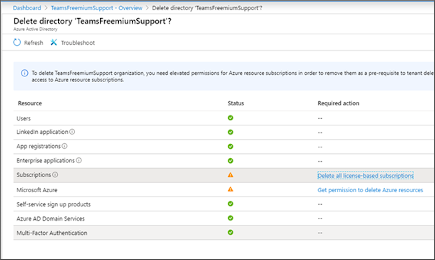
You will need to address all items with required actions EXCEPT for Subscriptions. You will take care of that in the next step.
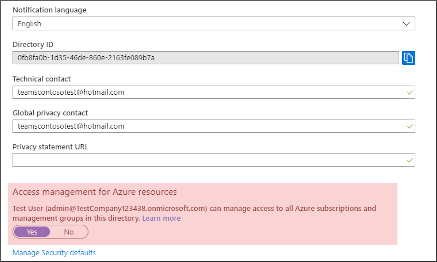
Note: If you receive a message about needing elevated permissions to in order to remove subscriptions: Select Azure Active Directory on the left, go down to the bottom of the page, and set Access management for Azure resources to Yes.
6. Cancel and delete the subscription
Once the only item remaining is Subscriptions, go to the Microsoft 365 Admin Center and log in with your admin email and password.
Now you need to cancel the subscription (before you can finally delete the directory). First, go here and follow the steps for canceling and deleting a subscription.
7. Delete the directory
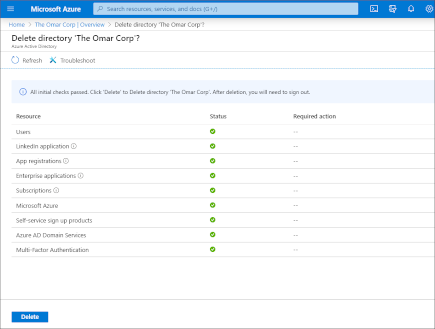
After 72 hours, go back to the Azure Portal and log in with the admin email and password that you set up earlier.
Select Azure Active Directoryon the left, then Delete Directory. All the checkmarks should be green. Finally, select the Delete button at the bottom of the screen.
And that's it!
Microsoft Office Tutorials: Delete Your Teams Organization >>>>> Download Now
ReplyDelete>>>>> Download Full
Microsoft Office Tutorials: Delete Your Teams Organization >>>>> Download LINK
>>>>> Download Now
Microsoft Office Tutorials: Delete Your Teams Organization >>>>> Download Full
>>>>> Download LINK GP