When you're working as a team — in Microsoft Teams, SharePoint, or Outlook—a shared library allows your team to store and access files that your team members work on together, and OneDrive for work or school connects you to all your shared libraries.
When you need a new shared location to store team files, you can create a site that contains a shared library right from OneDrive, add members, and start working together. And it's easy to copy or move files where you and others need them.
Create a shared library
-
Sign into the OneDrive website at https://www.onedrive.com with your work or school account, and then, under Shared libraries, click Create new.
Note: If you don't have the option to create a new library, it may have been turned off for your account. Please contact your admin for more information about the availability of this feature.
-
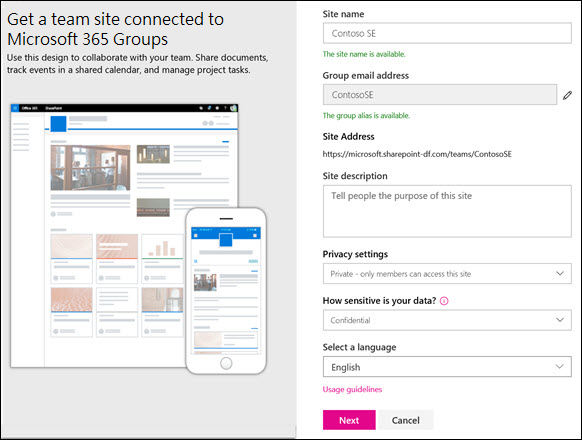
Give your new team site a name. Unless you're using SharePoint Server 2019, Microsoft 365 group email will be automatically generated with the same name as your team site. As you type, you will see whether or not the name you've chosen is available. Once it's been verified that the name is available, fill in the additional fields that appear.
Notes:
-
If offered, in the Privacy settings section, choose either Public - anyone in the organization can access this site or Private - only members can access this site to control who has access to your site.
-
If enabled by your admin, choose a site classification in the Site classification section. The options listed can pertain to sensitivity of information or to the lifecycle of information in your library.
Caution: Once you select a default language for your site and create the site, you can't change the language to something else later. You can, however, add alternate supported languages.
-
-
Once you're done, click Next.
-
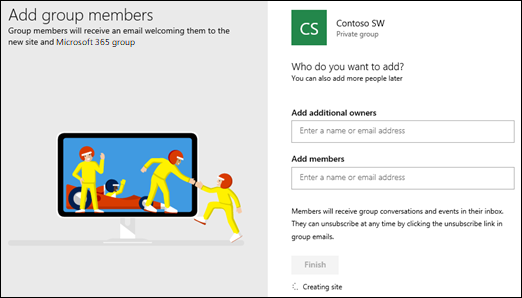
While your site's finishing setup, add the names or email addresses of anyone else you want to manage the site in the Add additional owners field. (The site creator is automatically a member of the site owners group.) In the Add members field, add the name or email address for everyone you want to be a member of your site, and then click Finish.
Note: You'll get a Redirecting notification, and then you'll be taken to the new site you just created. You can customize this as needed (in the upper right, click Next Steps), or you can go straight to Documents. Upload files and folders there just like you do in OneDrive.

-
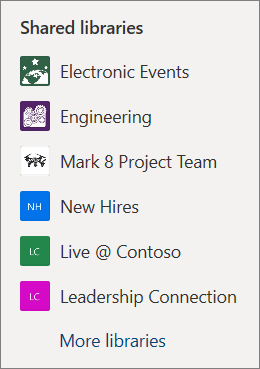
Your new library will be listed in the left pane of your OneDrive, or under the Followed section in More libraries. Note that it may take up to 48 hours for the new shared library to appear.
Delete a shared library
-
On the left pane under Shared libraries, select the library you want to delete.
-
Click Go to site on the upper right. You'll be taken to the Microsoft SharePoint site that houses the library.
-
Click Settings on the upper right.
-
Click Site information, and then, at the bottom of the pane, click Delete site.
-
You'll see a notification box that explains what's being deleted. To confirm, select the check box, and then click Delete.
Important: When you delete a shared library, all of the content in that library will be deleted.
No comments:
Post a Comment