If you've imported contacts from multiple sources or inherited someone else's contact list, you might have duplicate contacts stored in Outlook. When you import new contacts from an external source like iCloud or Gmail, Outlook checks for duplicates and lets you choose whether to create a new contact record (a duplicate) or merge the duplicate contacts. Unfortunately, once you have duplicate contacts in your contact folders, there is no automated process to remove them. However, you can export all of your contacts to a file, then re-import them into Outlook and take advantage of the built-in duplicate checking features. If you only have a couple of duplicate contacts, you can sort your contact list and delete them manually.
Delete duplicate contacts one at a time
-
Click People.

-
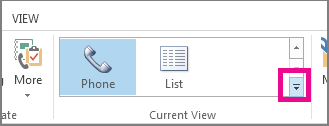
On the Ribbon, in the Current View group, click the bottom right corner of the views box, and then click Phone. This is the easiest view to use to scan your contacts list and see the duplicates.
-
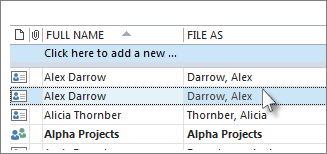
In your list of contacts, hold down Ctrl and click each contact you want to delete.
-
When you've selected all the duplicates, press Delete or Ctrl+D.
Delete a large number of duplicate contacts by using export and import
If you have a large number of duplicate contacts, deleting the duplicates one by one can be tedious and time-consuming. The fastest way to delete a large number of duplicate contacts is to export them to a file, then import them into a new folder. To take advantage of the duplicate detection feature in Outlook's import process, use the following steps
-
Click People.
-
Right-click on your current Contacts folder and select New Folder.

-
Give your new folder a name, for example Duplicates.
-
Click back into your main Contacts folder.
-
Press Ctrl+A to select all of your contacts.
-
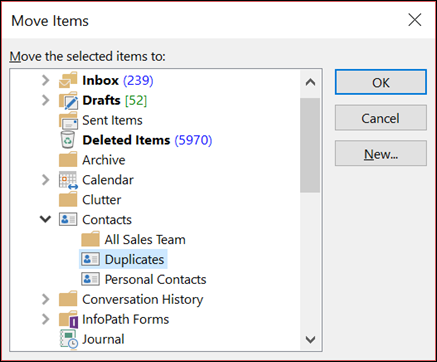
Either drag and drop your contacts into the Duplicates folder or use Ctrl+Shift+V to open the Move to Folder dialog and select your Duplicates folder.
-
Your primary contacts folder should now be empty.
-
Select File > Open & Export > Import/Export.
Note: In Outlook 2010, select File > Open > Export and skip to step 10.
-
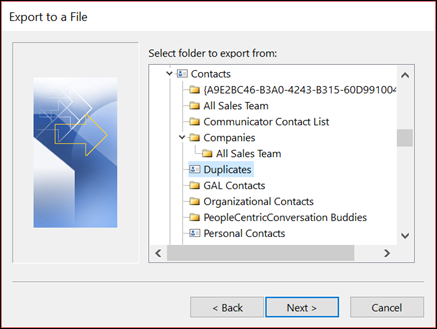
Select Export to a File.
-
Select Comma Separated Values (Windows).
-
Select the Duplicates folder you created in Step 3.
-
Save the file somewhere you'll be able to find it again.
-
Click Finish.
Import your contacts back into Outlook
-
Select File > Open & Export > Import/Export.
Note: In Outlook 2010, select File > Open > Import and skip to step 3.
-
Select Import from another program or file.
-
Select Comma Separated Values (Windows).
-
Browse to find the file you created in the procedure above.
-
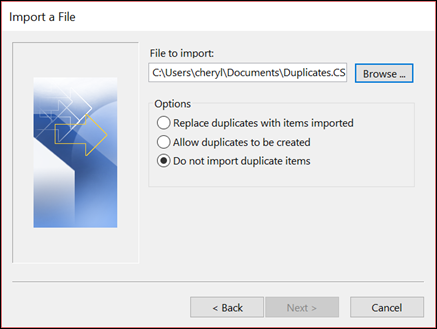
Select the option Do not import duplicate items.
-
Choose your main contacts folder as the destination folder. This is the folder that is currently empty.
-
Select Finish.
Copy the contacts from the Duplicates folder back into your main Contacts folder
-
Select the Duplicates contact folder.
-
Single-click one of the contacts in the folder, then press Ctrl+A to select all of the contacts.
-
Move the selected contacts into your main Contacts folder. You can drag and drop them or press Ctrl+Shift+V to use the Move to Folder dialog box.
-
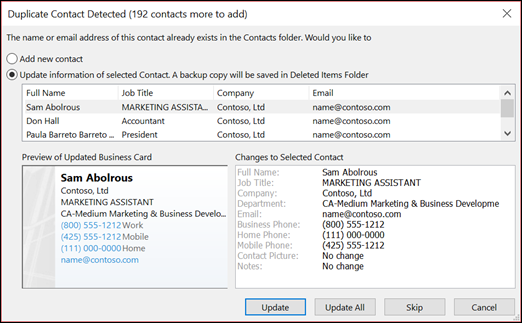
Every time Outlook encounters a duplicate contact, you'll see a prompt with two choices.
-
Select Add new contact if the contact isn't a duplicate.
-
Select Update information of selected contact if the contact is a duplicate.
Once you've made your choice, select Update. If you want to repeat the same choice for all duplicated contacts, select Update All.
-
-
When the move to folder process is done, you can delete the Duplicates folder.
For more information
Options for resolving duplicate contacts
You have two options to resolve duplicate contacts in the Duplicate Contact Detected dialog box:
Add a duplicate as a new contact The new contact will be added to your Contacts folder. For example, if you create a contact with the name Judy Lew, and you already have a contact with that name in your Contacts folder, you will have two contacts named Judy Lew. To distinguish between the two, you can add a middle initial to one.
Tip: Displaying your contacts as Electronic Business Cards is a good choice of views in which to see enough information to distinguish contacts with duplicate names.
Update new information from a duplicate contact to an existing one Outlook will compare all the fields that contain data in both the duplicate and existing contacts and copy the data from the duplicate contact into any fields in the existing contact that have conflicting data. For example, if you have a contact named Judy Lew with the phone number 555-0112, and you get a duplicate contact with a new phone number, Outlook will copy the new number into the appropriate field in the existing contact and leave all the other fields the same.
The color categories that you assign to the new contact and the text in the message from the new contact will not be copied into the existing contact. If you want to copy this information, you must do so manually. Certificates and links to contacts on the Activities tab will be copied from the duplicate contact and added to the existing contact without replacing the original information. However, links on the Activities tab to items other than contacts, such as tasks and appointments, will not be copied.
Whenever Outlook updates the data in a contact, a copy of the original contact is stored in the Deleted Items folder. This copy can be used if you need to revert to the information in the original contact.
Delete duplicate contacts
If you imported contacts into Outlook by using the same names or e-mail addresses that already exist in your Contacts folder, and you selected the Allow duplicates to be created option in the Import and Export Wizard, you might have unwanted duplicates of several or all of the contacts that you imported.
Removing the unwanted duplicate contacts is a manual process, but the following is the easiest way to do it.
-
In Contacts, select the contacts folder that has duplicate contacts.
-
In the Navigation Pane, under Current View, click Phone List. This is the best view to scan your contacts list and see the duplicate contacts. Now you can sort the list by modified date and group the duplicates together.
-
On the View menu, point to Current View, and then click Customize Current View.
-
Click Fields, select Modified in the Available fields list, and then click Add.
-
Click Move Up until Modified is at the top of the Show these fields in this order list.
-
Click OK twice.
-
In the list of contacts, hold down CTRL while you select each duplicate contact.
-
When you have selected all the duplicate contacts, press DELETE.
Note: If you do not want the duplicate contacts when you import contacts into Outlook, select the Do not import duplicates option or the Replace duplicates with items imported option in the Import and Export Wizard.
-
Do not import duplicates Existing data is kept, and the duplicate information in the Personal Folders file (.pst) is not copied to the Contacts folder.
-
Replace duplicates with items imported Existing data in the Contacts folder is replaced with the information in the .pst file that is being imported.
Turn off the duplicate detection feature
If you are saving many contacts to Outlook, the process can be faster if you do not use the duplicate detection feature. To turn this feature off, do the following:
-
On the Tools menu, click Options.
-
Click Contact Options, and then clear the Check for duplicate contacts check box.
No comments:
Post a Comment