Important: As of March 31, 2018, the SharePoint Online public website feature has been discontinued. Links that point to discontinued topics have been removed.
If you've been using the web page editor to change the general layout and appearance of a web page but still haven't got the look and feel you want, adding your own HTML code may be the answer. Adding to or editing the HTML that underlies a web page helps you further customize your public site according to your taste and requirements, so you can achieve the engaging site you have in mind. For example, you can:
-
Change page design, by adding a frame around a block of text.
-
Make the footer on every page work for you, by adding a special font style or size.
-
Check your code to make sure it's valid and complete before you add it to the source.
-
Logon to your public website and go to the page you want to edit.
-
Click Page > Edit and then from the Format Text tab, click Edit Source.
-
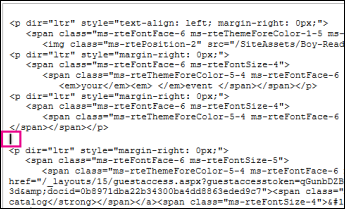
Locate the position where you want to insert the block of code. You may need to delete code that you want to replace or remove. The page you see will look something like this, with a cursor marking the insertion point for new code:

-
Enter the HTML code.
Important: HTML code is not validated when you add it to your web page. Errors in the HTML code can cause a web page to display incorrectly.
-
Click OK.
-
After you insert the HTML code, verify that everything appears as you expect.
-
If the page looks correct, click Page > Save > Save, and then open the page in a new browser window to confirm.
-
If you experience problems you can't resolve, then do not save the page. Instead, click Page > Save > Stop Editing > Cancel.
-
No comments:
Post a Comment