There are two types of page breaks in Word: breaks that Word automatically adds to mark the end of each page, and manual page breaks that you can add. You can delete manual page breaks. You can't remove automatic page breaks, but you can adjust where they occur.
Remove a manual page break
-
Go to Home and select Show/Hide
 .
.This displays page breaks while you're working on your document.
-
Double-click the page break to select it and then press Delete.

Adjust automatic page breaks
You can't remove automatic page breaks, but you can prevent them from landing in awkward places, such as between lines of text you'd like to keep together. You can adjust the page break settings for selected paragraphs.
-
Select the paragraphs you want to apply the settings to.
-
Go to Layout or Page Layout and select the Paragraph dialog box launcher
 .
. -
On the Line and Page Breaks tab, choose one or more of the following:
-
Widow/Orphan control places at least two lines of a paragraph at the top or bottom of a page.
-
Keep with next prevents breaks between paragraphs you want to stay together.
-
Keep lines together prevents page breaks in the middle of paragraphs.
-
Page break before adds a page break before a specific paragraph.
-
See also
Remove a manual page break
-
Go to Home and select Show all nonprinting characters
.This displays page breaks while you're working on your document.
-
Click or tap just after the paragraph mark in the page break, and then press Delete.

Adjust automatic page breaks
You can't remove automatic page breaks, but you can prevent them from landing in awkward places, such as between lines of text you'd like to keep together. You can adjust the page break settings for selected paragraphs.
-
Select the paragraphs you want to apply the settings to.
-
On the Format menu, select Paragraph.
-
In the Paragraph dialog box, select the Line and Page Breaks tab.
Choose one or more of the following options:
-
Widow/Orphan control places at least two lines of a paragraph at the top or bottom of a page.
-
Keep with next prevents breaks between paragraphs you want to stay together.
-
Keep lines together prevents page breaks in the middle of paragraphs.
-
Page break before adds a page break before a specific paragraph.
-
See also
Remove a manual page break
-
On the View menu, select Draft.
-
In the document, select the manual page break, and then press DELETE .
Adjust automatic page breaks
-
Select the paragraph following the unwanted page break.
-
On the Format menu, select Paragraph, and then select the Line and Page Breaks tab.
-
Clear the Keep lines together, Keep with next, and Page break before check boxes.
See also
In Editing View, a manually insert a page break in Word for the web, looks like this:

You won't see this in Reading View.
-
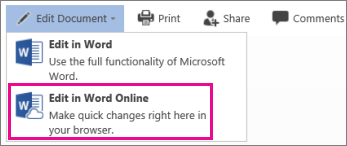
If you're not in Editing View, select Edit Document > Edit in Word for the web.
-
Select the page break.
-
Press Delete.
Note: You can only delete the page breaks that you've added to your documents. You can't delete the page breaks that Word adds automatically as text flows from one page to the next.
No comments:
Post a Comment