Every class team comes with its own linked OneNote Class Notebook. Your Class Notebook is a digital notebook for the whole class to store text, images, handwritten notes, attachments, links, voice, video, and more.
Teams delivers these essential components of the OneNote Class Notebook experience:
-
Student Notebooks - a private space shared between the teacher and each individual student. Teachers can access every student notebook, while students can only see their own.
-
Content Library - a read-only space where teachers can share handouts with students.
-
Collaboration Space - a space where everyone in your class can share, organize, and collaborate.
In this article
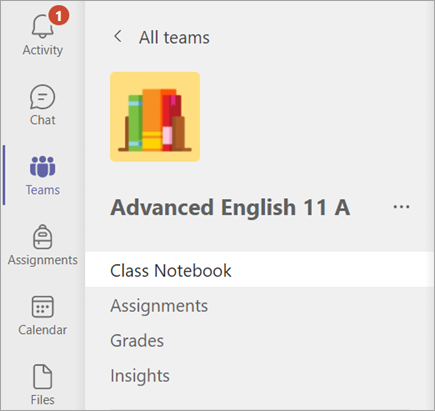
Find Class Notebook in Teams
The Class Notebook is the central location for viewing and interacting with the Content Library, Collaboration Space, and each student's private space.
-
Navigate to the desired class team, then select Class Notebook.
-
Add or edit pages using the expandable menu at the left side of your notebook.
Set up your Class Notebook
If you haven't set up your Class Notebook yet, you'll be guided through the right steps the first time you visit the Class Notebook app. You can either create a blank notebook from scratch or copy content from an existing Class Notebook.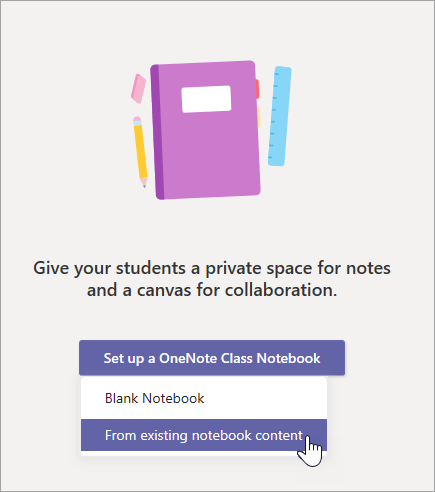
Use Class Notebook in a channel
Each time you create a new channel in a class team, a new section is automatically created in the Class Notebook's Collaboration Space. All students and teachers can edit and work on OneNote pages within a channel.
-
Navigate to a class team, then select a channel.
-
Select the Notes tab.

Open Class Notebook in full-screen mode
Expand the Class Notebook tab to a bigger size by selecting Expand tab  .
.
Manage Class Notebook settings
Manage your Class Notebook settings by navigating to your notebook in Teams, select Class Notebook, then Manage Notebooks.
Use these settings to:
-
Edit notebook sections
-
Copy a link to your notebook
-
Create a Teacher-only section group
-
Lock the Collaboration Space
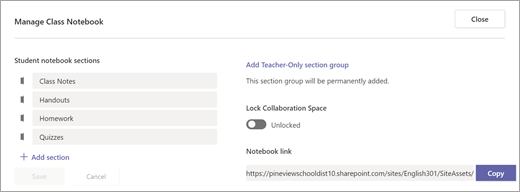
Note: To create separate Collaboration Space permissions in your Class Notebook, follow these steps. All the Class Notebooks you've created in Microsoft Teams will be listed under your Co-owned notebooks.
Create assignments with Class Notebook pages
Add Class Notebook pages to assignments for students to edit or reference. To create an assignment using a Class Notebook page:
-
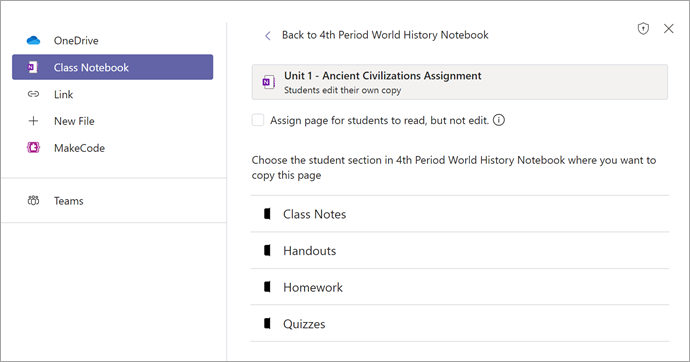
Add the page to your notebook's Content Library or Collaboration Space.
-
Navigate to Assignments in your class team and select the Create button.
-
Fill out the details for your assignment and select
 Add resources. In the box that opens, select Class Notebook and navigate through your notebook's sections to choose the page you'd like to attach.
Tip: When adding a page from your Content Library, click Assign page for students to read, but not edit to add resources as read-only materials. If you select this option, skip step 4.
-
Choose the section of your students' notebooks you'd like the page distributed to. For example: Handouts.
-
Select Done when you're finished. Each student will now have a copy of the page inside their Class Notebooks. They can also open the page directly from the assignment card in Microsoft Teams.
Note: Check to see which version of OneNote students are using before creating your assignment. Using these versions of OneNote ensures that notebook pages you assign will lock and prevent students from editing them after the assignment's due date passes. The student's page will lock when they Turn in the assignment, but unlock when you Return an assignment or they select Undo turn in.
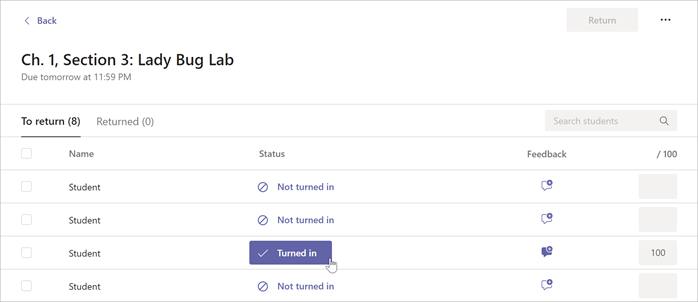
Review assignments with Class Notebook pages
Review assignments and add feedback in a breeze without leaving Microsoft Teams:
-
Navigate to Assignments in your class team.
-
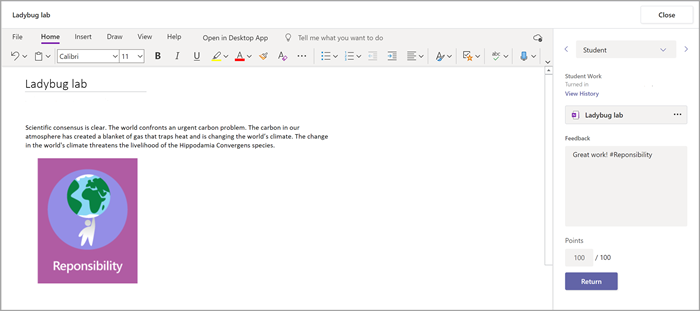
Open the assignment, select the Turned in button underneath the student's work status.
-
Review the student's work and add any feedback or points. You can add feedback directly to the Class Notebook page or using the Feedback box. Your changes will be saved automatically.
Tips:
-
To open and edit the page in the desktop app or the browser, select More attachment options
 next to the name of the Class Notebook page.
 -
-
-
When you're ready to return your student's work, select Return.
Open Class Notebook in OneNote
Select Open in OneNote to launch into OneNote and access all of Class Notebook's learning features.
Notes:
-
When using a OneNote Class/Staff Notebook created via Microsoft Teams, you cannot add/remove Students or members using the Class Notebook Wizard online.
-
Notebook members must be added/removed via Microsoft Teams.
Learn more
Class Notebook Support Library
No comments:
Post a Comment