Share files with your students that they can read but not edit using the Class Materials folder in your General channel. This is a great way to share documents like syllabi, school rules, and reference materials with the class. You can also create your own read-only folders to restrict members' editing privileges in any team.
-
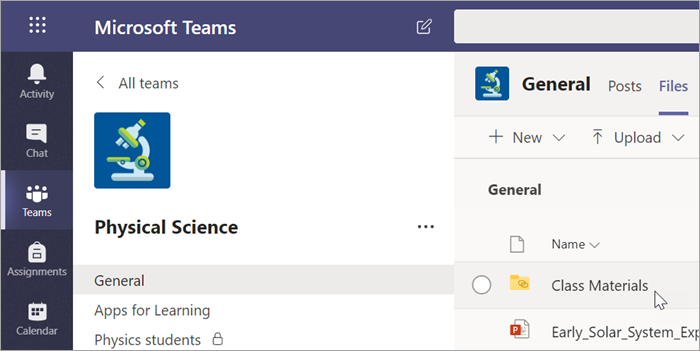
Navigate to the General channel in your class team and select the Files tab.
-
Select Class Materials.
-
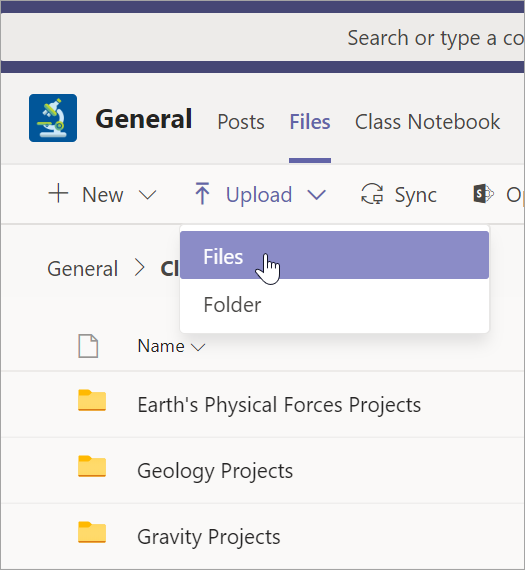
Use the New button to create new read-only files in the Class Materials folder. Use the Upload button to add files from OneDrive or your device.
-
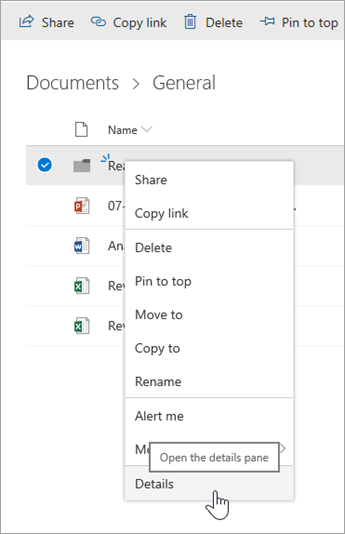
You can also move or copy a file into the Class Materials folder by selecting More options
 next to your file and choosing either Move or Copy. Follow the file structure to choose Class Materials.
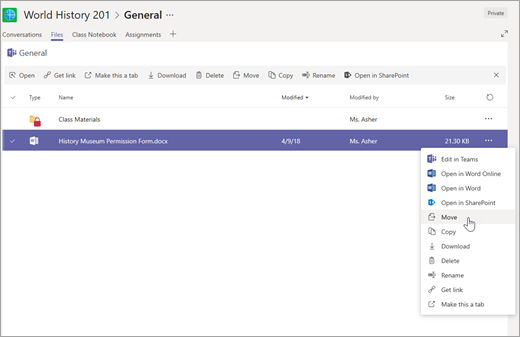
Note: Moving or copying a Class Materials file to a folder without the same permissions means students will be able to edit that copy of the document.
From now on, add any files you don't want students to edit to the Class Materials folder. You can add files to the folder from Teams or SharePoint -- your changes will stay in sync.
Create your own read-only folders
Creating read-only folders allows you to share files with members of a team you own while preventing them from editing the files.
-
Navigate to a channel in the team where you plan to share files.
-
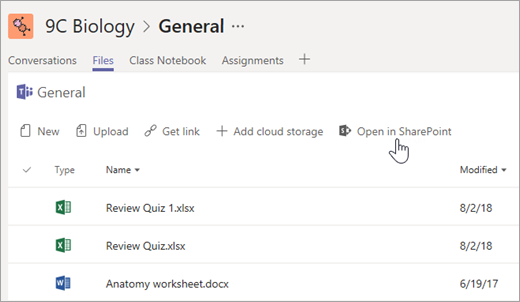
Select the Files tab, then Open in SharePoint. SharePoint will open in your web browser and show you the file structure for your team.
-
In SharePoint, select + New > Folder. Name your folder and select Create.
-
Right-click on or select Show actions (the vertical three dots that appear when you select the folder) for the folder you just created and select Details.
-
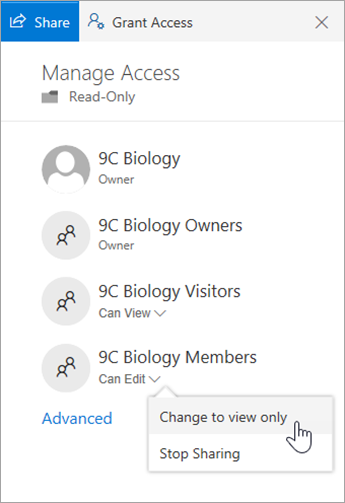
Select Manage access in the Details pane.
-
Beneath Members, select the dropdown arrow and then Change to view only.
From now on, add any files you don't want students or staff to edit to this folder. You can add files to the folder from Teams or SharePoint--your changes will sync back and forth.
Note: Moving or copying a read-only file to a folder without the same permissions means team members will be able to edit that copy of the document.
No comments:
Post a Comment